
KF2 Field Medic: Lone Warrior Build vs Team Support Build
The Field Medic is often seen as a walking first-aid kit, but this Russian-language guide argues the class is far more flexible: it can carry a match on its own or be a proper support. Two builds are described below, one for comfortable solo-style play and one for team healing. Everyone in the lobby will have an opinion on how the Medic should behave, so pick the approach that fits you.
 The Field Medic.
How the class works
The Medic is a support class built around healing and poison. Every Medic weapon has an alternative fire mode that shoots darts: they heal allies on hit and poison enemies. Stronger weapons give stronger effects, and the dart charge recharges on its own, which gives the Medic an effectively infinite arsenal. Medic grenades release a cloud that heals allies and poisons zeds passing through, and weaker zeds may be stunned and pushed aside. As the last survivor, a Medic can finish the remaining zeds off with poison.
Build 1 - The lone warrior
This build treats the Medic as an individual fighter instead of someone chasing teammates who ignore their own health. The author finds it comfortable enough for Hell on Earth and most modes thanks to the stats at level 20 to 25.
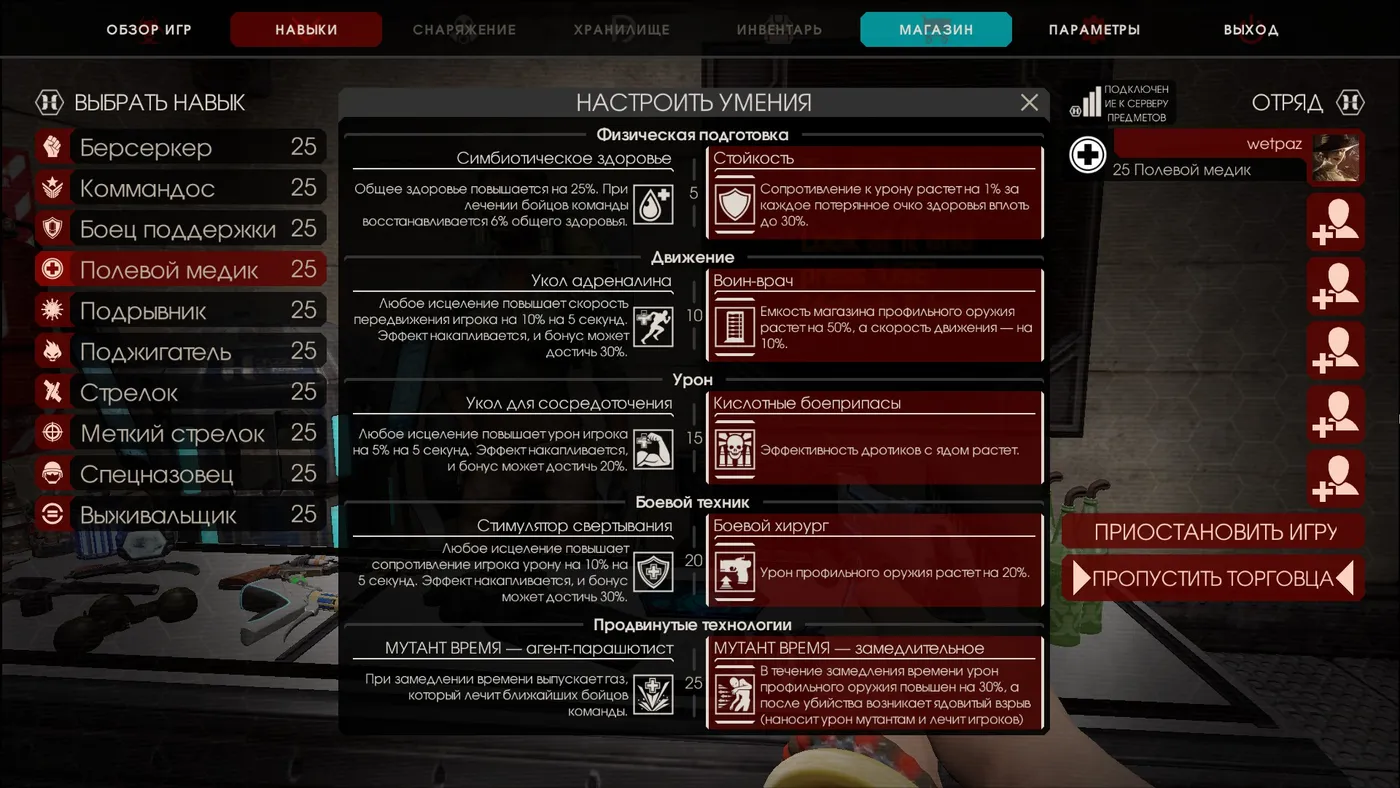 Skill choices for the solo build.
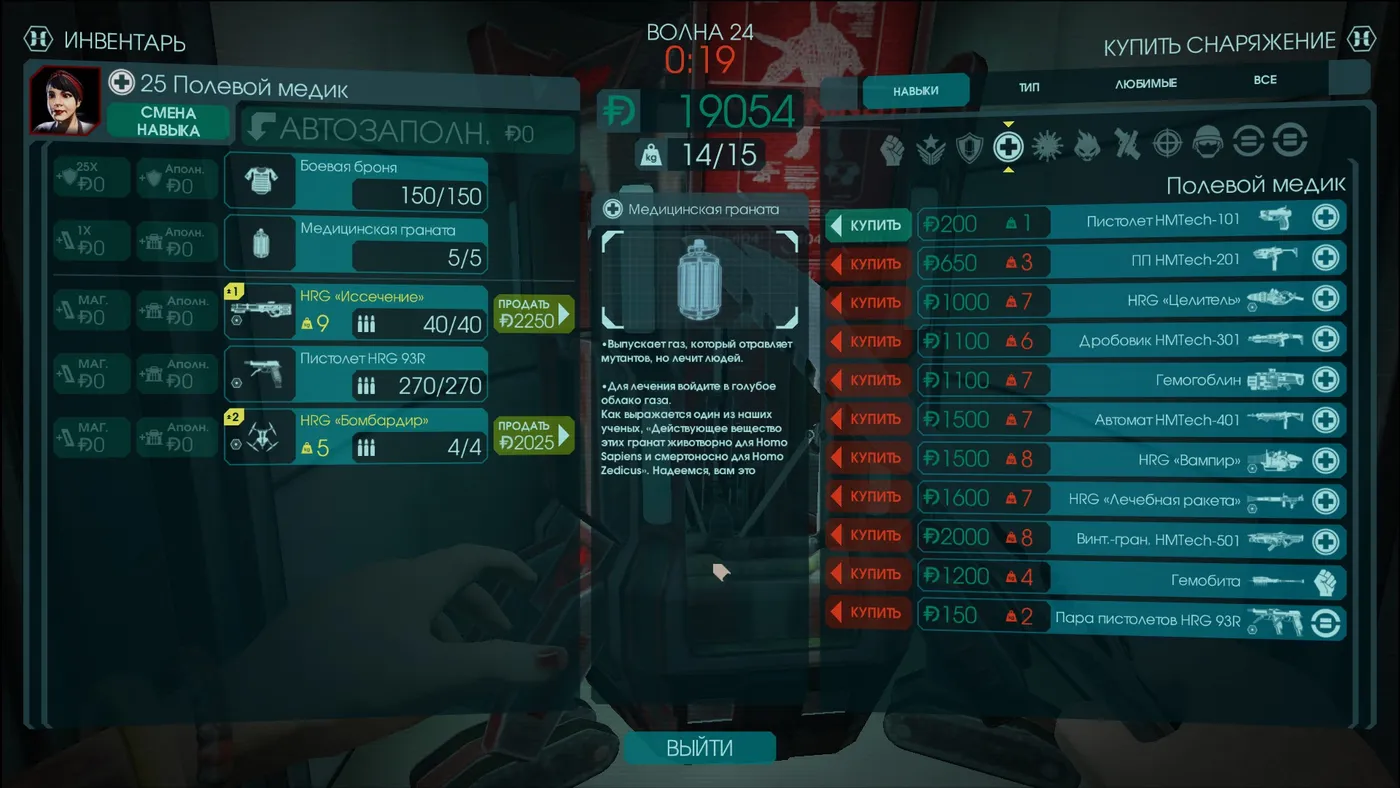 Suggested arsenal. Swapping the drone for the HMTech-301 shotgun also makes sense.
What the build gives you:
- Damage resistance of up to 30 percent, so keeping health around 70 is the most efficient protection (do not go lower).
- Extra run speed of 10 percent, which lets the Medic outrun zeds, heal up and keep shooting darts.
- Poison as the main damage source, with weapon damage mattering too. Because you mostly heal yourself, the opposing healing skills do not matter.
- A choice between a poison cloud or a healing cloud on allies and on killed zeds. The poison cloud suits an incoming wave better.
Playing it
- Survive the early waves quietly and heal allies until you can reach the HRG Incision, then the class starts to shine.
- Money is the weak point at the start: damage is low and healing earns almost nothing. One suggestion is to play a Berserker for two waves without changing weapons, then buy what you need on the Medic.
- Find a defensible spot, place the drone and kill zeds that are visible from afar. The rifle kills a Bloat or a Siren with a single dart hit, and Scrakes and Fleshpounds may die from poison before they even reach you.
- Keep moving. Zeds already spawned will not spawn next to you, but new ones can appear behind walls. If you lose your position, throw a grenade to deal with the pursuers and heal yourself.
- Firing darts does not slow you down, since recharge is automatic; only a rifle shot forces a reload and slow walking.
Bosses: the King Fleshpound is the bad matchup, the others are fine, and the Patriarch is even better because poison can kill him fast before he heals. Darts, darts and more darts.
Build 2 - The team medic
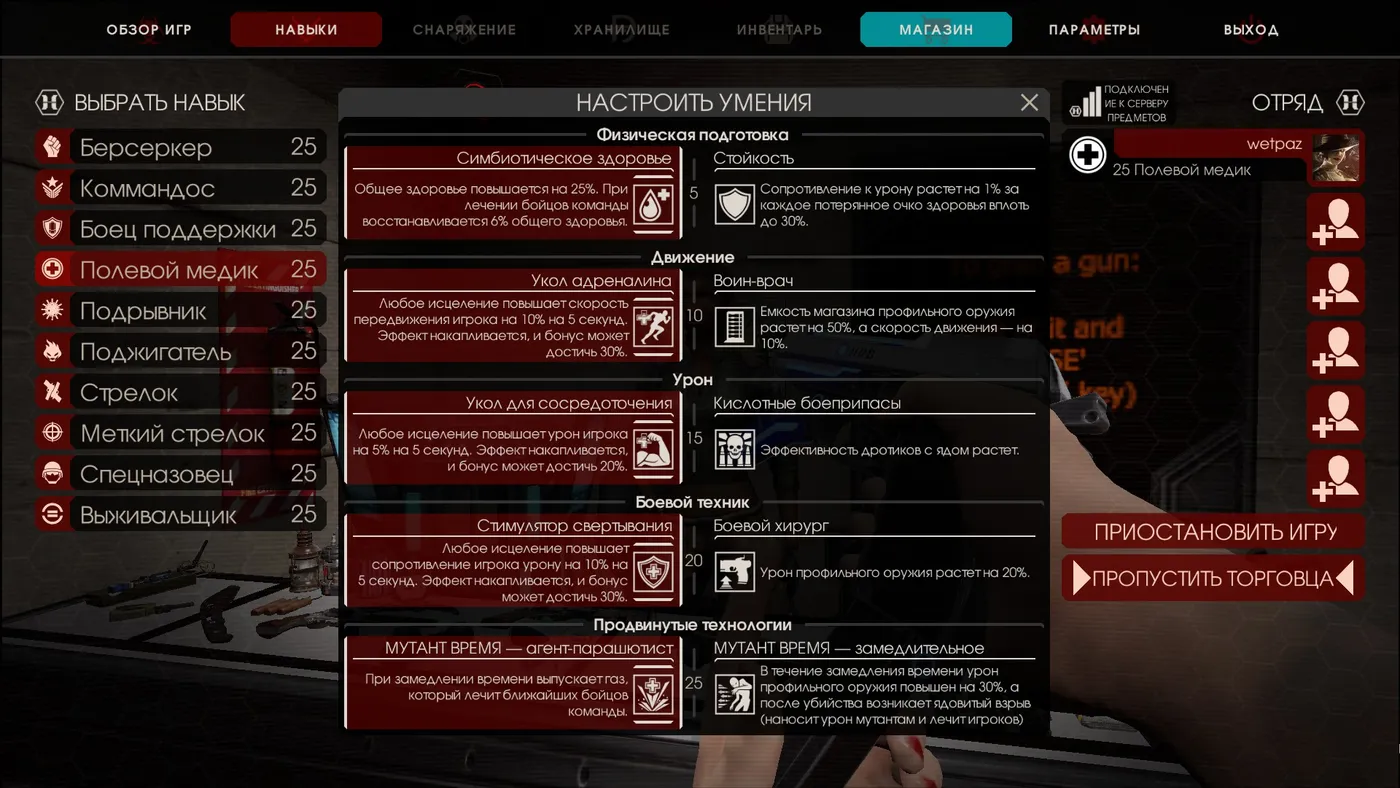 Skills for the support build.
- Take stronger healing, which also gives bonuses to speed, damage and damage resistance, and during Zed Time heals the team around you with a grenade-like pulse.
- Any weapon from the Medic list works; each has its own fire mode (gas spray, bouncing balls, plain bullets) plus alternative dart fire. Try each of them and find the one you like.
- A drone is a good purchase because it damages zeds anywhere on the map without your help.
The trade-off: this Medic is excellent for the team but cannot play comfortably alone, because the skills aim at helping others rather than killing. If you want independence, go back to the first build.
FAQ
- Can the Field Medic play without teammates?
- Yes. The lone warrior build relies on poison darts, self-healing and 10 percent extra run speed, and can finish a round as the last survivor.
- Which skills reduce damage for the solo Medic?
- The guide uses damage resistance of up to 30 percent, keeping health around 70 as the most efficient protection.
- What is the main difference between the two builds?
- The solo build invests in poison damage and self-sustain; the support build invests in stronger healing that also grants speed, damage and resistance buffs.
