
KF3 ZED Weaknesses and Resistances - Damage Type Chart
Killing Floor 3 sorts damage into nine types and gives every ZED its own strengths and weaknesses against them, split further by what you actually hit: flesh, armor, Mire tissue or zedtech. This page is based on a popular Steam community guide that compresses the in-game codex into a Pokemon-style type chart, so you do not have to dig through the codex mid-match. It includes the overview chart, a more precise data chart built by the community, notes for every specimen and boss, and a card for each damage type. For how damage is calculated in the older games see damage calculation; for the story behind the Mire see Mire lore.
The charts
Overview chart (quick reference)
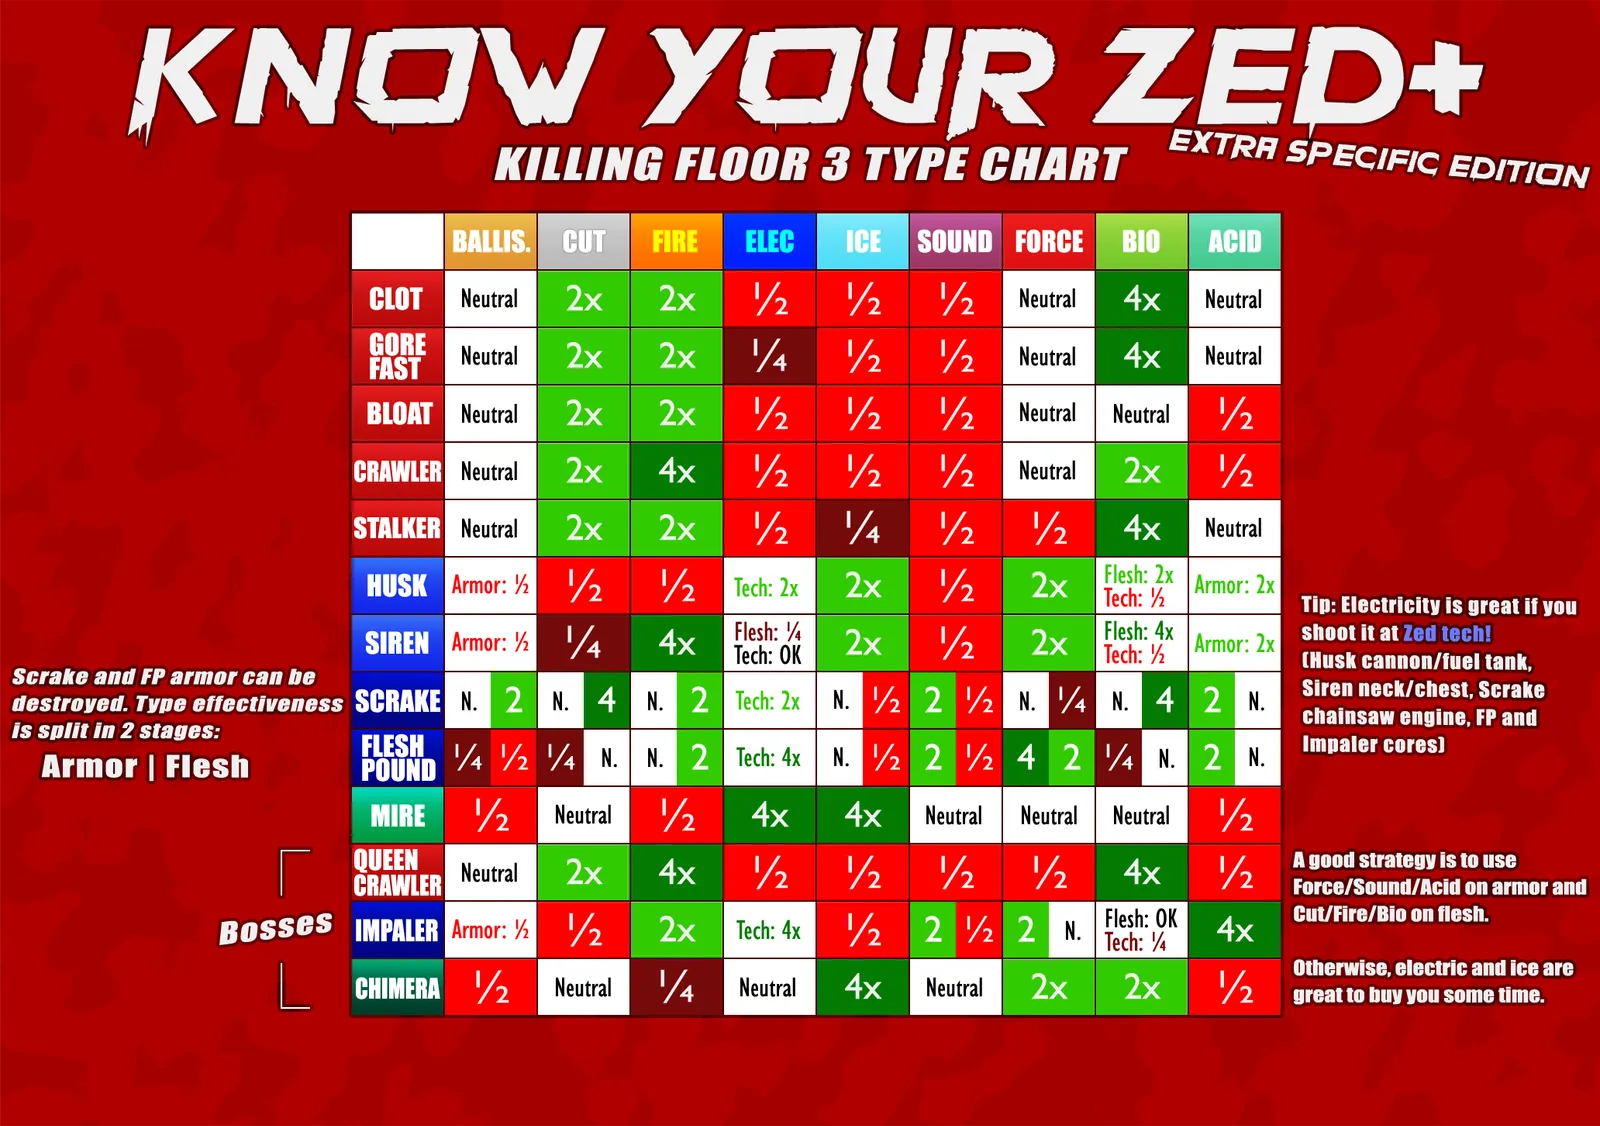 "Know Your ZED+" type chart for Killing Floor 3, made by the guide author from the codex.
The overview is simpler but less precise than the raw data. Green means more effective, red means less effective, white means normal. The multipliers below are the chart's own exaggerated scale meant for quick comparison, not literal damage values.
| ZED | Ballistic | Cut | Fire | Electric | Ice | Sound | Force | Bio | Acid |
|---|---|---|---|---|---|---|---|---|---|
| Clot | N | 2x | 2x | 1/2 | 1/2 | 1/2 | N | 4x | N |
| Gorefast | N | 2x | 2x | 1/4 | 1/2 | 1/2 | N | 4x | N |
| Bloat | N | 2x | 2x | 1/2 | 1/2 | 1/2 | N | N | 1/2 |
| Crawler | N | 2x | 4x | 1/2 | 1/2 | 1/2 | N | 2x | 1/2 |
| Stalker | N | 2x | 2x | 1/2 | 1/4 | 1/2 | 1/2 | 4x | N |
| Husk | Armor 1/2 | 1/2 | 1/2 | Tech 2x | 2x | 1/2 | 2x | Flesh 2x, Tech 1/2 | Armor 2x |
| Siren | Armor 1/2 | 1/4 | 4x | Flesh 1/4, Tech N | 2x | 1/2 | 2x | Flesh 4x, Tech 1/2 | Armor 2x |
| Scrake (armor / flesh) | N / 2x | N / 4x | N / 2x | Tech 2x | N / 1/2 | 2x / 1/2 | N / 1/4 | N / 4x | 2x / N |
| Fleshpound (armor / flesh) | 1/4 / 1/2 | 1/4 / N | N / 2x | Tech 4x | N / 1/2 | 2x / 1/2 | 4x / 2x | 1/4 / N | 2x / N |
| Mire | 1/2 | N | 1/2 | 4x | 4x | N | N | N | 1/2 |
| Queen Crawler (boss) | N | 2x | 4x | 1/2 | 1/2 | 1/2 | 1/2 | 4x | 1/2 |
| Impaler (boss) | Armor 1/2 | 1/2 | 2x | Tech 4x | 1/2 | 2x / 1/2 | 2x / N | Flesh N, Tech 1/4 | 4x |
| Chimera (boss) | 1/2 | N | 1/4 | N | 4x | N | 2x | 2x | 1/2 |
How to read it:
- Scrake and Fleshpound armor can be destroyed, so their cells are split into two stages: armor / flesh.
- Electric is great against zedtech: the Husk's cannon and fuel tank, the Siren's neck and chest, the Scrake's chainsaw engine, and the Fleshpound and Impaler cores.
- A good general plan is Force, Sound or Acid on armor and Cut, Fire or Bio on flesh. Otherwise, electric and ice are great for buying time.
Notes on Sound damage: it is the only type with no ZED-specific strengths or weaknesses. Its main job is stripping armor, and it is weaker against flesh and tech.
Raw data chart (precise values)
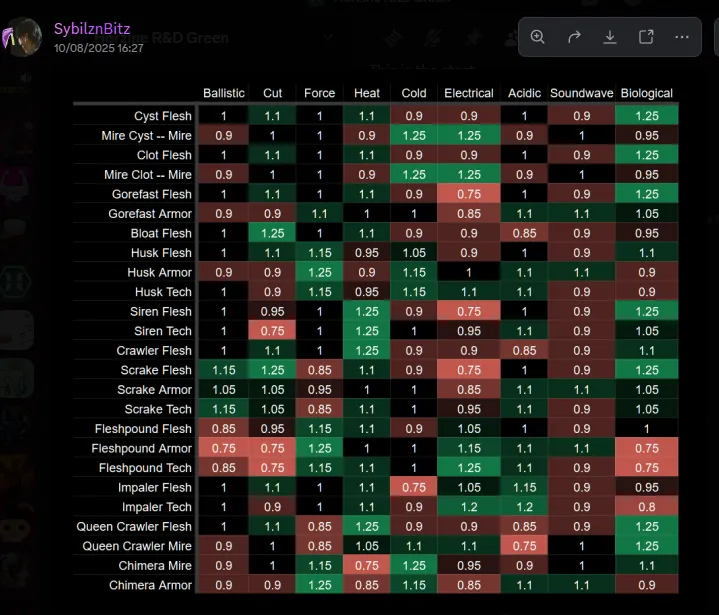 Community-made chart of per-hitzone damage multipliers, shared in the guide's comments. Green is above 1, red below 1.
A community member later produced a much more precise breakdown by hit zone, and the guide added it alongside the overview. The two serve different purposes: the overview is a beginner-friendly cheat sheet, this one is the detailed data. A value of 1.25 means 25% more damage, 0.75 means 25% less.
| Hit zone | Ballistic | Cut | Force | Heat | Cold | Electrical | Acidic | Sound | Bio |
|---|---|---|---|---|---|---|---|---|---|
| Cyst flesh | 1 | 1.1 | 1 | 1.1 | 0.9 | 0.9 | 1 | 0.9 | 1.25 |
| Mire Cyst (Mire) | 0.9 | 1 | 1 | 0.9 | 1.25 | 1.25 | 0.9 | 1 | 0.95 |
| Clot flesh | 1 | 1.1 | 1 | 1.1 | 0.9 | 0.9 | 1 | 0.9 | 1.25 |
| Mire Clot (Mire) | 0.9 | 1 | 1 | 0.9 | 1.25 | 1.25 | 0.9 | 1 | 0.95 |
| Gorefast flesh | 1 | 1.1 | 1 | 1.1 | 0.9 | 0.75 | 1 | 0.9 | 1.25 |
| Gorefast armor | 0.9 | 0.9 | 1.1 | 1 | 1 | 0.85 | 1.1 | 1.1 | 1.05 |
| Bloat flesh | 1 | 1.25 | 1 | 1.1 | 0.9 | 0.9 | 0.85 | 0.9 | 0.95 |
| Husk flesh | 1 | 1.1 | 1.15 | 0.95 | 1.05 | 0.9 | 1 | 0.9 | 1.1 |
| Husk armor | 0.9 | 0.9 | 1.25 | 0.9 | 1.15 | 1 | 1.1 | 1.1 | 0.9 |
| Husk tech | 1 | 0.9 | 1.15 | 0.95 | 1.15 | 1.1 | 1.1 | 0.9 | 0.9 |
| Siren flesh | 1 | 0.95 | 1 | 1.25 | 0.9 | 0.75 | 1 | 0.9 | 1.25 |
| Siren tech | 1 | 0.75 | 1 | 1.25 | 1 | 0.95 | 1.1 | 0.9 | 1.05 |
| Crawler flesh | 1 | 1.1 | 1 | 1.25 | 0.9 | 0.9 | 0.85 | 0.9 | 1.1 |
| Scrake flesh | 1.15 | 1.25 | 0.85 | 1.1 | 0.9 | 0.75 | 1 | 0.9 | 1.25 |
| Scrake armor | 1.05 | 1.05 | 0.95 | 1 | 1 | 0.85 | 1.1 | 1.1 | 1.05 |
| Scrake tech | 1.15 | 1.05 | 0.85 | 1.1 | 1 | 0.95 | 1.1 | 0.9 | 1.05 |
| Fleshpound flesh | 0.85 | 0.95 | 1.15 | 1.1 | 0.9 | 1.05 | 1 | 0.9 | 1 |
| Fleshpound armor | 0.75 | 0.75 | 1.25 | 1 | 1 | 1.15 | 1.1 | 1.1 | 0.75 |
| Fleshpound tech | 0.85 | 0.75 | 1.15 | 1.1 | 1 | 1.25 | 1.1 | 0.9 | 0.75 |
| Impaler flesh | 1 | 1.1 | 1 | 1.1 | 0.75 | 1.05 | 1.15 | 0.9 | 0.95 |
| Impaler tech | 1 | 0.9 | 1 | 1.1 | 0.9 | 1.2 | 1.2 | 0.9 | 0.8 |
| Queen Crawler flesh | 1 | 1.1 | 0.85 | 1.25 | 0.9 | 0.9 | 0.85 | 0.9 | 1.25 |
| Queen Crawler (Mire) | 0.9 | 1 | 0.85 | 1.05 | 1.1 | 1.1 | 0.75 | 1 | 1.25 |
| Chimera (Mire) | 0.9 | 1 | 1.15 | 0.75 | 1.25 | 0.95 | 0.9 | 1 | 1.1 |
| Chimera armor | 0.9 | 0.9 | 1.25 | 0.85 | 1.15 | 0.85 | 1.1 | 1.1 | 0.9 |
How the multipliers stack
Players who pulled the values from the game files explain the logic behind the codex:
- A ZED's listed strength or weakness is roughly a +/-15% modifier for that damage type.
- The material you hit (flesh, armor, tech, Mire) adds roughly another +/-10%.
- Weapons with two damage types multiply both values. Hollow Point Rounds deal Ballistic and Cut: against the Scrake's mask that is 1.05 x 1.05 = about 1.10 (+10%), against the face underneath 1.15 x 1.25 = about 1.44 (+44%).
The same players compared ammo attachments on the Scrake, a useful trick for an easy wave 2:
| Ammo | Mask | Face under the mask | Extra effect |
|---|---|---|---|
| Hollow Point Rounds | about +10% | about +44% | Stun |
| Incendiary Rounds | about +5% | about +26.5% | Panic |
| Armor-piercing | neutral | about -3% | - |
| Overpressure | about +4.5% | about -23.5% | - |
Stun and Panic both make the Scrake stand still, which makes mag-dumping easy. Remember that the attachments also add their own flat bonus on top (the commenters cite about +20% for Incendiary, +18% for armor-piercing and +15% for cut ammo).
Raw resistance only matters up to a point: a hit strong enough to kill outright ignores it. A charged Vulcan rocket still deletes a Husk in one shot even though its fire component is resisted.
The specimens
Clot and Cyst
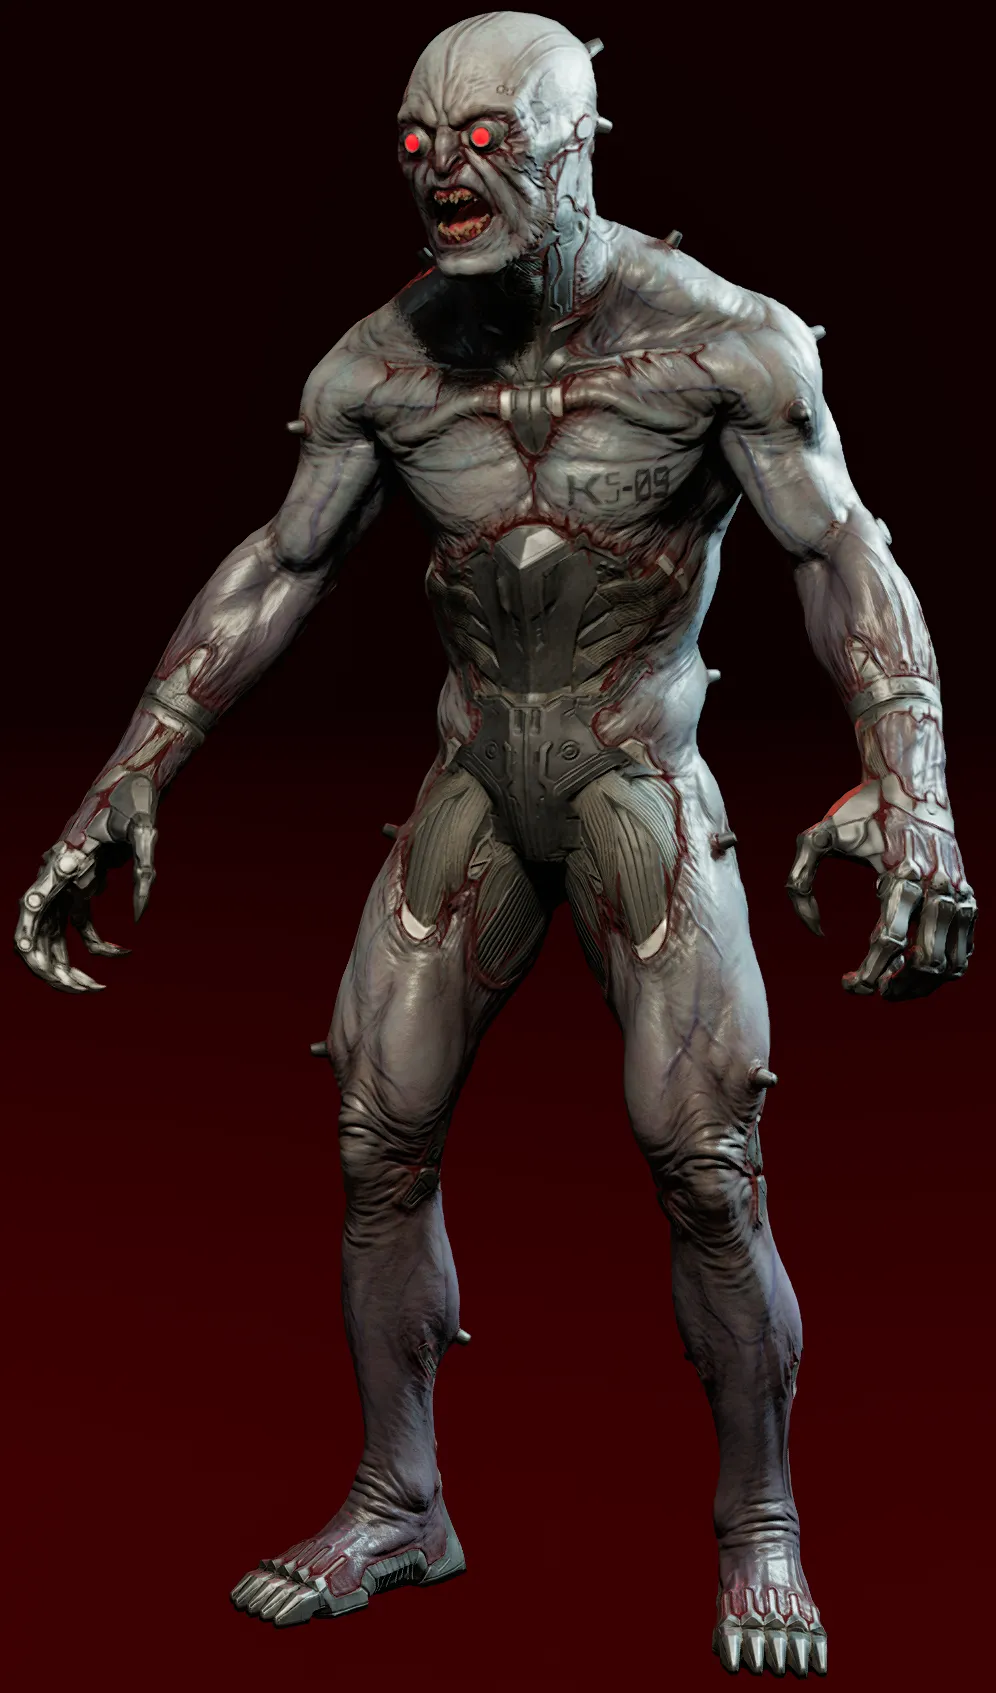 Clot.
 Cyst, a Clot variant.
Weak to pretty much everything. The Cyst is a Clot variant with a short, feeble bile projectile. Both die easily, so knife them to save ammo when you can.
Gorefast
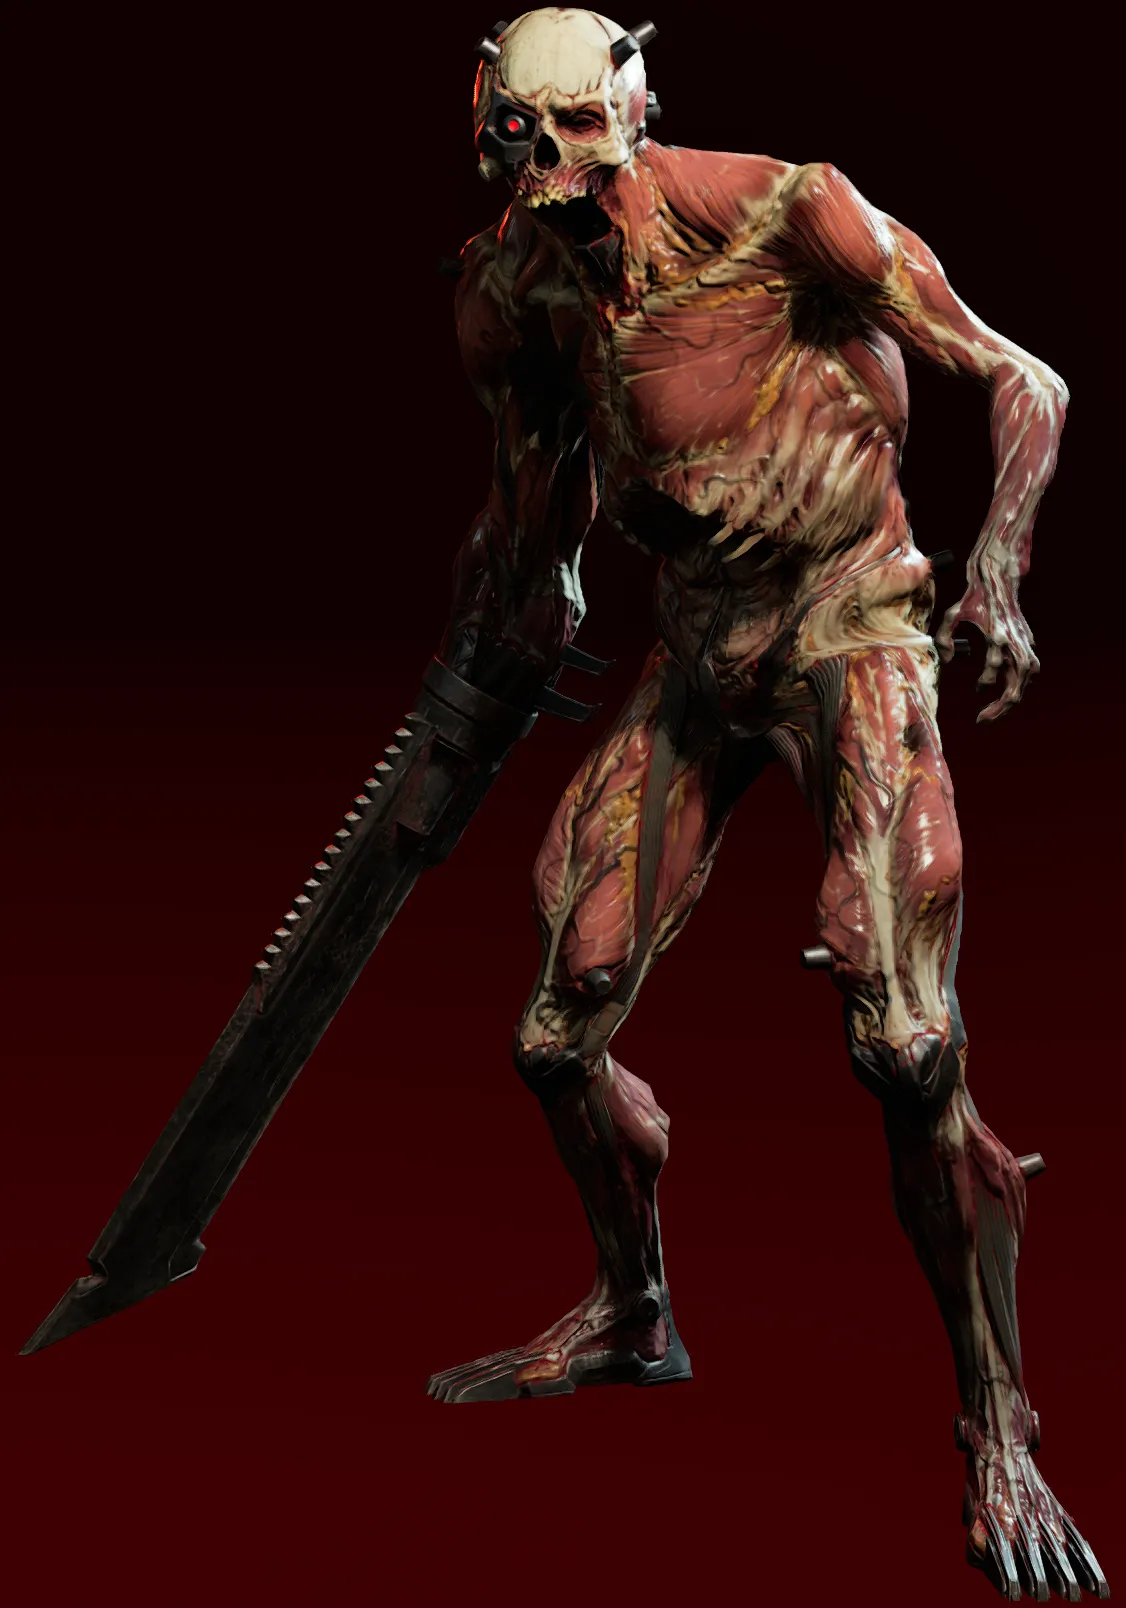 Gorefast.
They gore fast; gore them faster. Cut, fire and especially bio work well, electric is poor.
Bloat
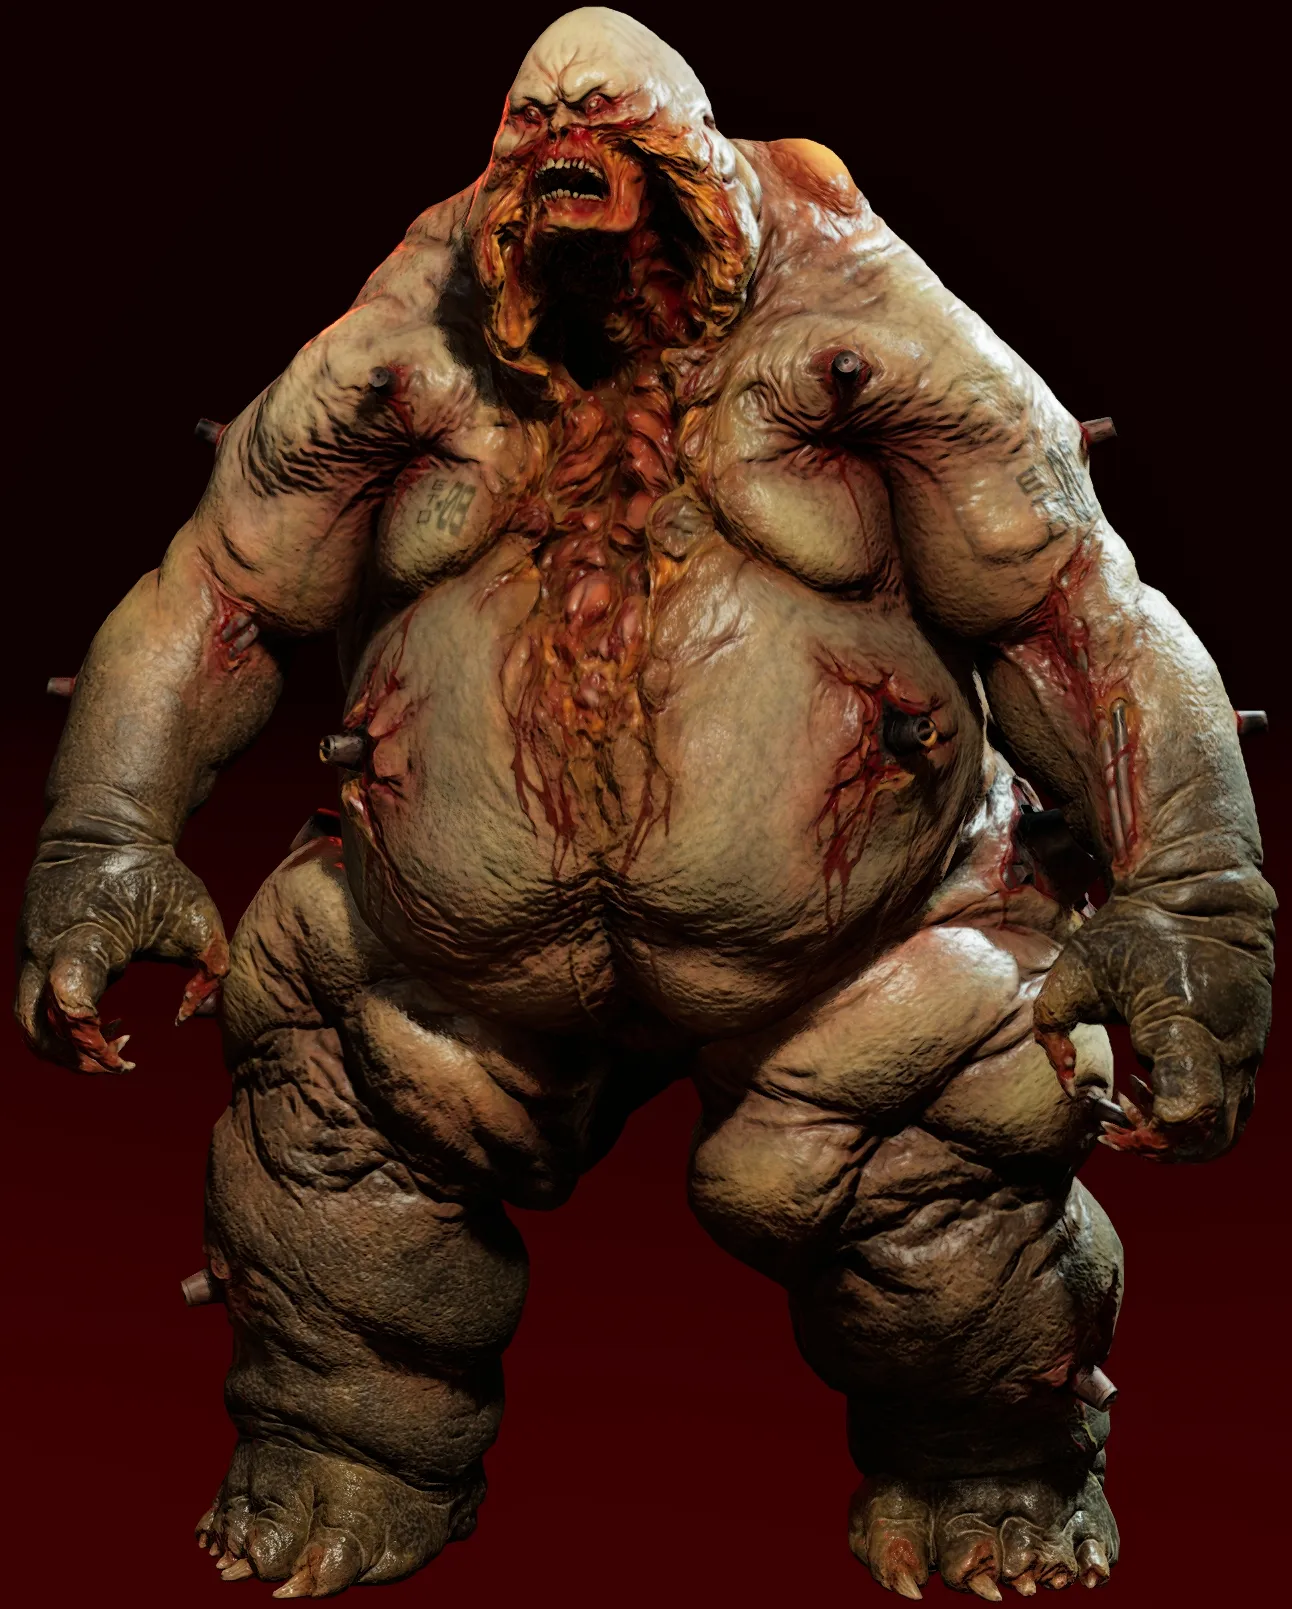 Bloat.
Dodge the bile projectile and take his head off. He is weak to Cut. Careful: he can explode and leave toxic sludge on the floor, so watch where you step.
Crawler
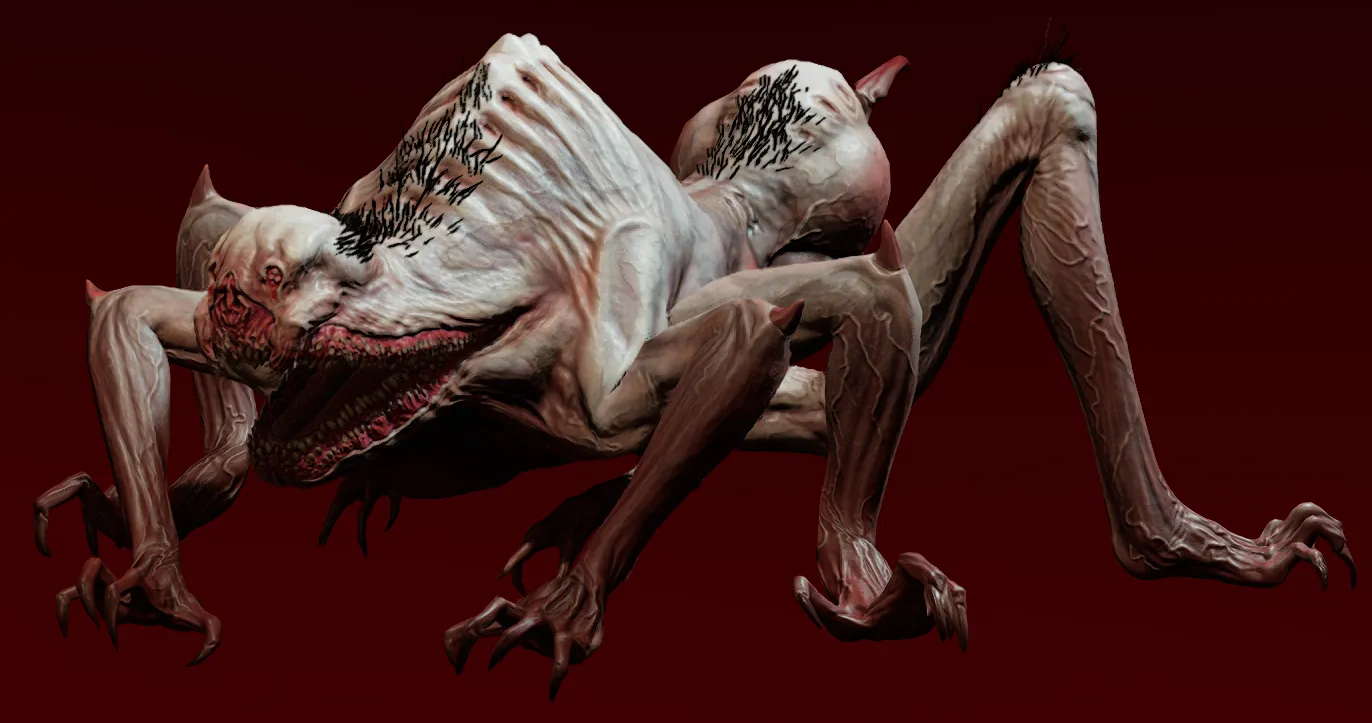 Crawler.
Burn them to cinders (fire is their big weakness) or just shoot their heads off. They are awkward to hit in melee.
Stalker
 Stalker.
They love jump scares. Stalkers are almost invisible at a distance but get revealed by certain attachments such as the UV light, and the Commando sees them by default. They die quickly, but drop your guard and you get surrounded, and their acrobatic attacks make headshots hard if you wait until they are close.
Husk
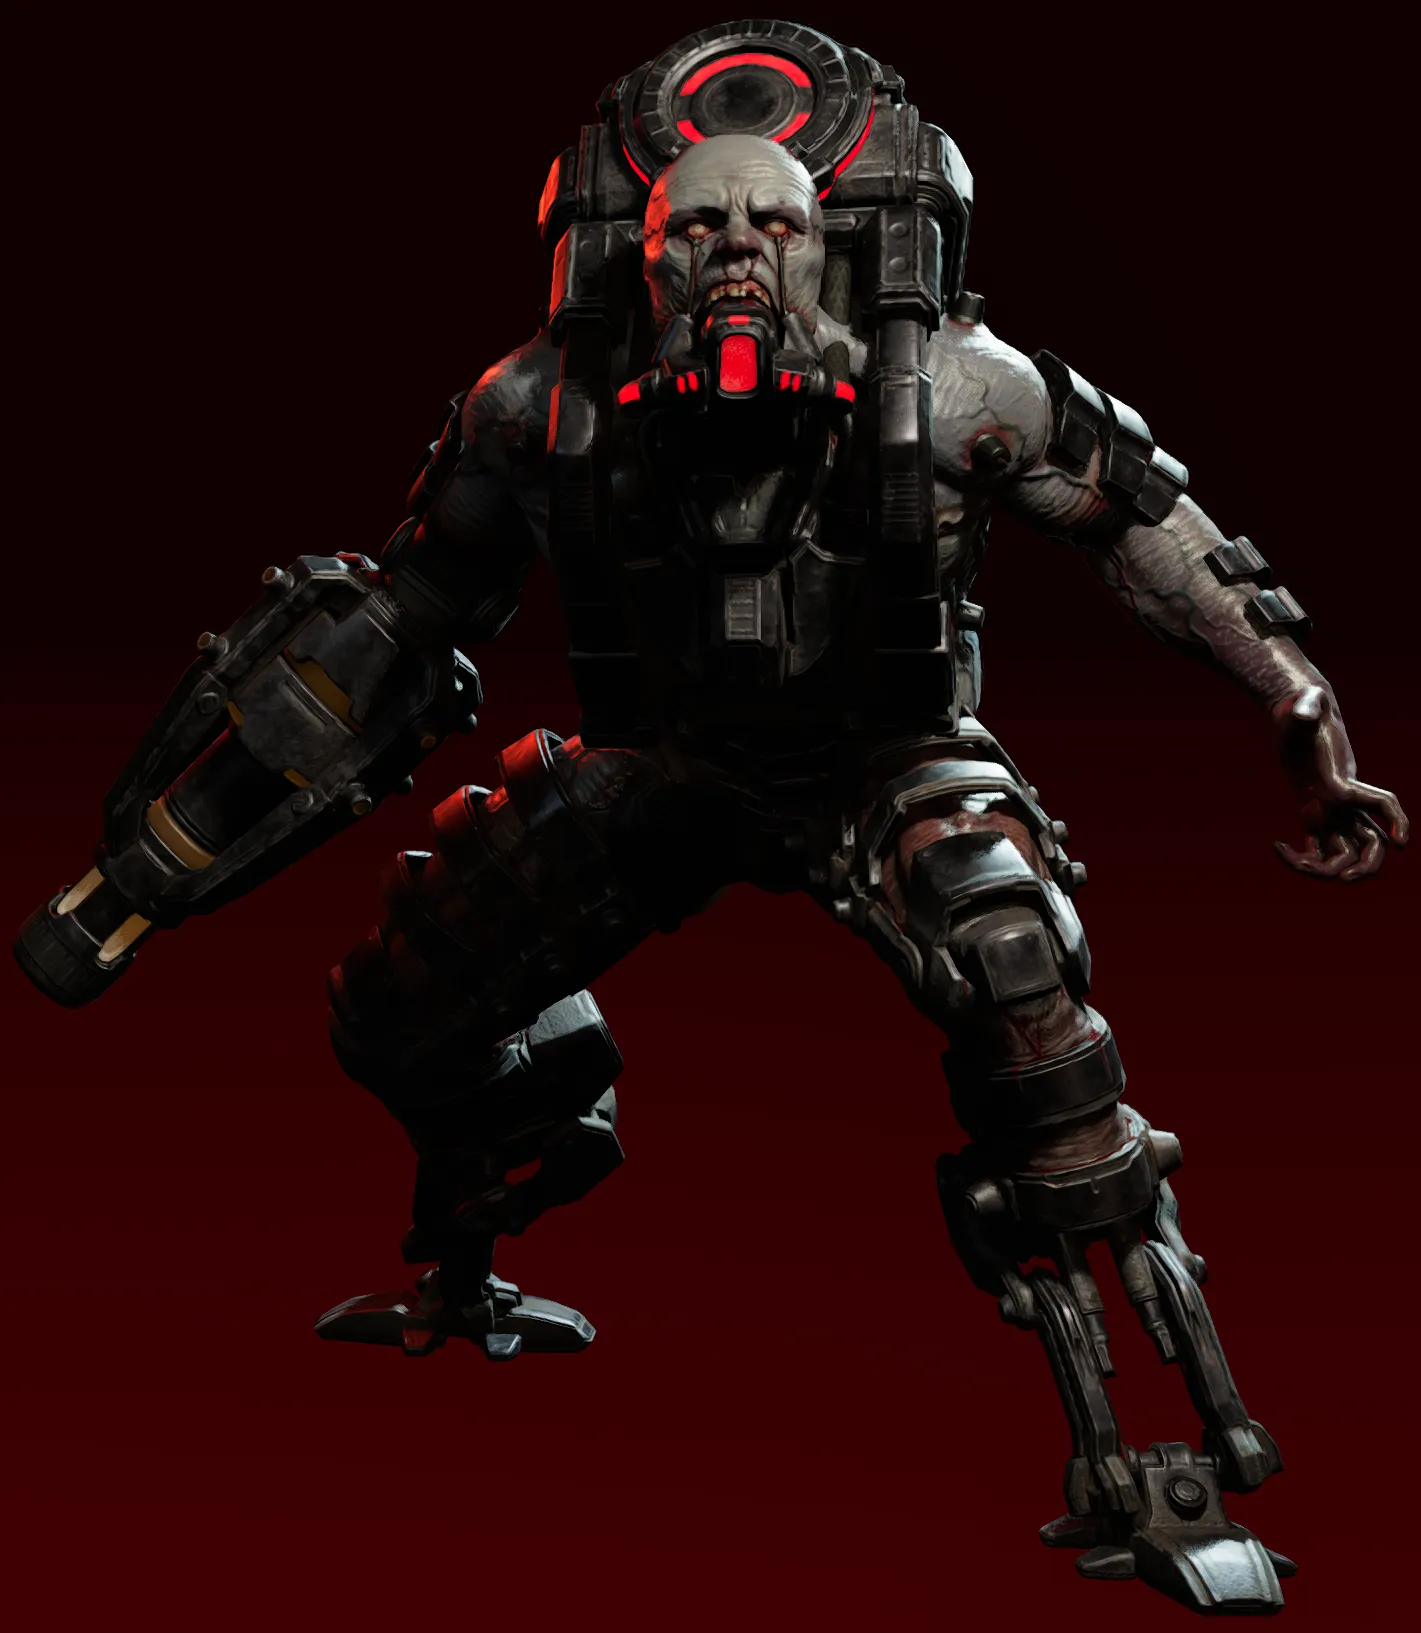 Husk.
The Husk can fly and fires fireballs from range. Shoot his fuel tank to make him explode; the blast kills nearby specimens too. Husks freeze easily, which makes aiming at the tank much simpler. The tank is a fragile weak spot that kills him when destroyed, so almost any damage type works on it.
Siren
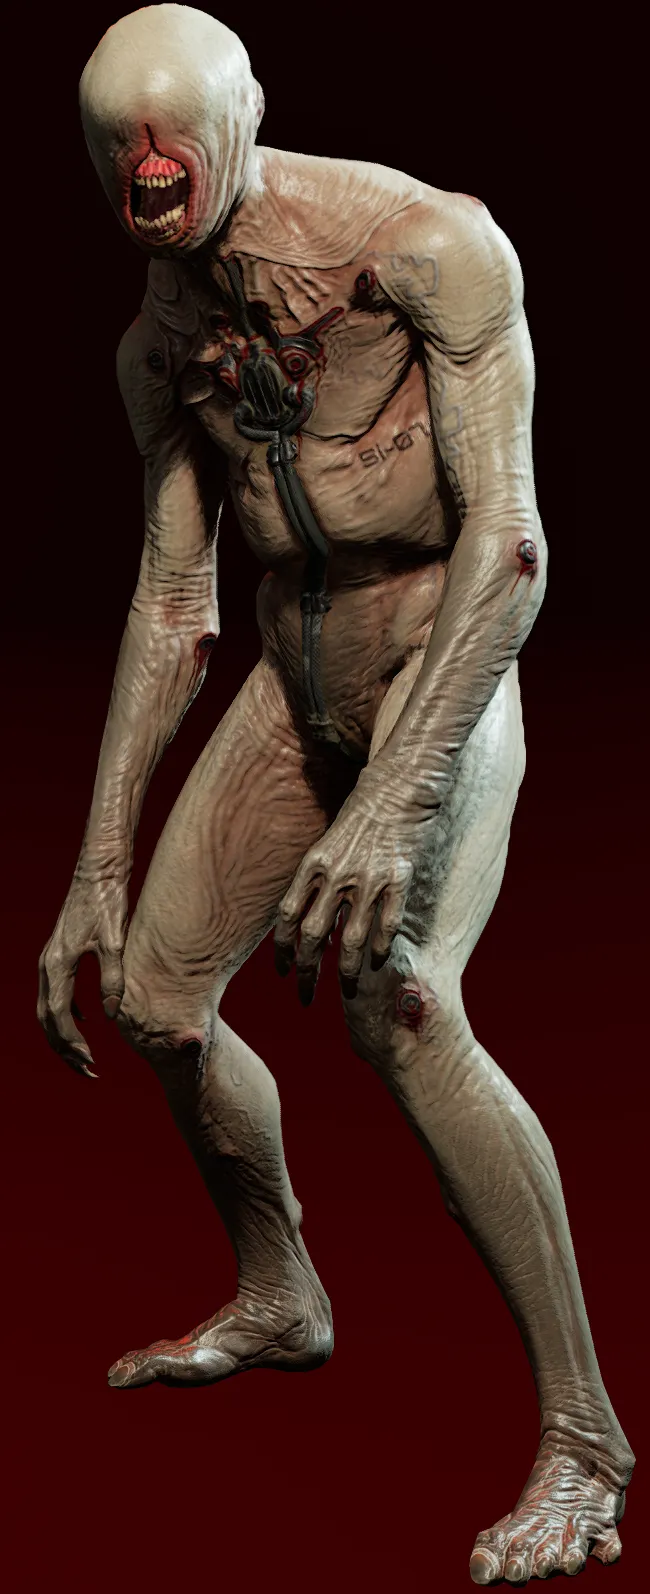
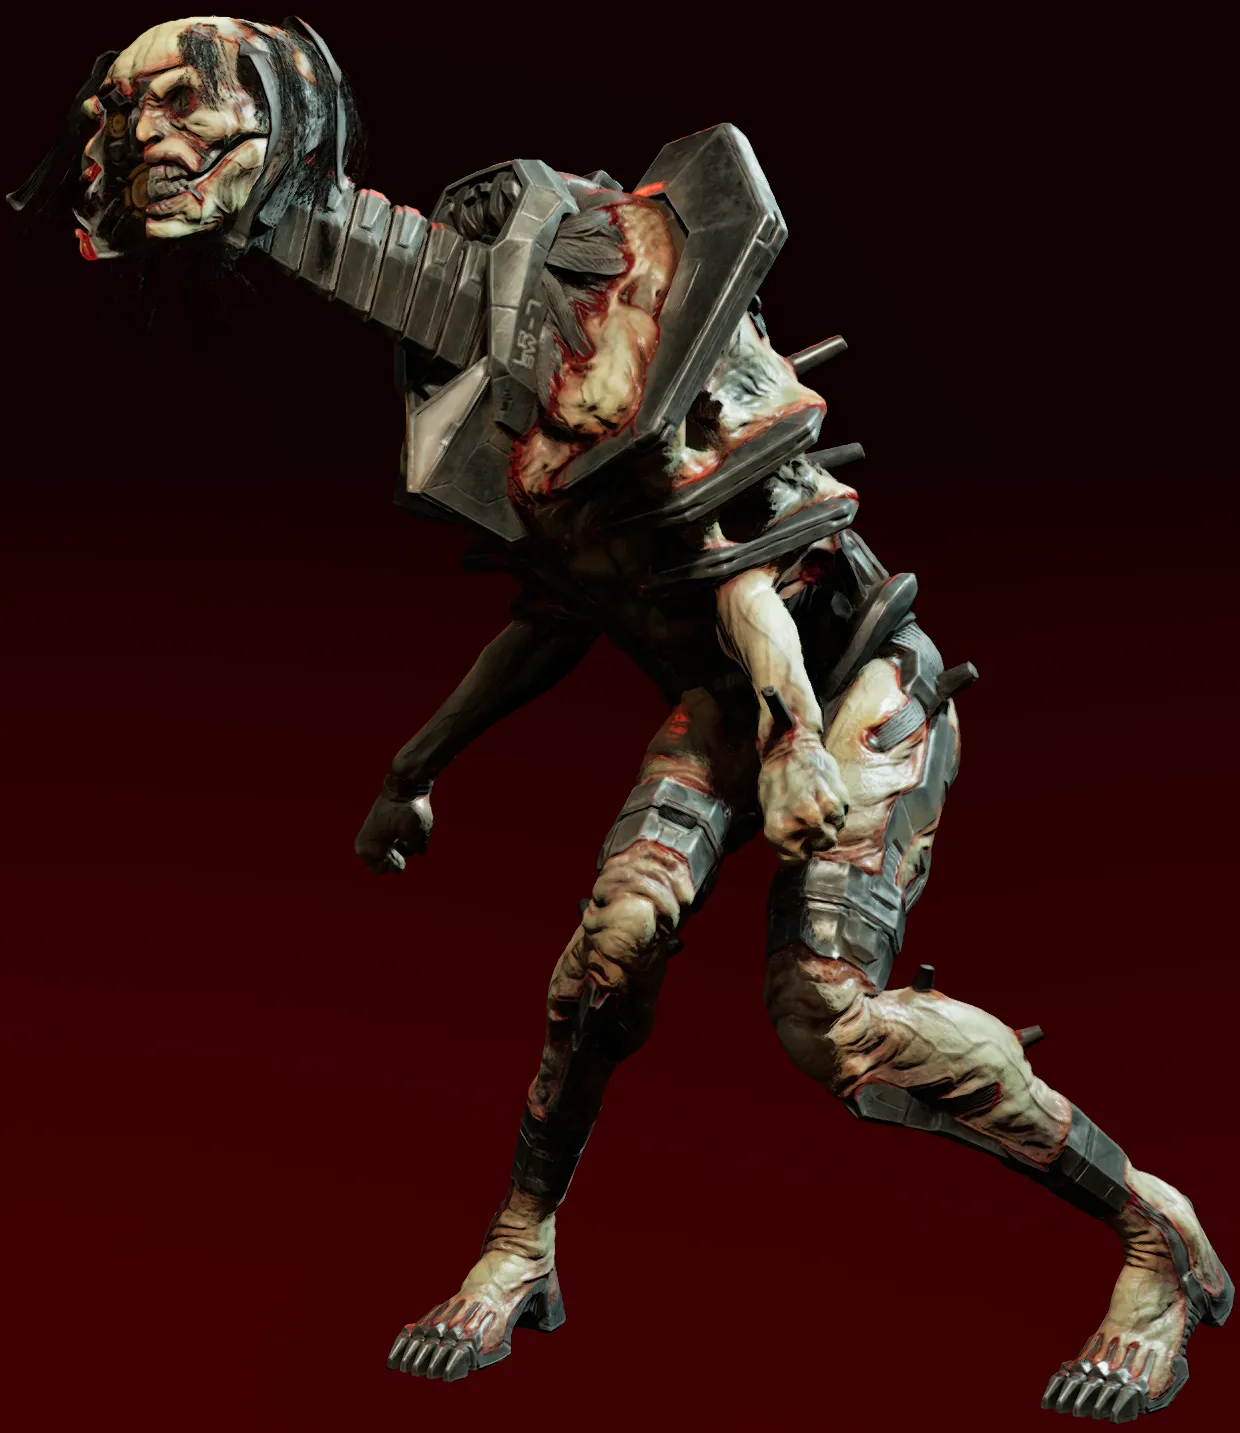 Siren.
A high-priority target: she has both a projectile and an area scream. Her neck becomes a weak point when it extends, but try to take her head before that. She resists electric damage yet can still be stunned by it, which stops her screams; the same goes for Husks and their projectiles. Ice freezes her as well.
Scrake
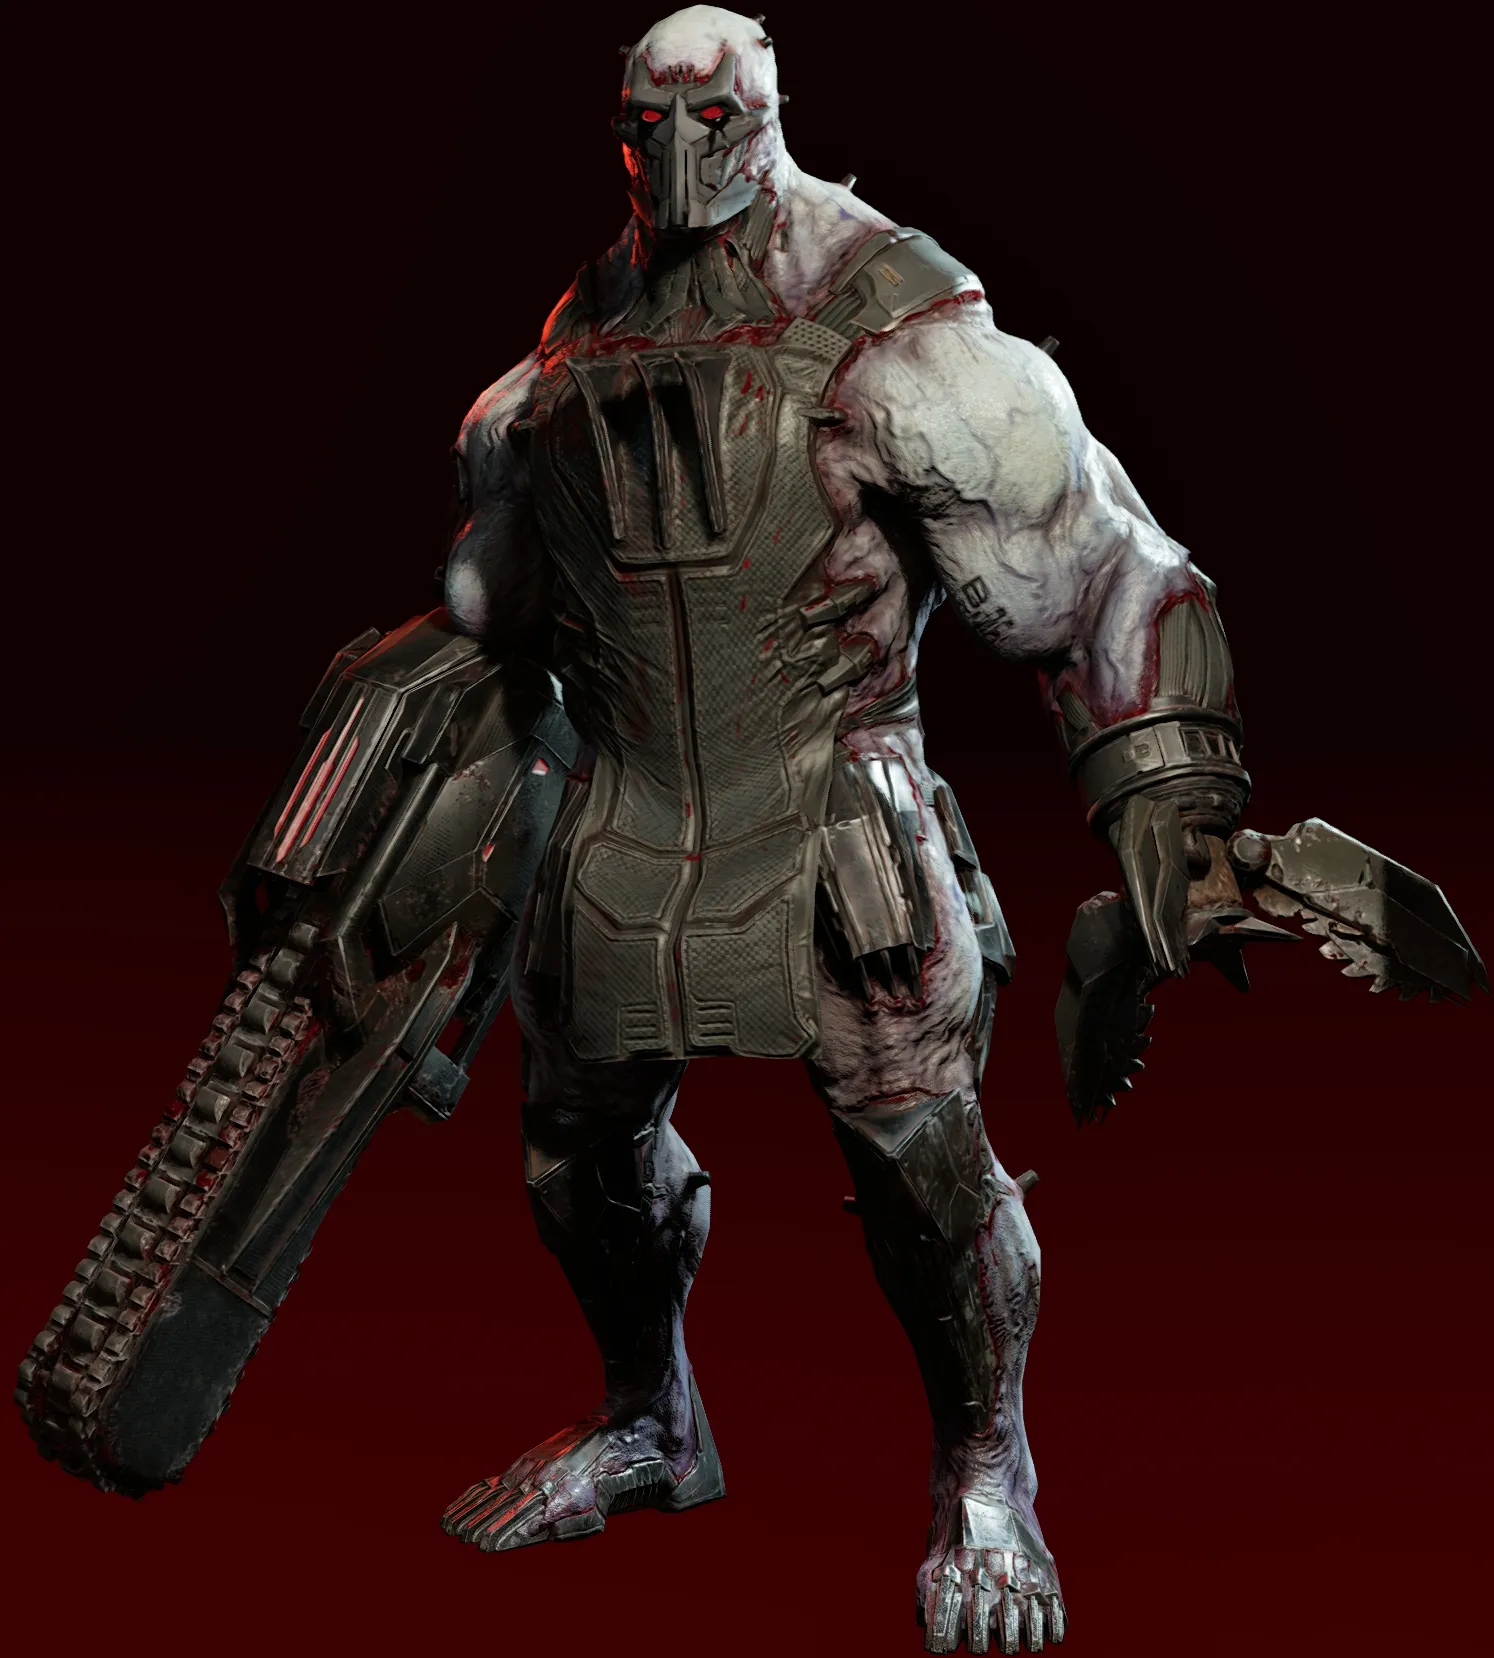 Scrake.
Run. Or don't, if you are brave. Break his face armor with Sound or Acid, then empty heavy ballistic weapons into his face. Electric damage on the chainsaw engine buys time. More tactics in Scrake and Fleshpound takedowns.
Fleshpound
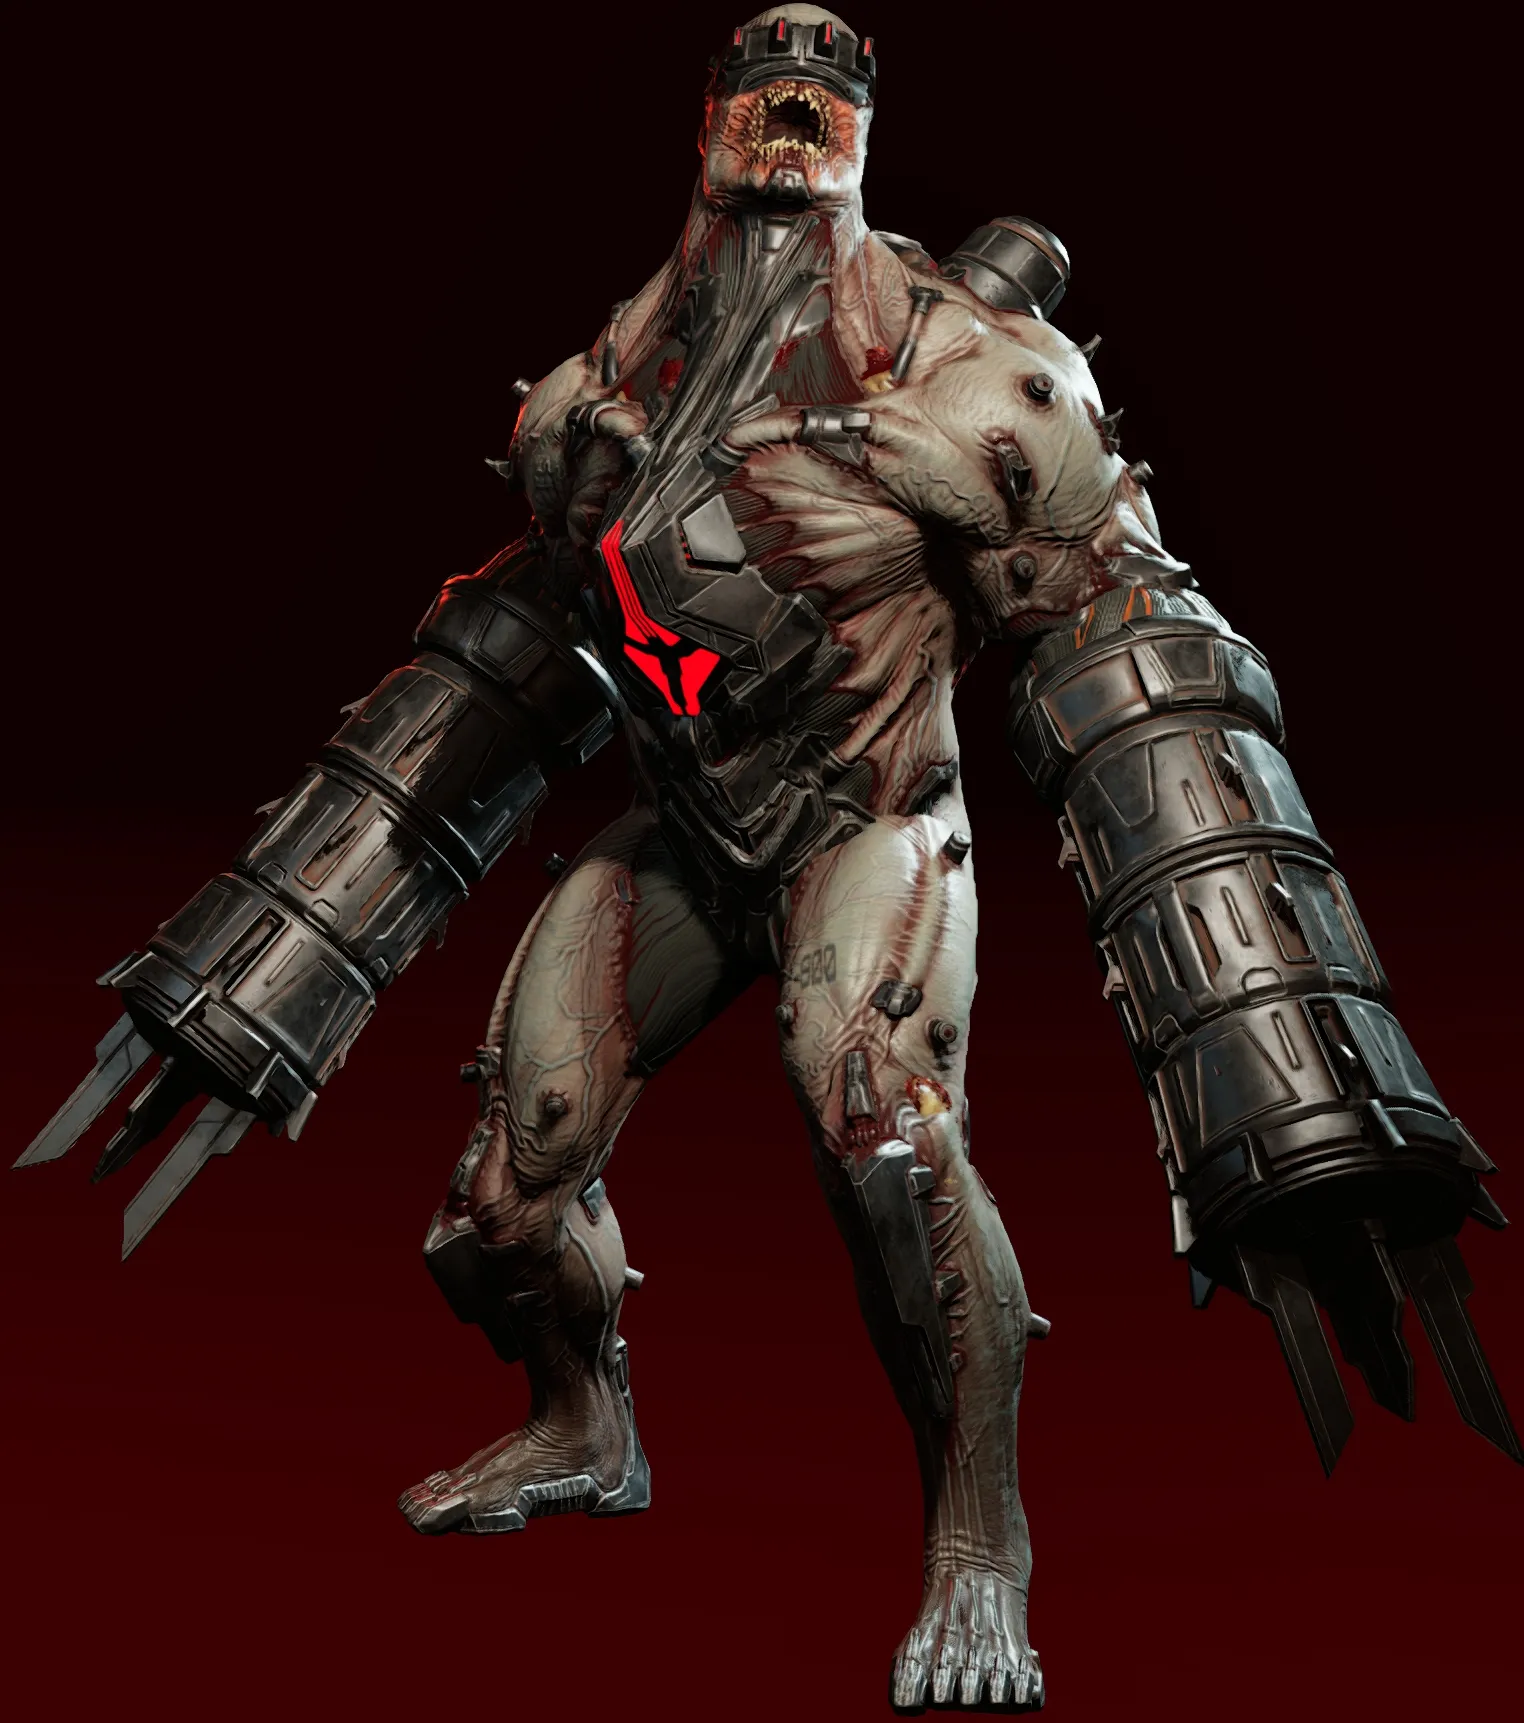 Fleshpound.
Run faster. If you feel confident, blow him up or electrocute him. Not sure what to do? Stay with the team and shoot his chest (or back, if you end up behind him) until you hear the armor come off, then keep hitting the exposed zedtech cores, which are weakest to electric damage.
Mire variants
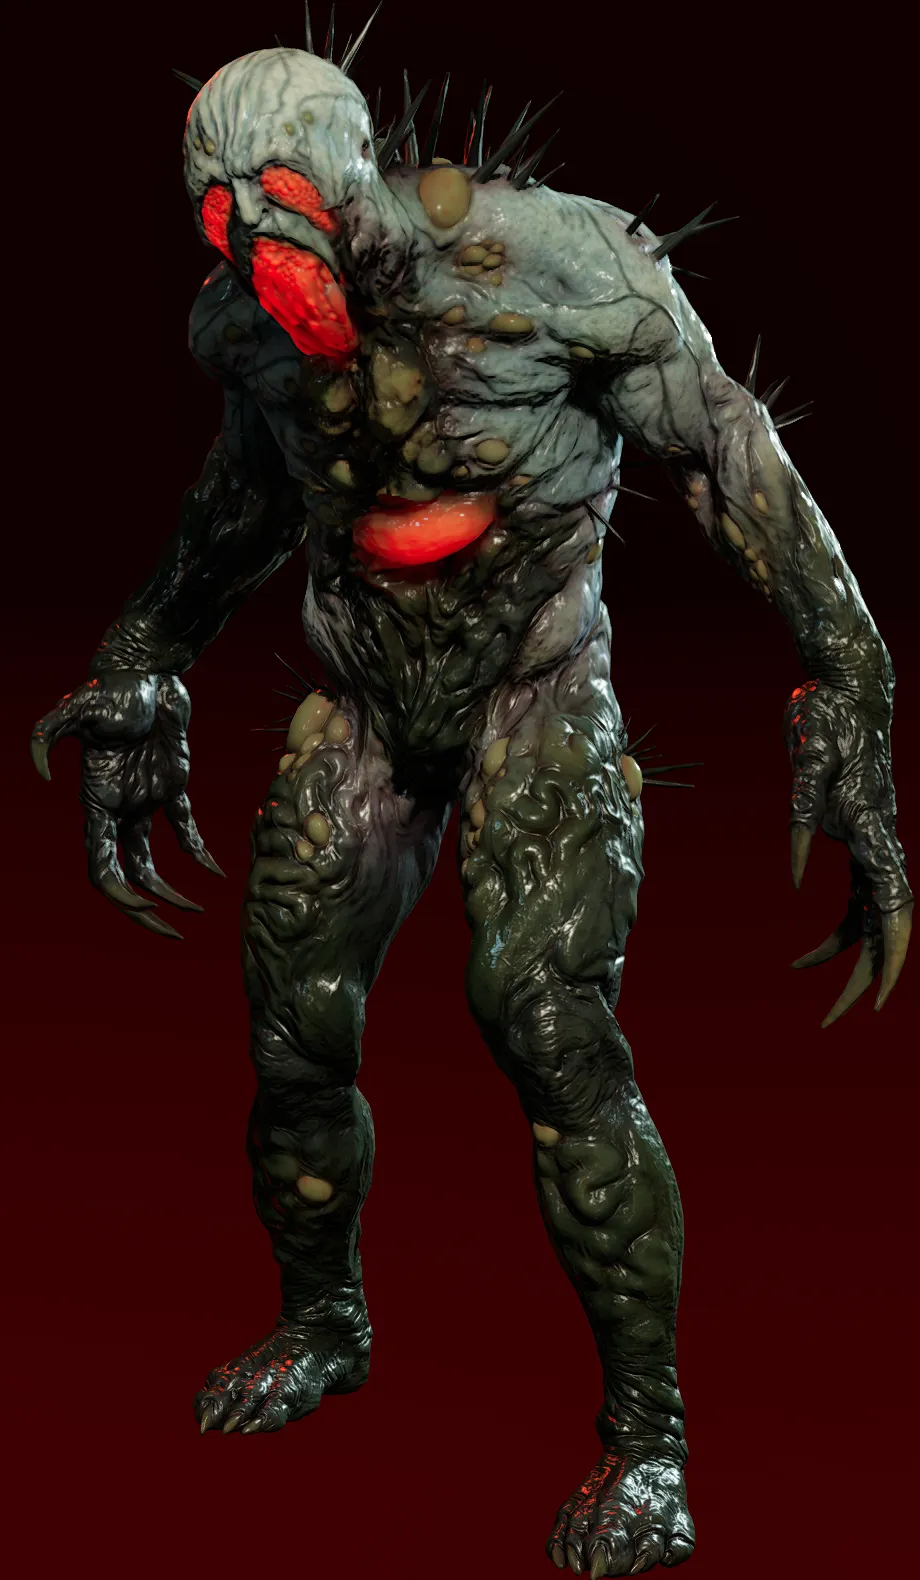 Mire-infused specimen.
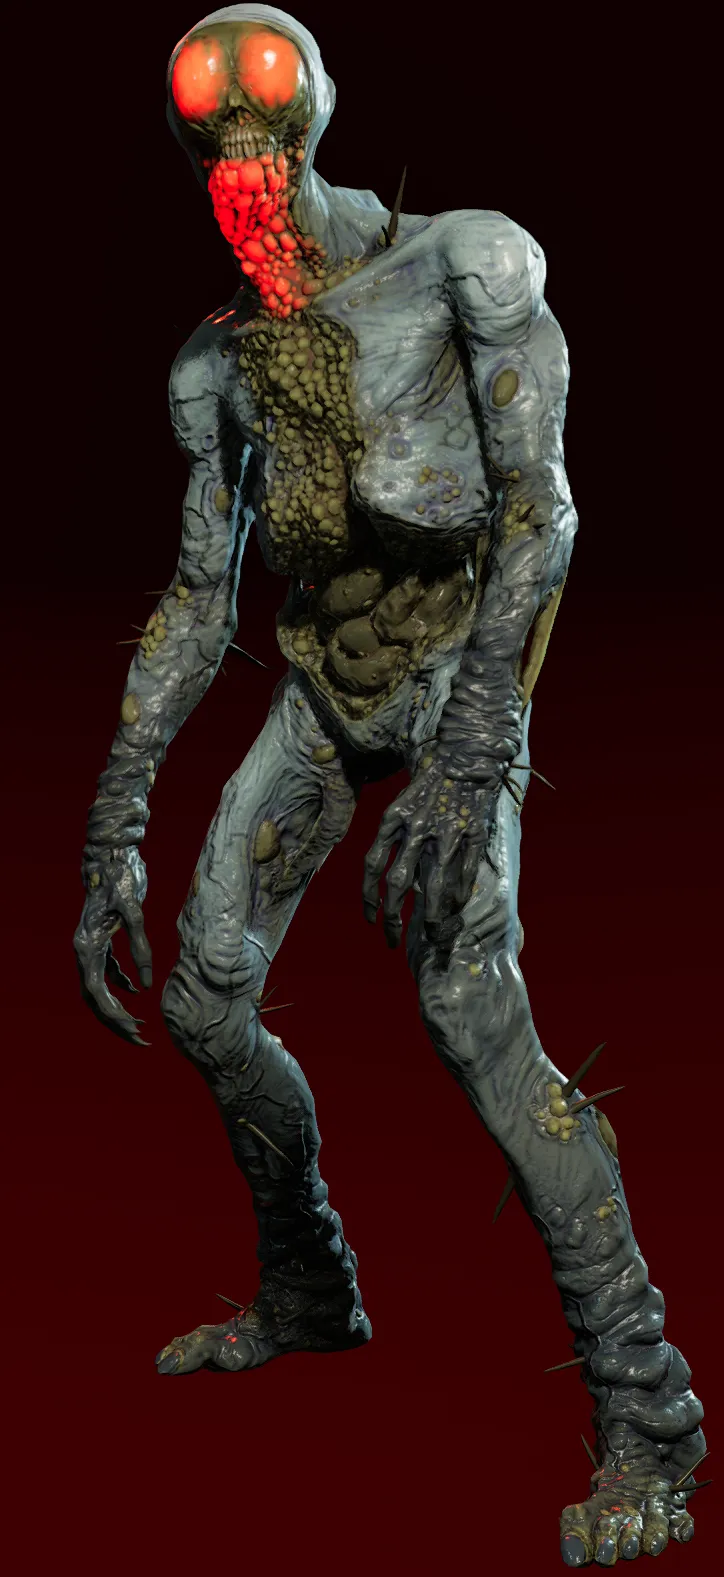 Another Mire variant.
A swampy take on the Clot, more or less. The one with a glowing belly may survive losing its head, so aim for the belly instead. Mire specimens are very weak to cold and electric damage.
The bosses
Boss strategy beyond damage types is covered on the Killing Floor 3 overview.
Queen Crawler
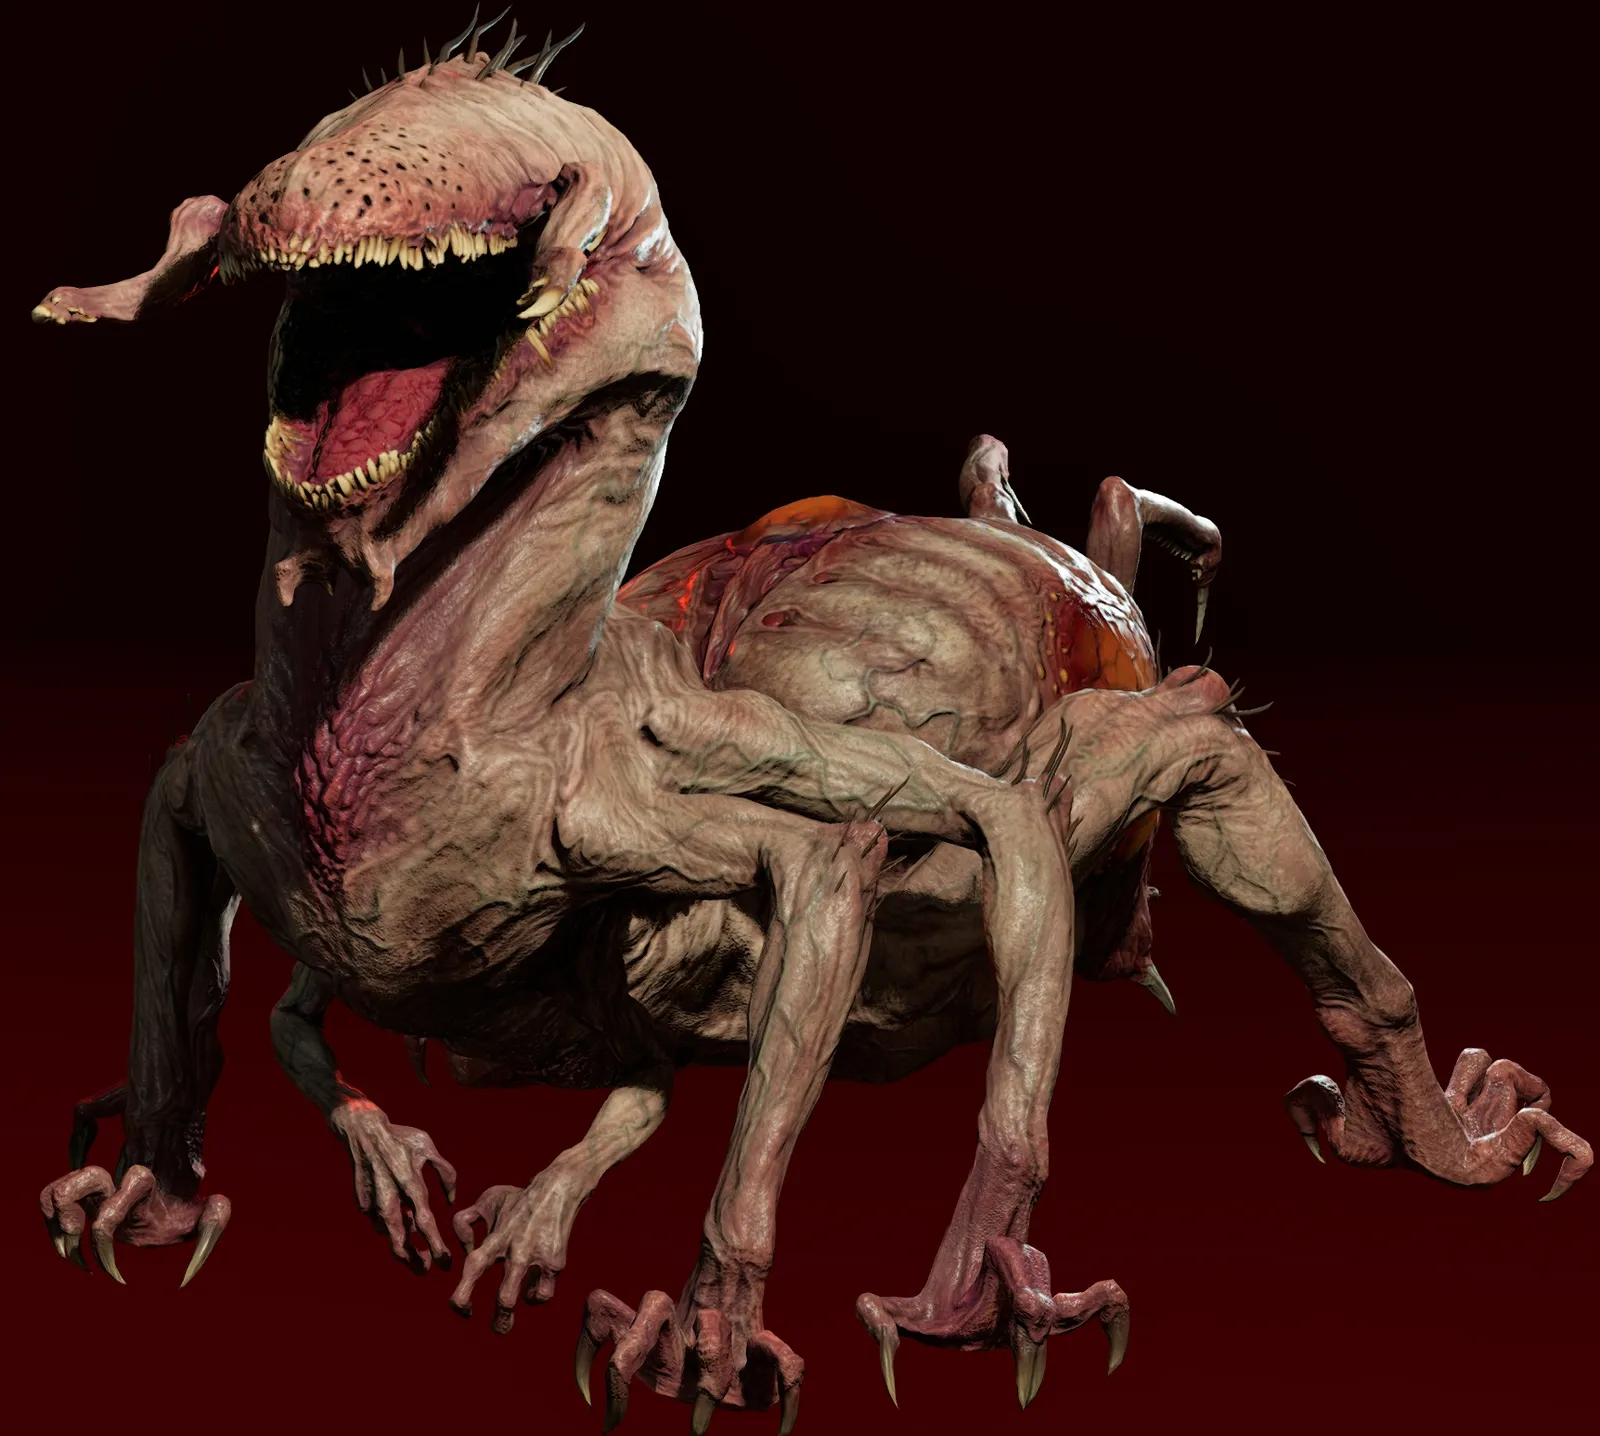 Queen Crawler.
Very weak to fire, just like regular Crawlers and her spawn: burn the whole place down. She is also very weak to Bio. Without fire or bio, pull out a knife and start slicing, or use Hollow Point Rounds. Do not ignore her spawn; they chip away at your health.
Impaler
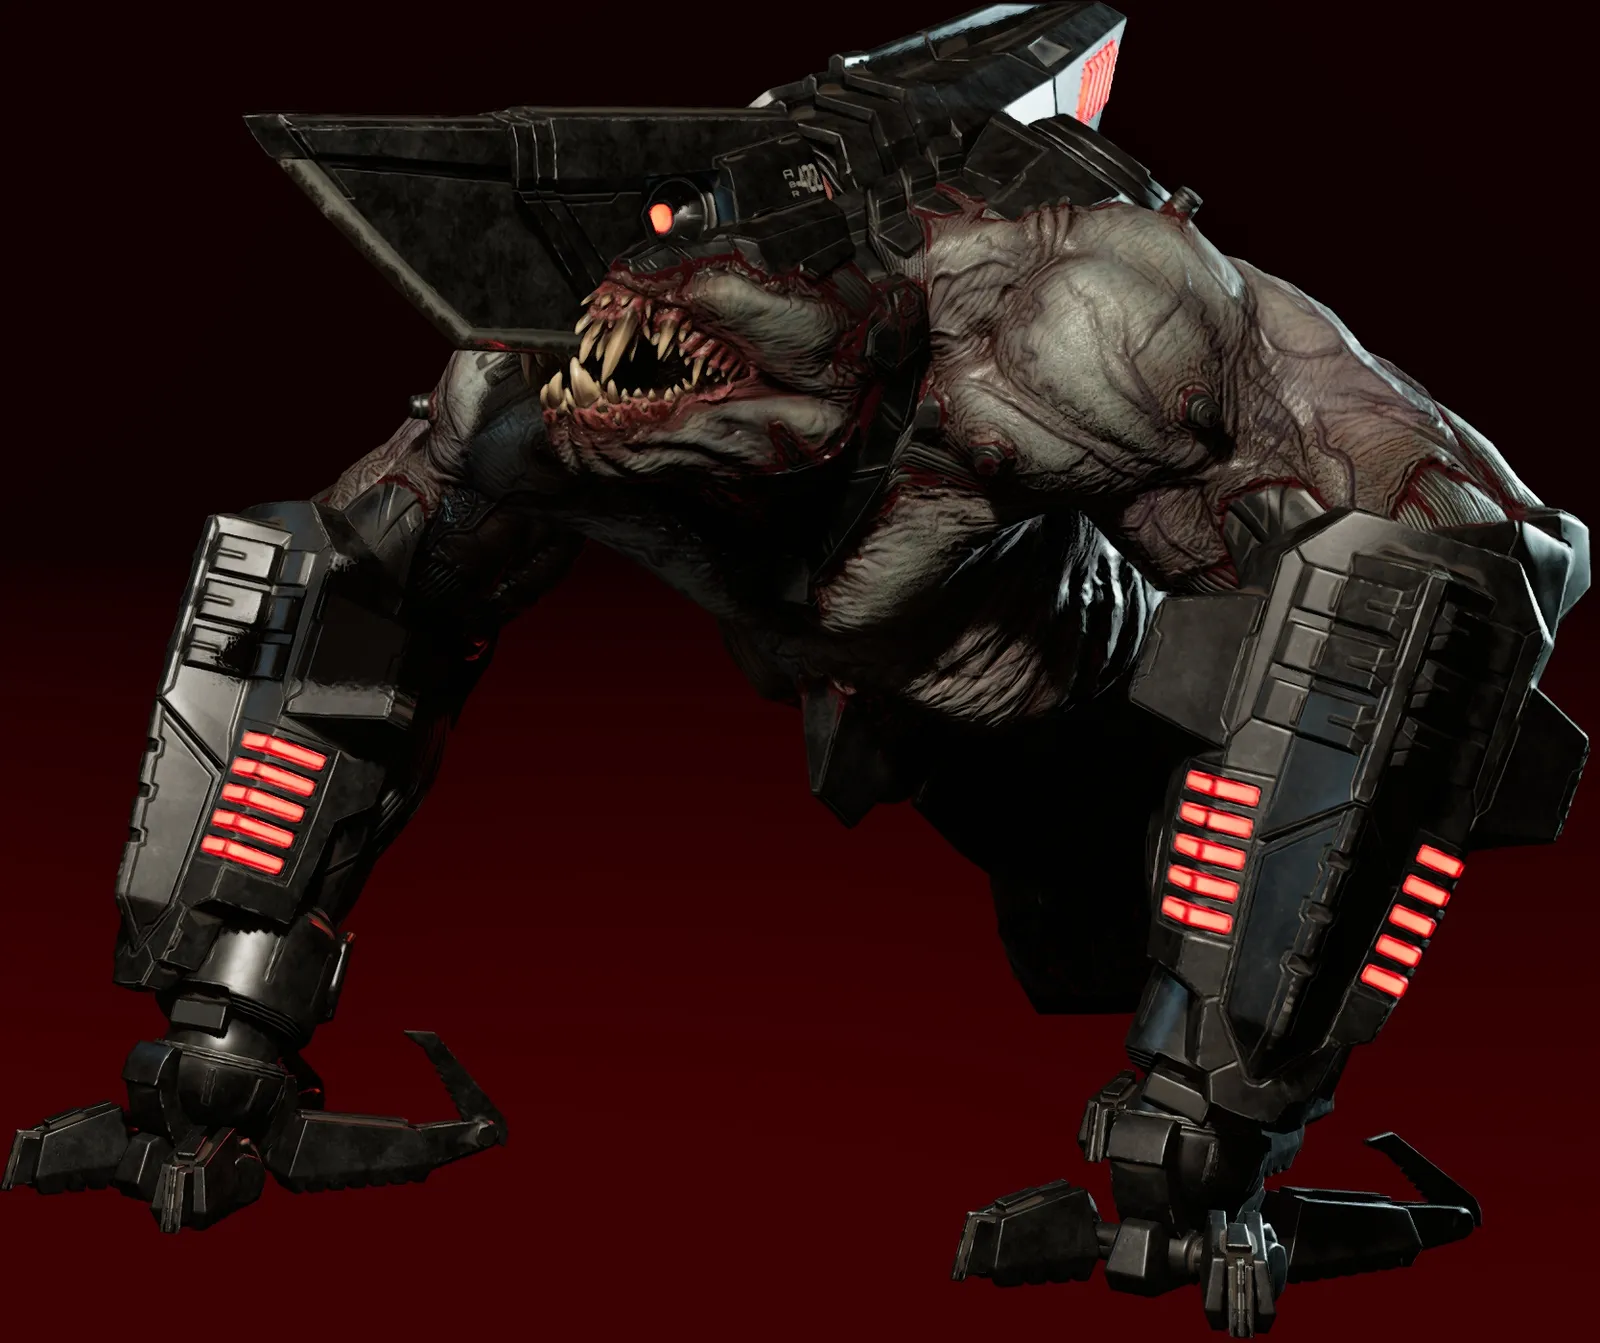 Impaler.
Very weak to acid, and very weak to electric once the armor is broken and you aim at the cores. With a bio weapon, do not shoot the cores, it barely does damage. Medics should concentrate on healing; Impalers attack relentlessly.
Chimera
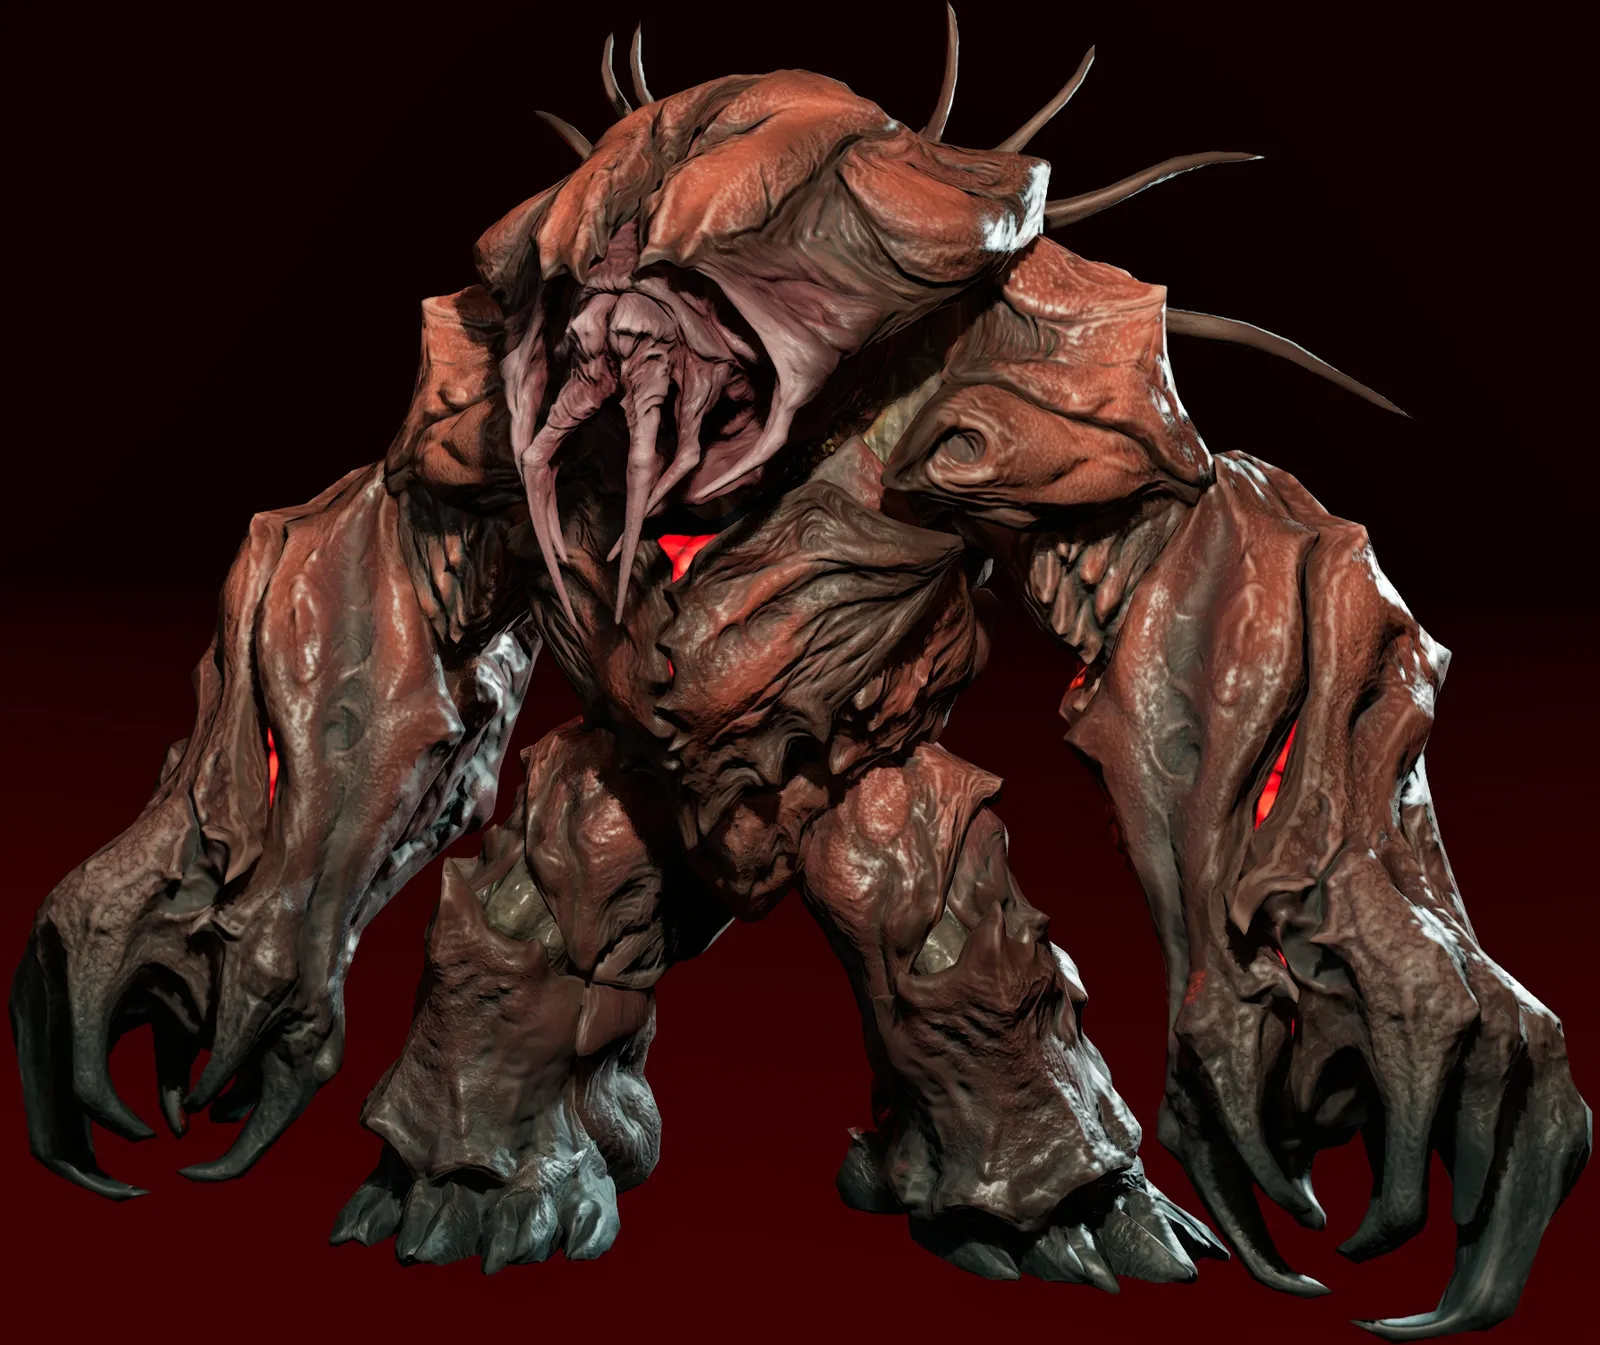 Chimera.
Avoid bringing fire to this fight (although the Vulcan still works well for a Firebug). He is weakest to ice, and explosives and bio damage also work well. Electric is fine, but if you carry an electric gun, switch to the Mire Clots as soon as they show up: they can swamp the team fast and are weak to electricity.
Players in the comments also mention that newer content is not on the chart yet, for example the Alpha Scavenger reportedly taking heavy extra damage from fire and Dr. Moorcroft from force and sound. Treat those as unverified until the codex confirms them.
Damage types
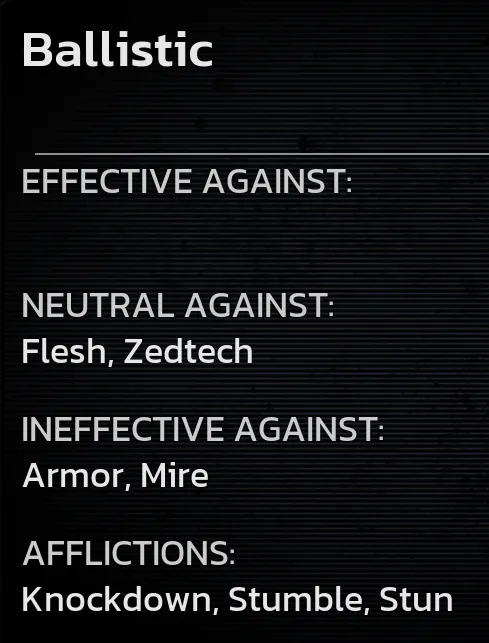
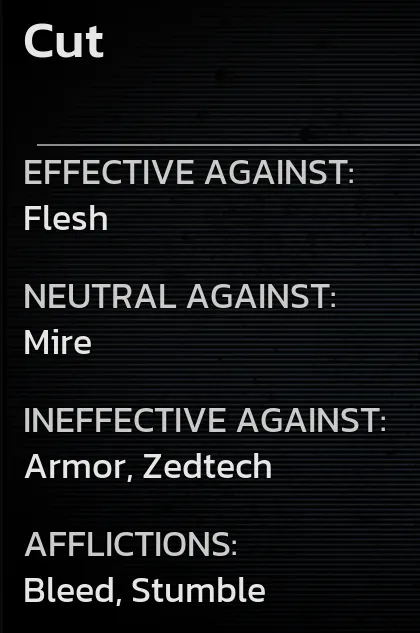
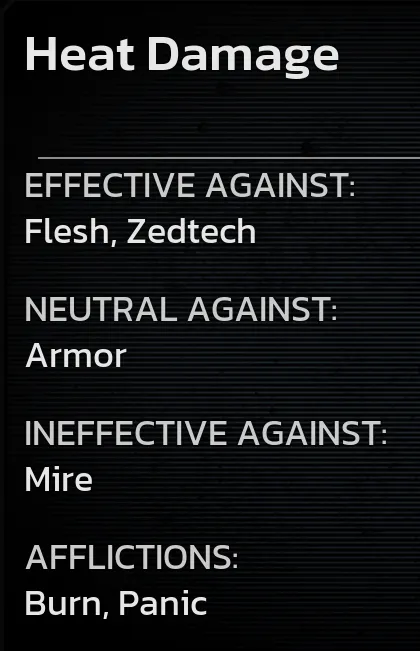
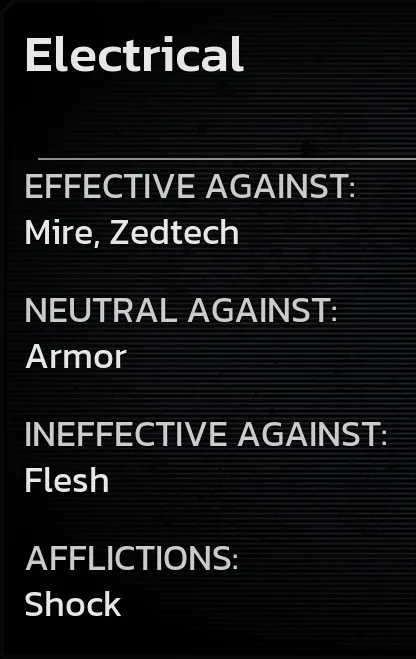
Each type has a codex card listing what it is effective, neutral and ineffective against, and which afflictions it can cause.
| Type | Effective against | Neutral against | Ineffective against | Afflictions |
|---|---|---|---|---|
| Ballistic | - | Flesh, Zedtech | Armor, Mire | Knockdown, Stumble, Stun |
| Cut | Flesh | Mire | Armor, Zedtech | Bleed, Stumble |
| Heat | Flesh, Zedtech | Armor | Mire | Burn, Panic |
| Electrical | Mire, Zedtech | Armor | Flesh | Shock |
| Cold | Mire | Armor, Zedtech | Flesh | Freeze, Enfeeble |
| Sound Wave | Armor | Mire | Flesh, Zedtech | Knockdown, Stumble, Stun |
| Force | Armor | Flesh, Mire, Zedtech | - | Knockdown, Stumble |
| Biological | Flesh, Mire | - | Armor, Zedtech | Toxic, Confuse, Enfeeble |
| Acidic | Armor, Zedtech | Flesh | Mire | Corrosion, Panic |
 Ballistic.
 Cut.
 Heat (fire).
 Electrical.
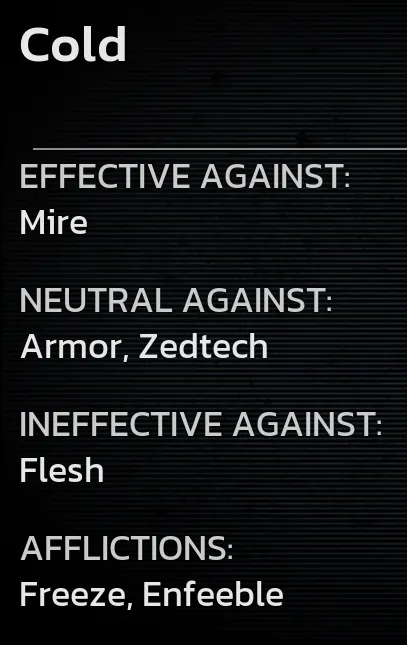 Cold (ice).
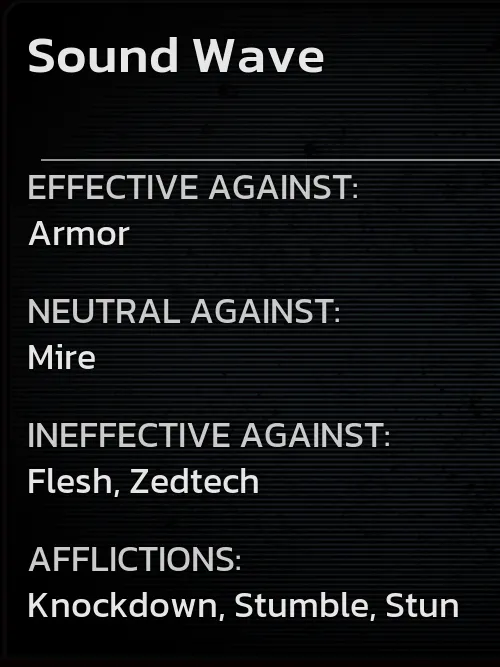 Sound Wave.
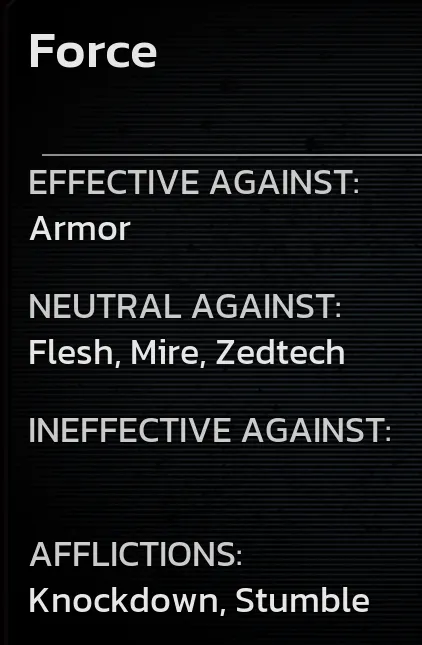 Force.
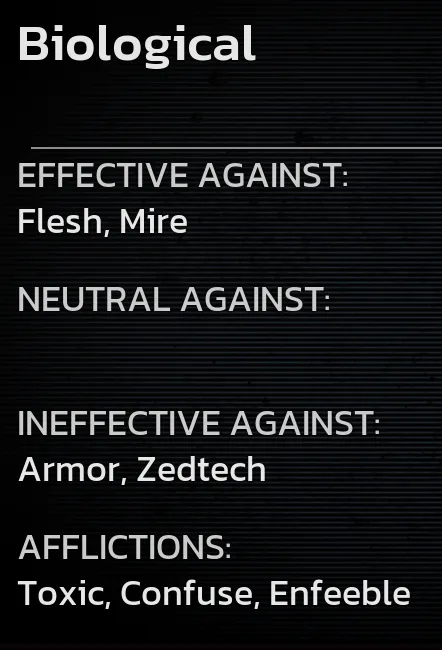 Biological.
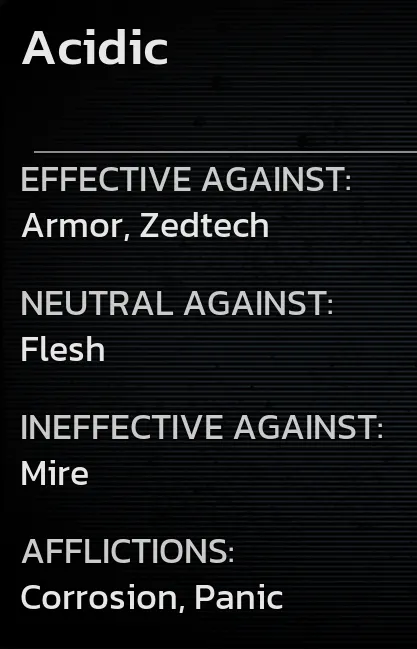 Acidic.
FAQ
- Which damage type is best against Fleshpounds in KF3?
- Explosive force and electric. Shoot the chest (or back) until the armor comes off, then hit the exposed zedtech cores, which are weakest to electric damage.
- How do I kill a Scrake quickly in KF3?
- Break his face armor with sound or acid, then empty heavy ballistic weapons into his face. Electric damage on the chainsaw engine buys time.
- What is zedtech?
- The mechanical parts of a ZED: the Husk's cannon and fuel tank, the Siren's neck and chest gear, the Scrake's chainsaw engine and the Fleshpound and Impaler cores. Electric damage is especially good against it.
- What is Sound damage for?
- Sound has no ZED-specific strengths or weaknesses. Its job is stripping armor; it is less effective on flesh and zedtech.
- How big are the multipliers?
- Community data mined from the game files shows small per-hitzone values, roughly 0.75 to 1.25. A weapon with two damage types multiplies both values together.
