
KF2 SDK: Edit the Default Skybox for Daytime Maps
By default Killing Floor 2 SDK maps get a night sky. This May 2015 tutorial shows how to build your own sky material instance so that a custom map can be set in daylight. It assumes that you already know how to build a map. Save your map before starting.
Setting it up
- Open the Content Browser, select the
KFGamepackage and search for "Sky" with the Static Meshes filter. Drag ENV_Basic_Sky into the map.
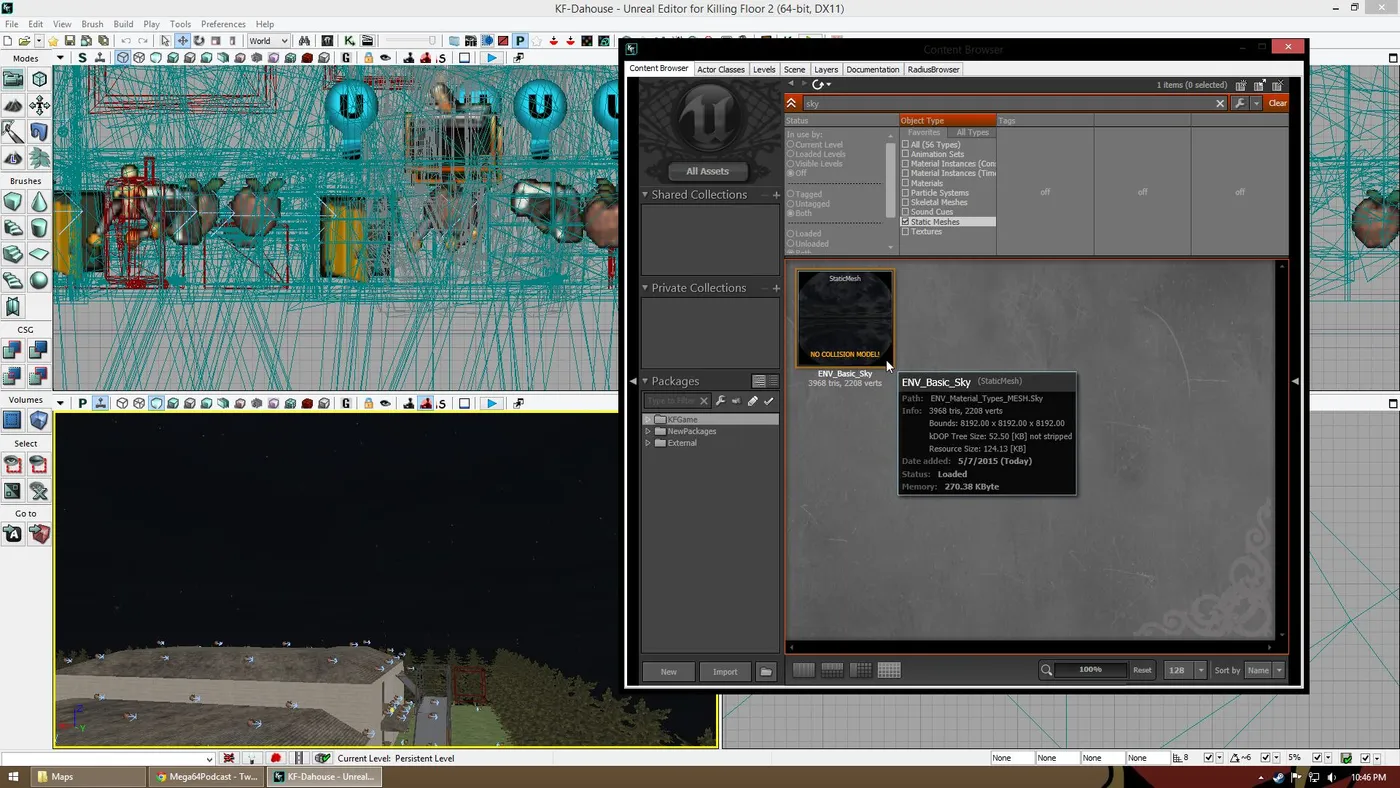 Search for ENV_Basic_Sky and drop it into the level.
- Switch the filter to All, right-click in the Content Browser and choose New MaterialInstanceConstant.
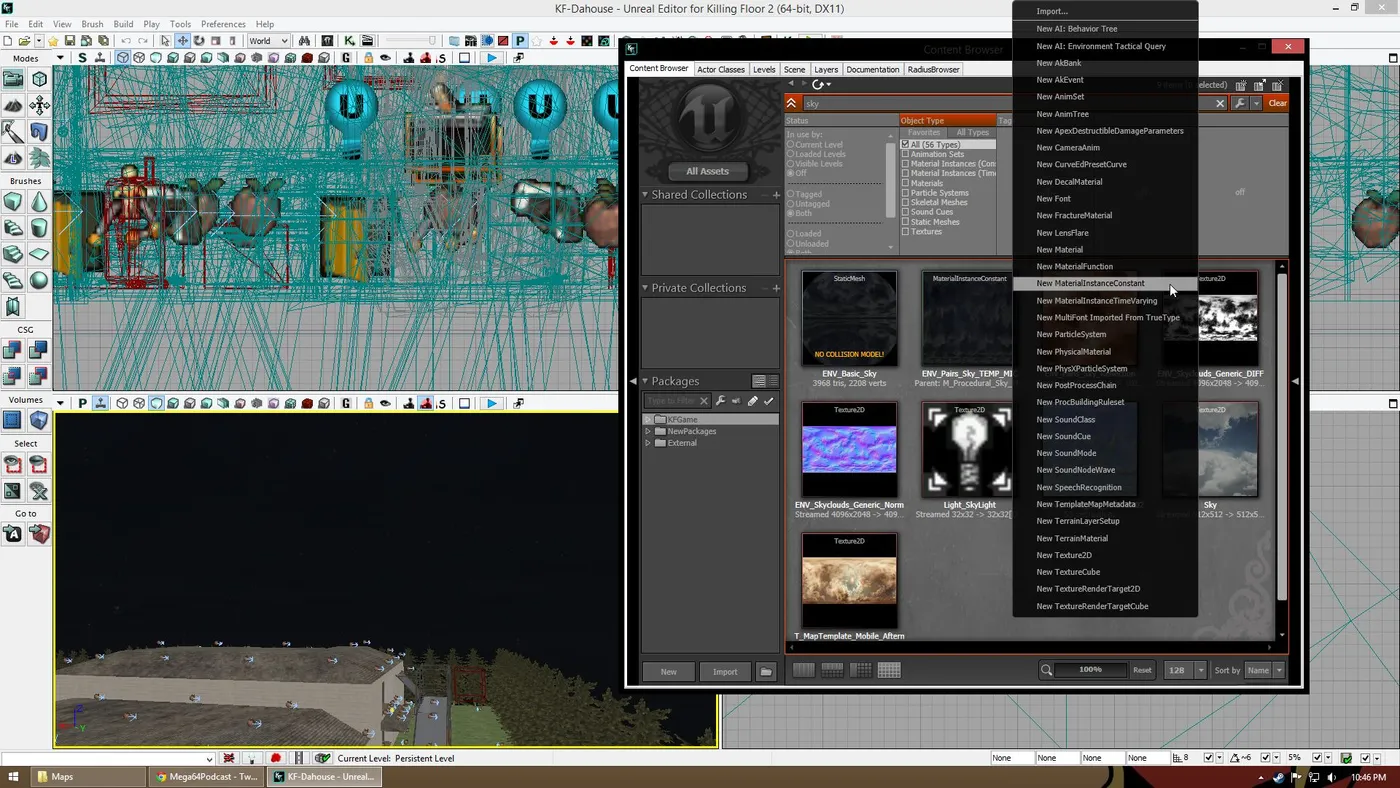 Create a MaterialInstanceConstant from the context menu.
- In the dialog pick your map name as the Package. The Group is a folder name for your custom texture (the author used
Customtexture) and the Name is free (the author usedSky_day). Click OK.
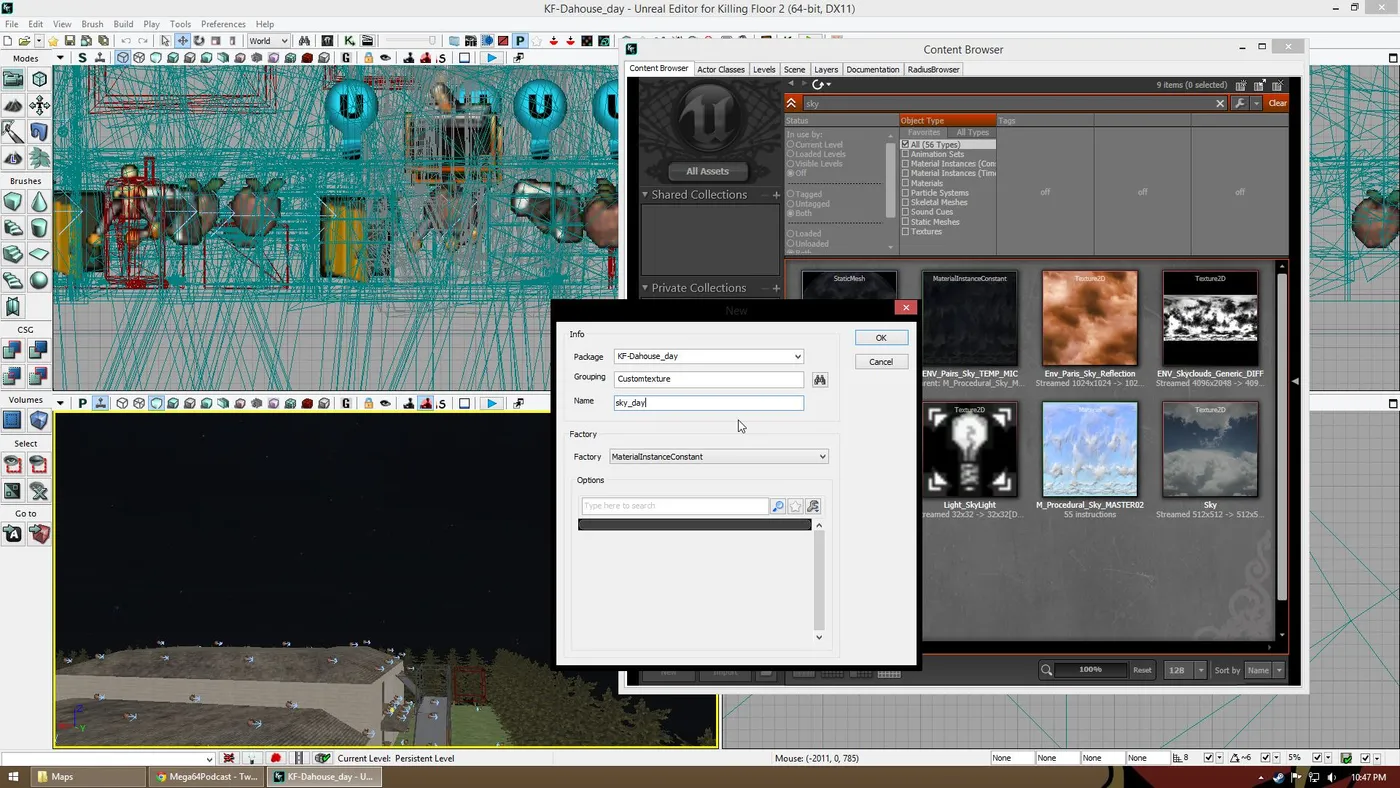 Package, group and name for the new instance.
- In the Material Editor, scroll to Parent. Select the material
M_Procedural_Sky_MASTER02in the Content Browser, then click the green arrow beside Parent to load it. You can also import a custom texture.
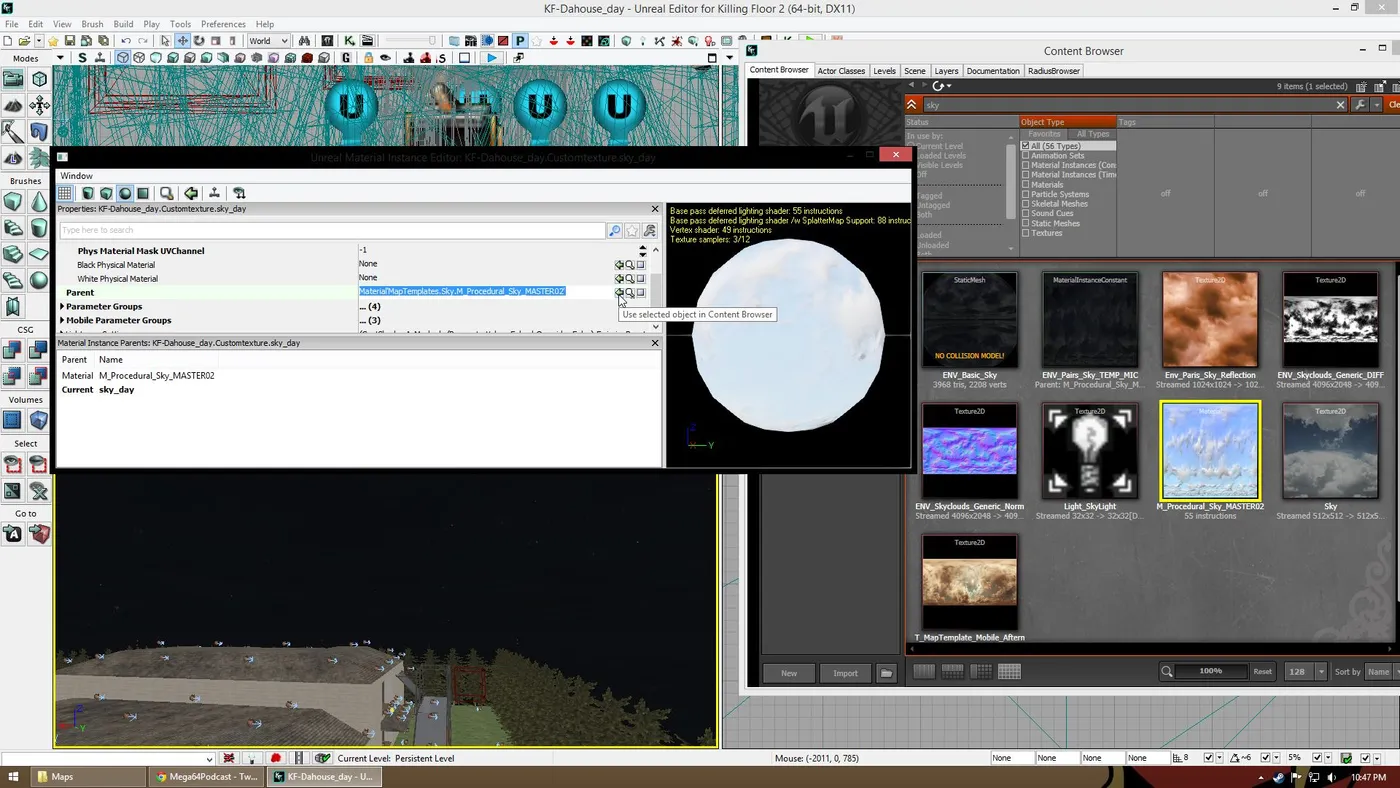 Use the green arrow to assign the selected material as the parent.
- Close the editor, right-click the sky mesh you placed and choose StaticMeshActor Properties (or press F4).
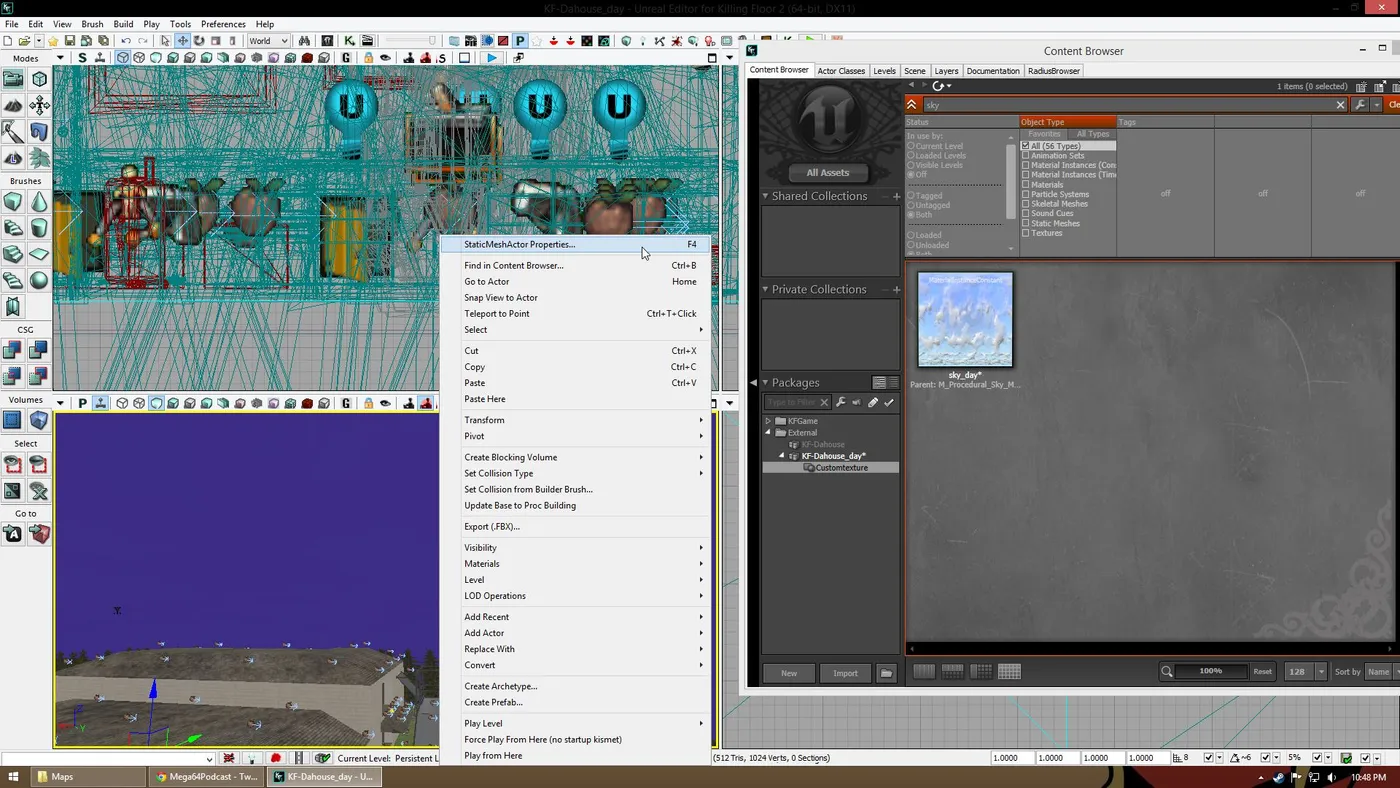 Open the actor properties.
- Search for "material". Under Rendering, find Materials (0), click Add a new item, select your MaterialInstance in the Content Browser and press the green arrow (Use selected object). Doing it this way lets you see edits in real time.
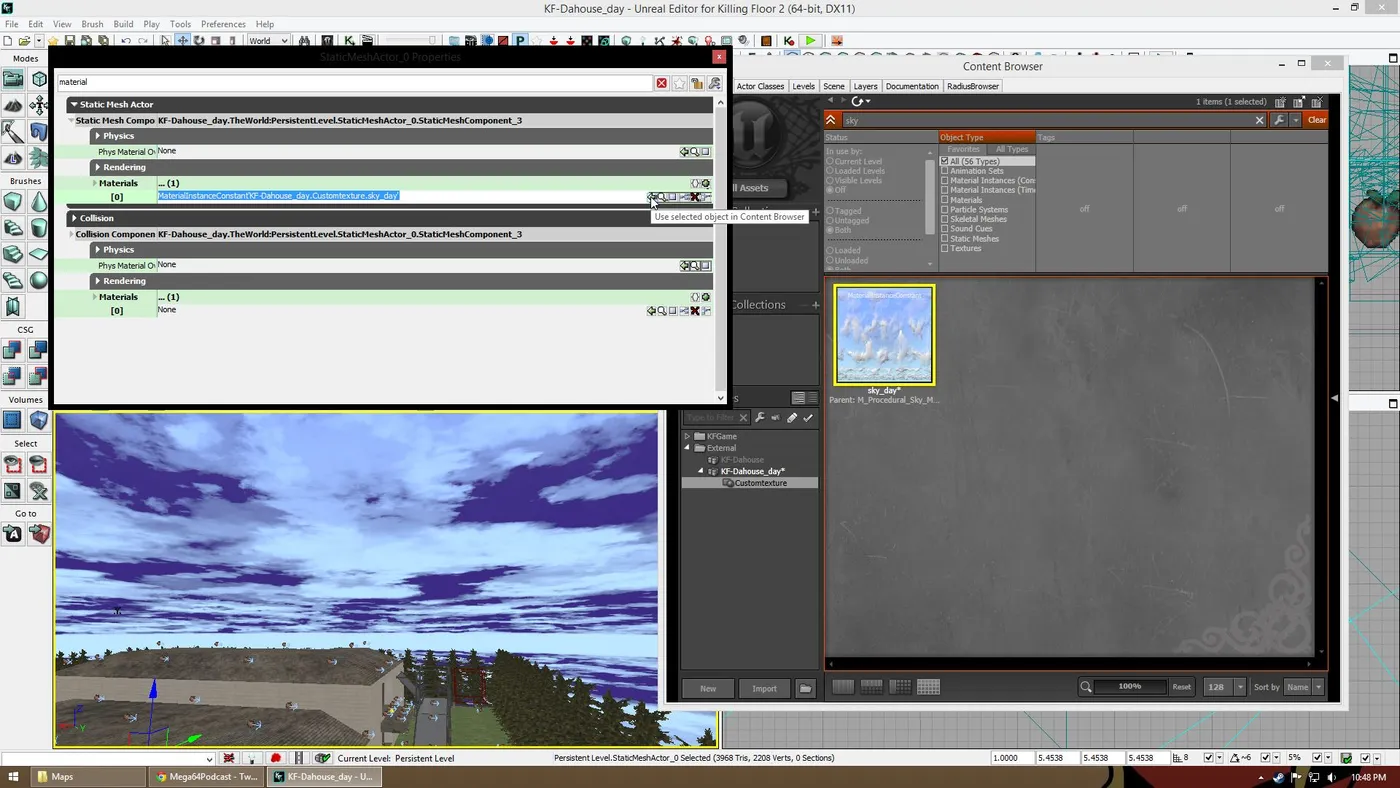 Assign the new material instance to the sky mesh.
- Close the window, right-click the sky material and choose Edit Using Material Instance Editor.
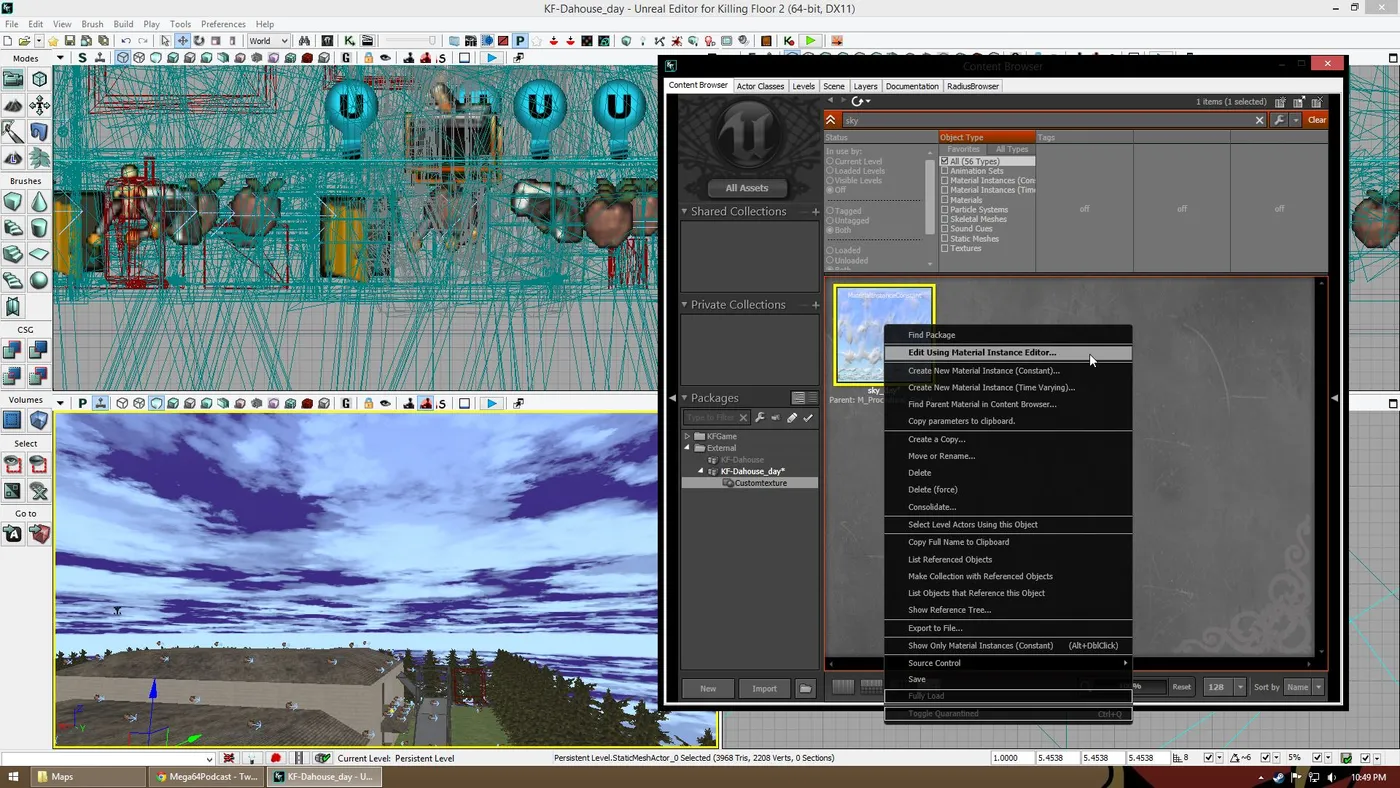 Open the instance editor.
Editing the sky material
Go to Parameter Groups, where you will find several submenus.
- Custom sky texture: open Texture Parameter Values. Tick
Tex2D_Clouds_Diffand choose your imported texture. TickTex2d_Cloud_Normto set custom normals. For importing textures see custom textures and materials with the SDK.
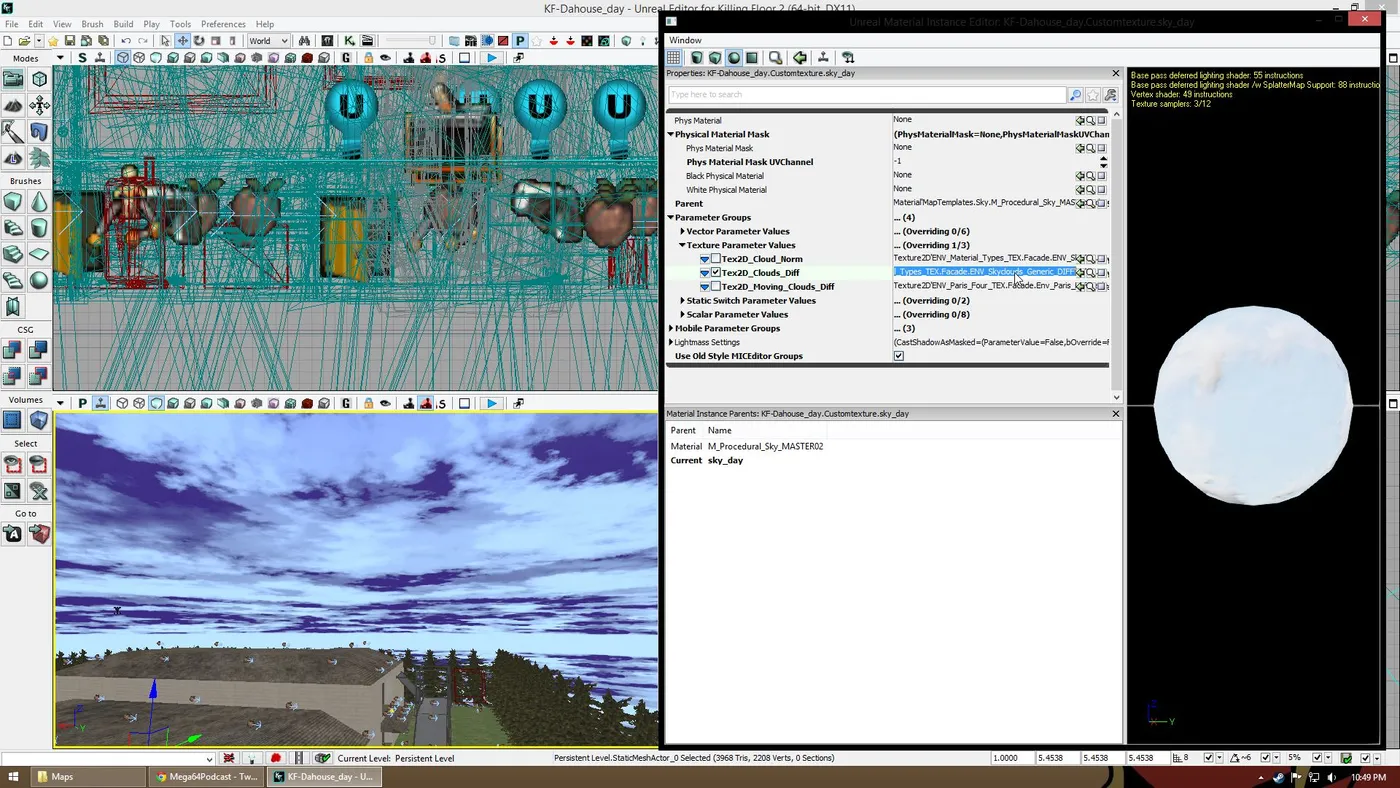 Texture parameters for a custom sky.
- Stock texture: edit Vector Parameter Values and Scalar Parameter Values instead.
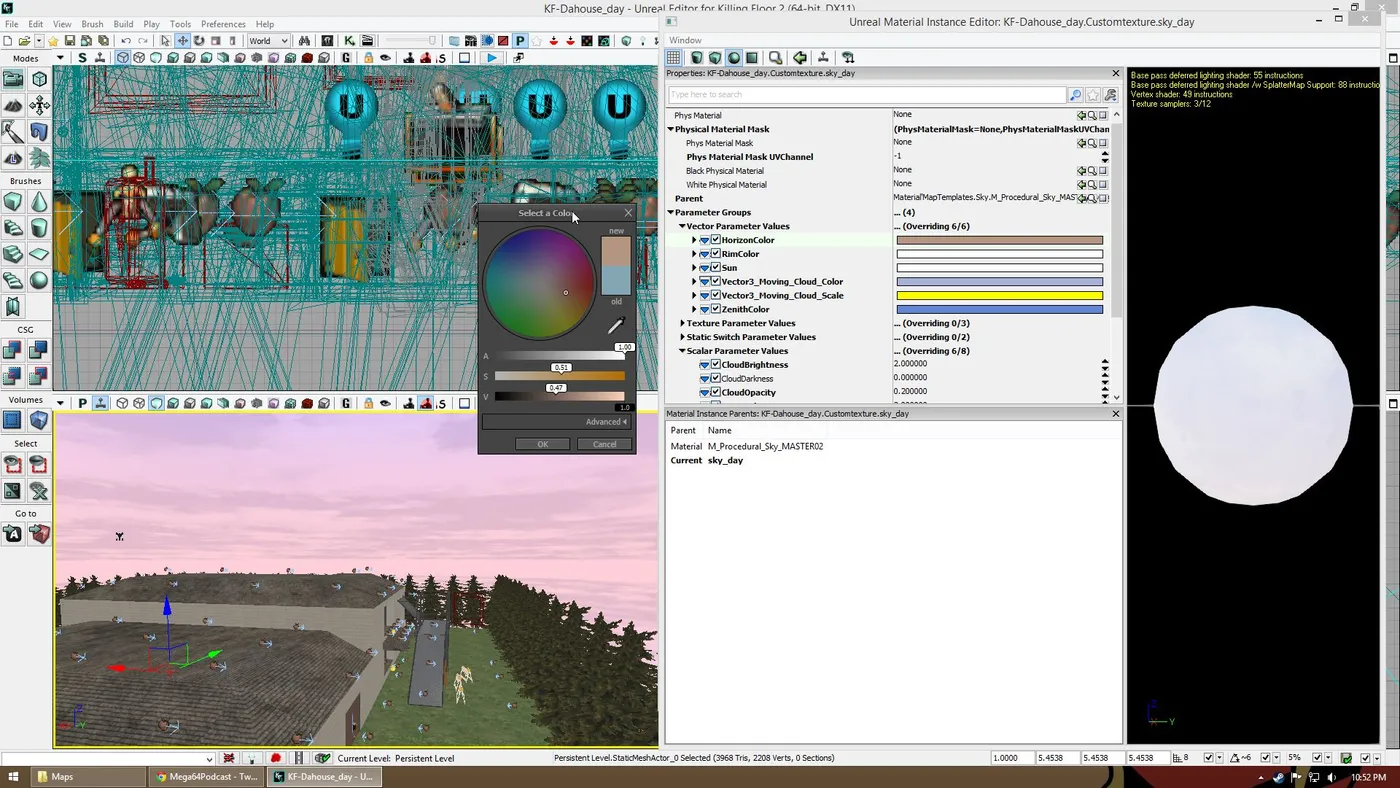 Vector parameters.
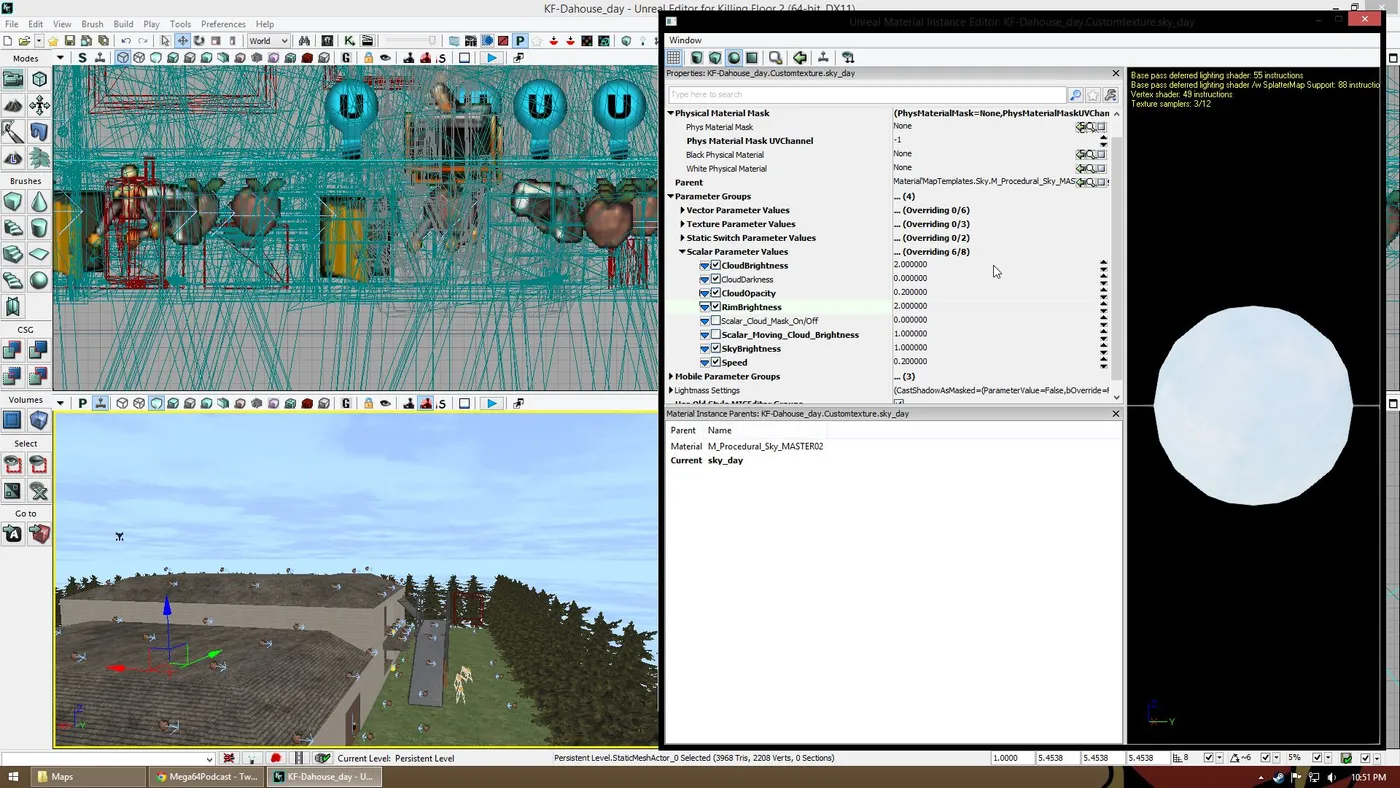 Scalar parameters.
Most settings are self-explanatory, so change them to taste. When you close the Material Editor the changes save automatically, and you can see them in the viewport and in the Content Browser.
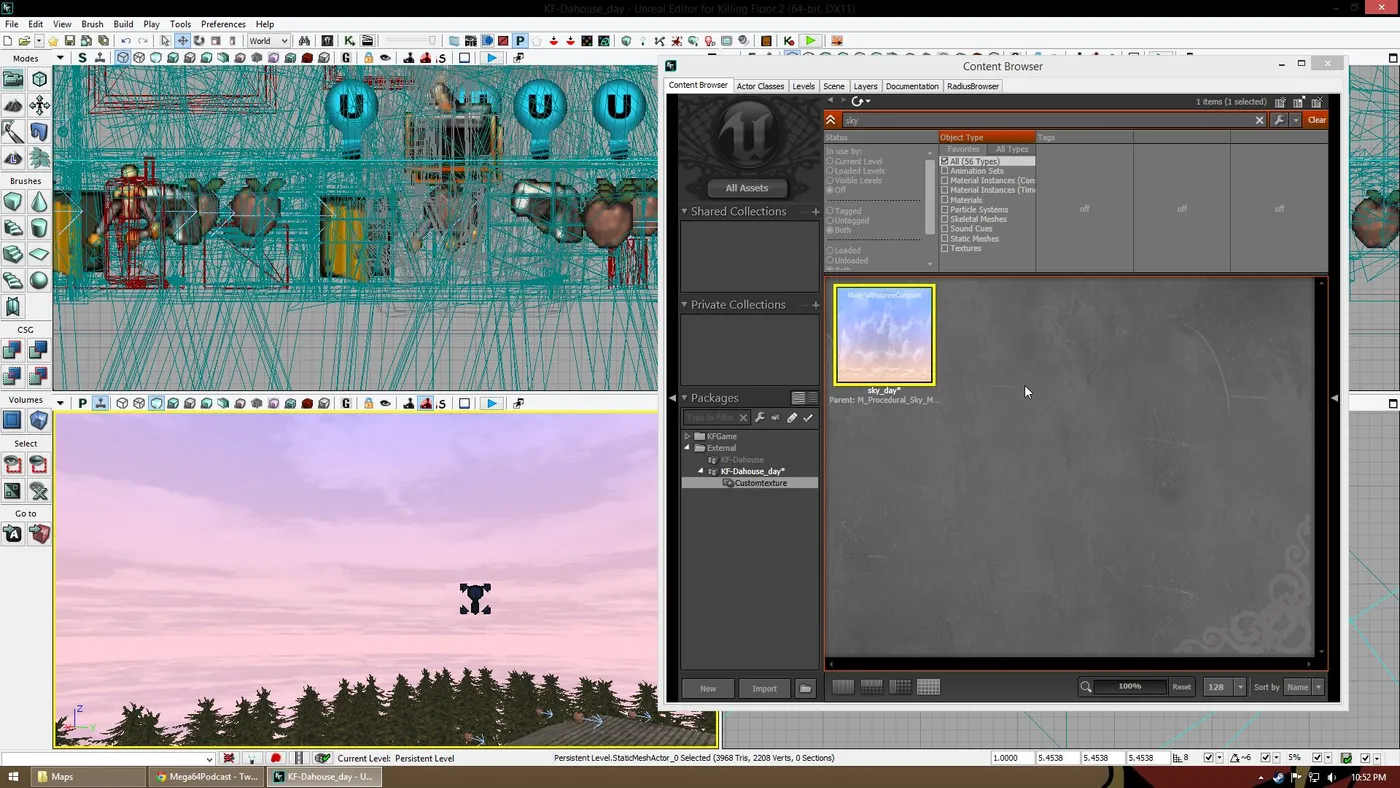 The edited sky in the rendered viewport.
Add a Skylight to match
Add a Skylight actor if you have not already. Its position does not matter, so place it anywhere easy to find. Choose Lit in the bottom-left viewport mode to see the lighting.
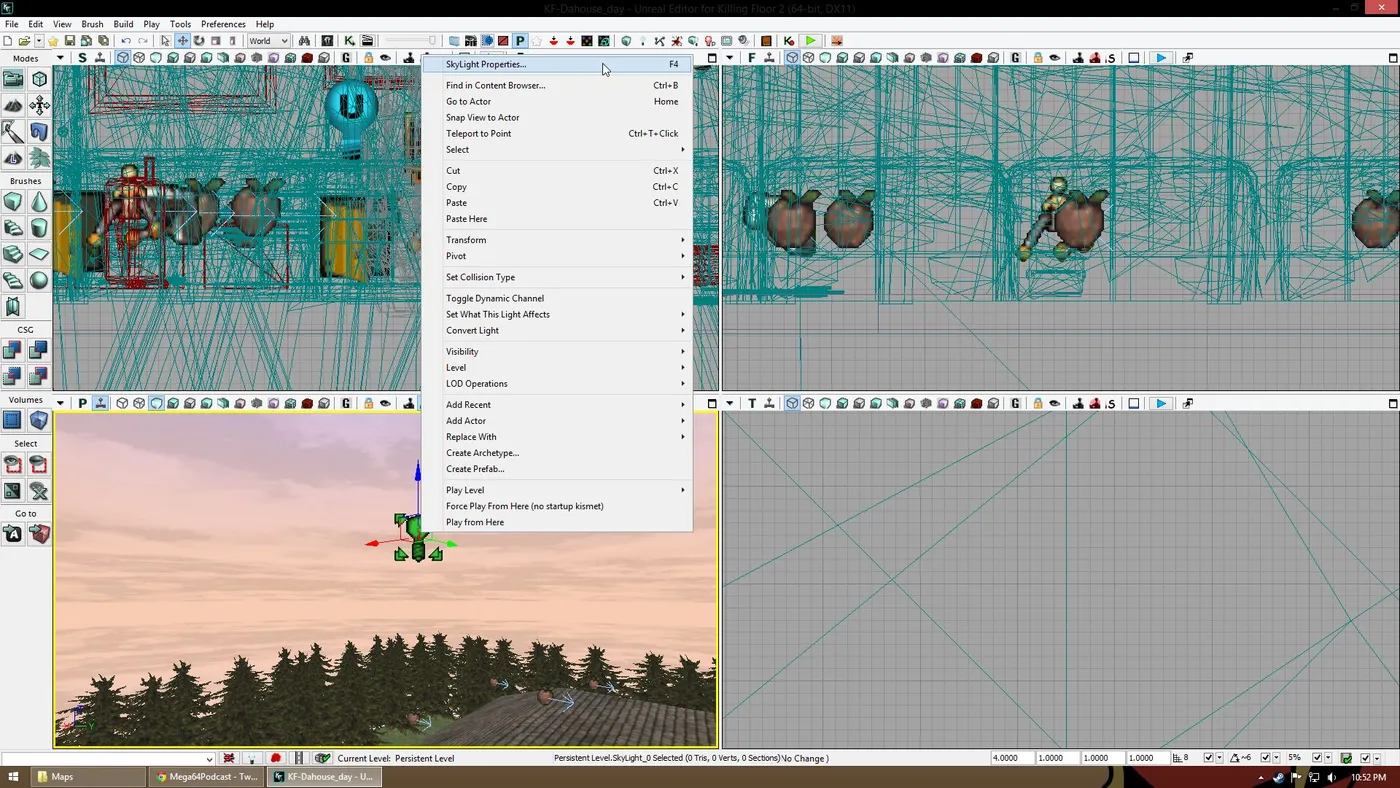 Placing a Skylight and previewing with Lit.
Then open Light, Light Component in its properties and adjust color and brightness. The author only changed those two, though more options exist.
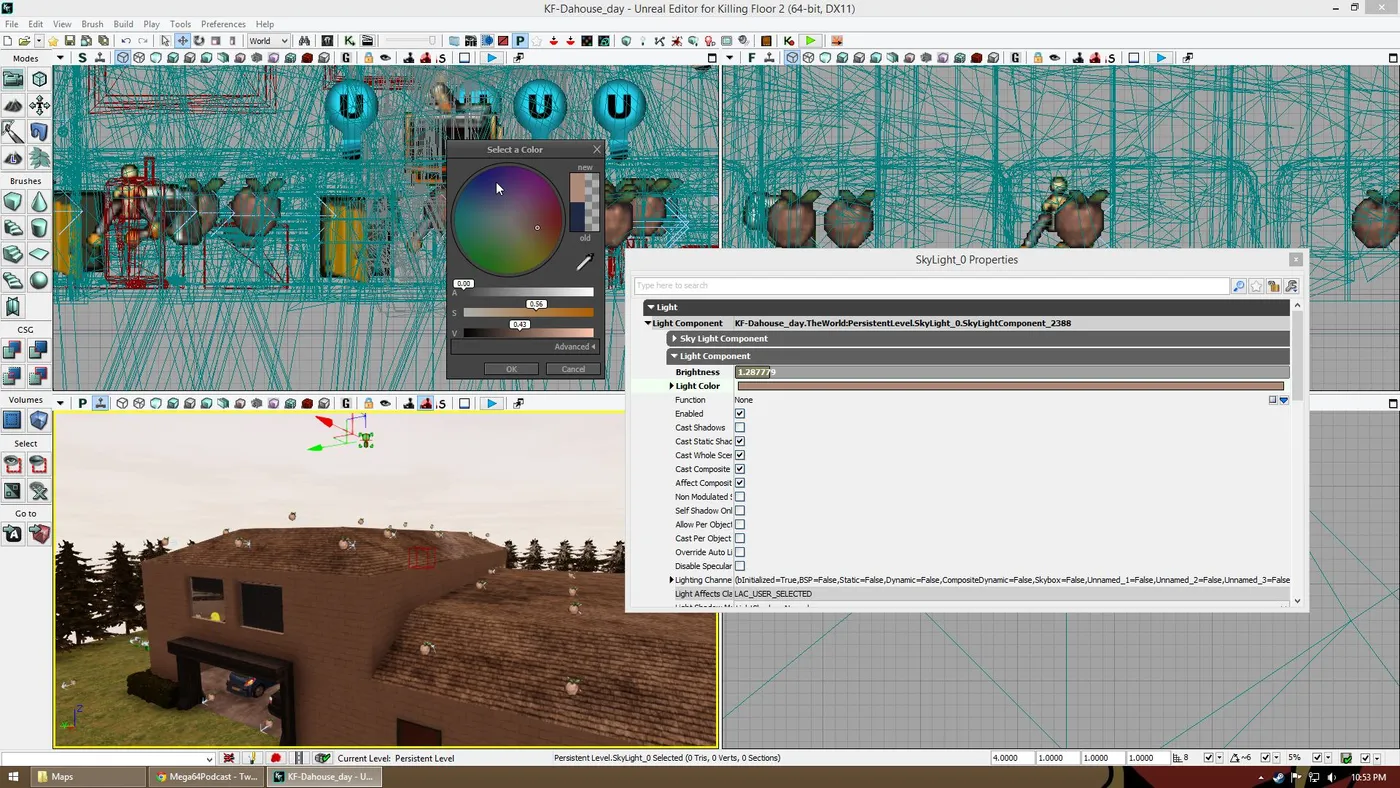 Light component settings.
Finishing up
Build your map and then Publish. If you get an error dialog like the one below, click Yes. It will still work.
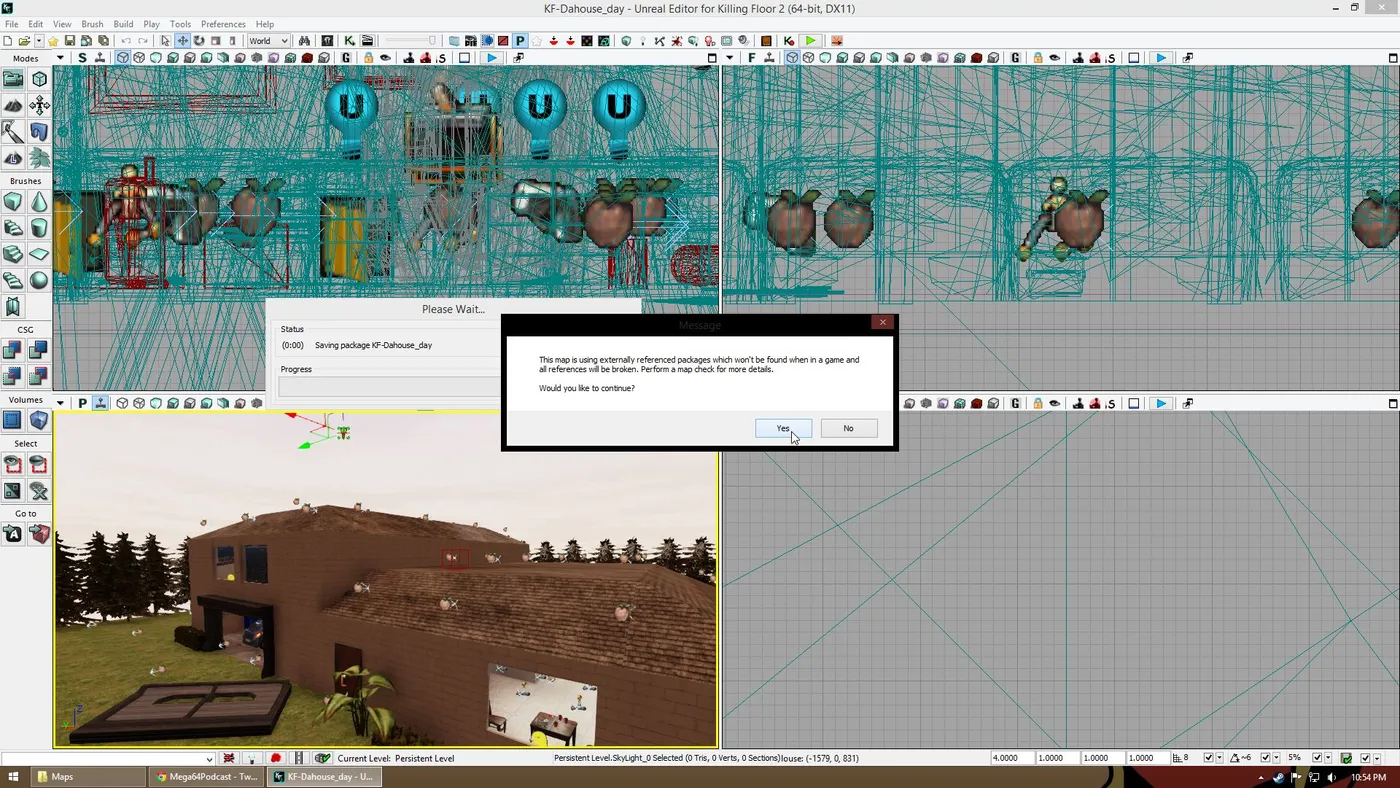 The publish warning that you can accept.
Finally, launch the game to check the result.
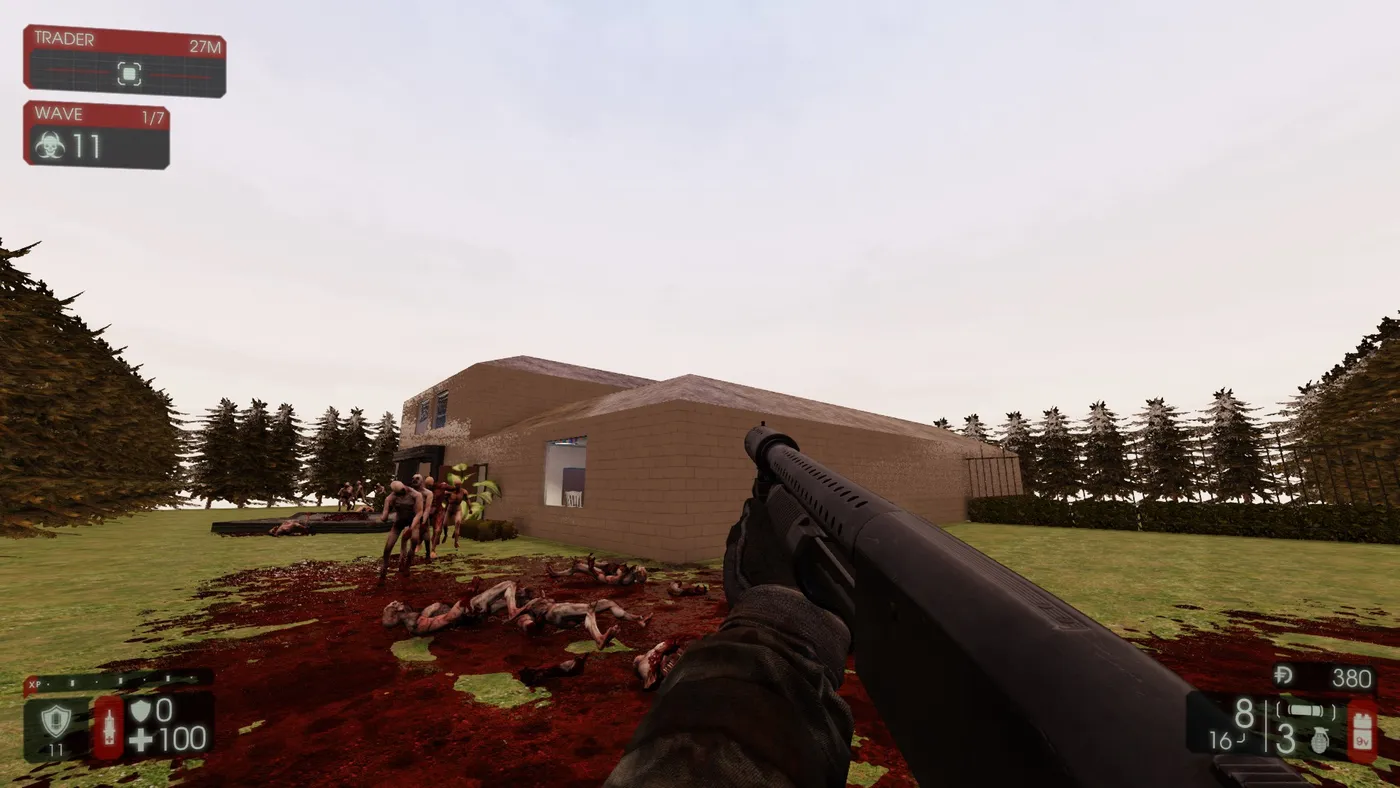 The daytime sky in game.
For more mapping material see the SDK mapping guide.
FAQ
- Which mesh and material does the tutorial use?
- The static mesh ENV_Basic_Sky from the KFGame package and the parent material M_Procedural_Sky_MASTER02, wrapped in a new MaterialInstanceConstant stored in your own map package.
- Why add a Skylight?
- So the lighting of the map matches the sky you built. The Skylight color and brightness are changed in its Light Component properties, and you should switch the viewport to Lit to preview.
- What if publishing shows an error?
- The guide says to click Yes in the error dialog. The map will still work.
