
KF2 Support Guide: Skills, Buy Order and Doomstick Loadouts
An in-depth Support guide written for 6-player Hell on Earth: role, skill choices, wave-by-wave buying strategy, three loadouts, big zed takedowns and advanced tricks. The Support is the generous perk that shares ammo and armor with the team, but should not forget that it needs enough ammo for itself. Related pages: Support perk and the shotguns and loadouts guide.
The role of Support
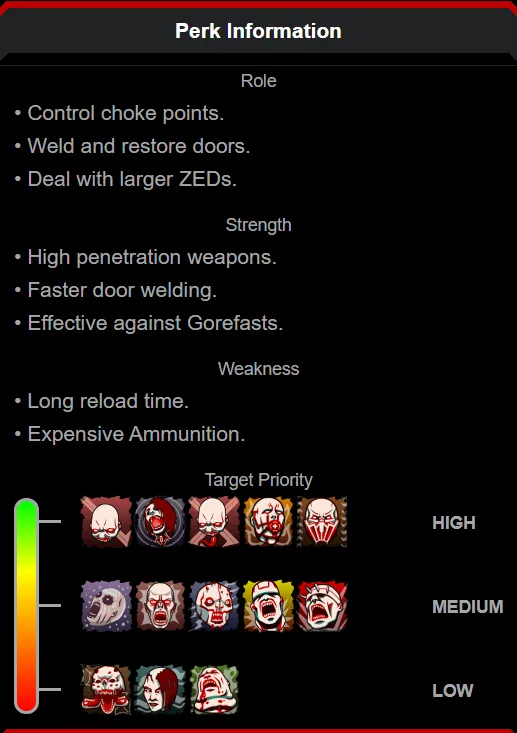
The official perk information panel with Tripwire's suggested target priority.
The Support is a general-purpose perk that handles ZEDs at close to medium range. The author disagrees with the official target priority chart, because the right target depends on two things.
- Who you are laning with. Next to big zed hunters (Sharpshooter, Gunslinger, Demolitionist) clear the trash and medium ZEDs first, since they disturb teammates doing takedowns. Next to trash specialists (Commando, SWAT, Firebug) start big zed takedowns yourself or cooperate to kill them.
- Which map. Hold chokepoints such as the long hallways in Containment Station and Biotics Lab.
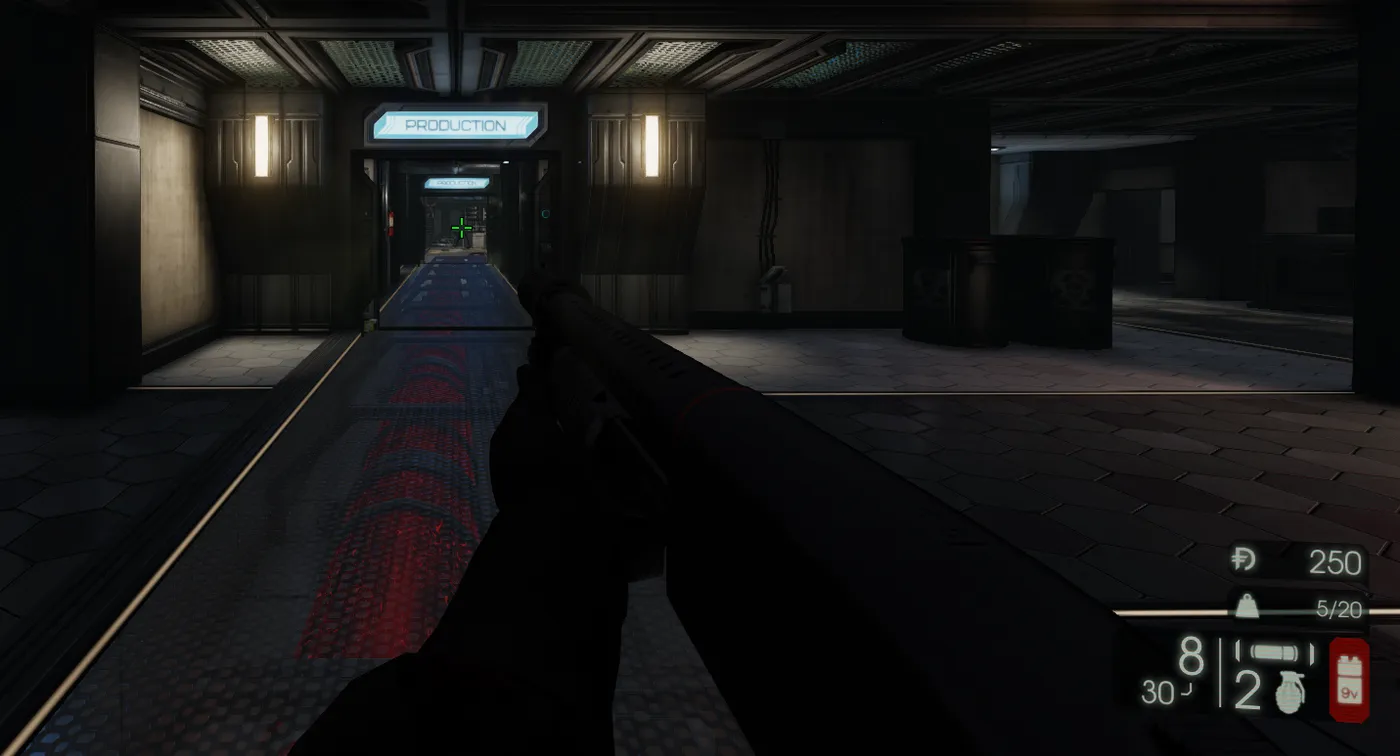
Biotics Lab, a typical Support chokepoint.
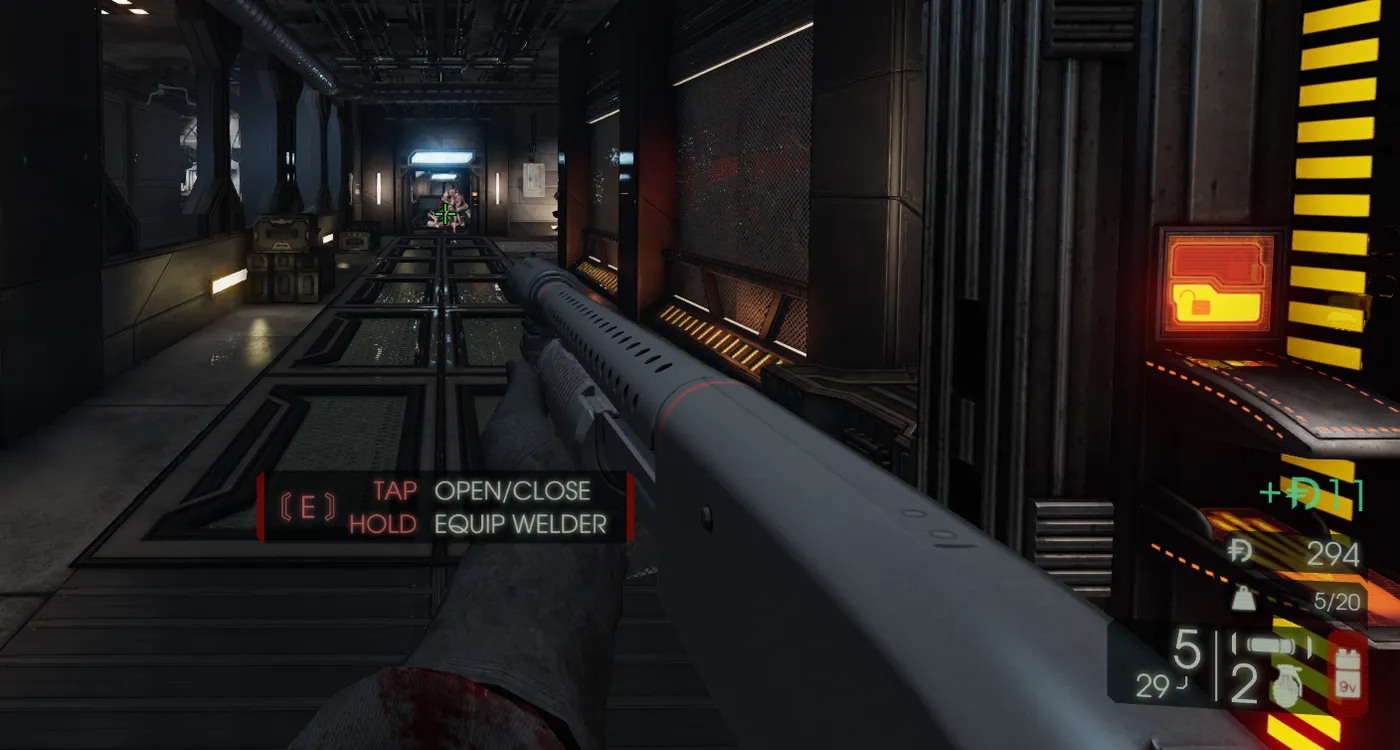
Containment Station, the long hallway.
Welding and repairing doors
Welding doors is not recommended: it constrains the escape and kite route of the whole team. Weld only to give breathing space after everyone has passed through while kiting, which buys time for the Medic to heal, for guns to reload and for the team to relax. Repairing doors is useful only to gain XP or when you have agreed with a Demolitionist who will weld doors as traps. It costs twice the energy of welding and leaves you unarmed, so a swarm of Crawlers or Stalkers means trouble. With shotguns most trash and medium ZEDs die in one to three headshots, preferably within 15 metres.
Skill choice (6 players, Hell on Earth)
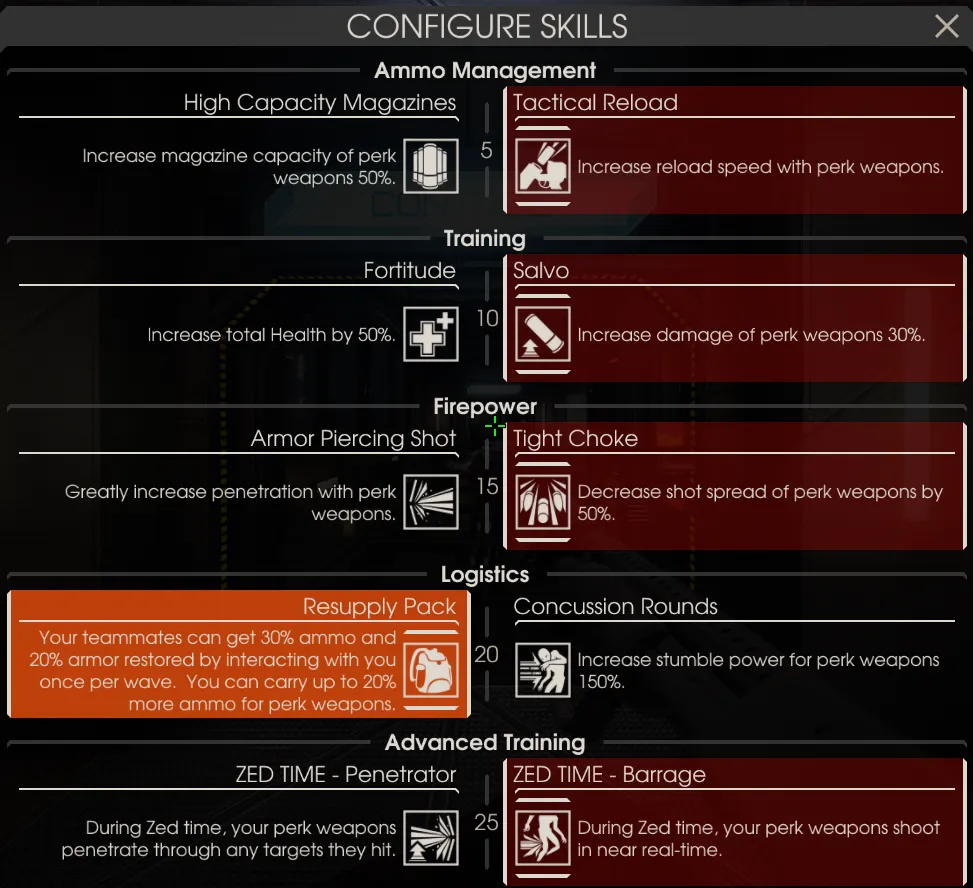
Waves 1 to 3: Resupply Pack gives teammates extra ammo and armor.
- Waves 1 to 3: Resupply Pack gives teammates 30% extra ammo and 25% armor. That improves the whole team's economy; a Commando can keep gaining AR-15 ammo and buy a tier 4 assault rifle as early as wave 3, which is why Support is so loved.
- From wave 3 (wave 5 at the latest): Concussion Rounds. Three to five waves of generosity is enough, because stumble power is essential for big zed takedowns.
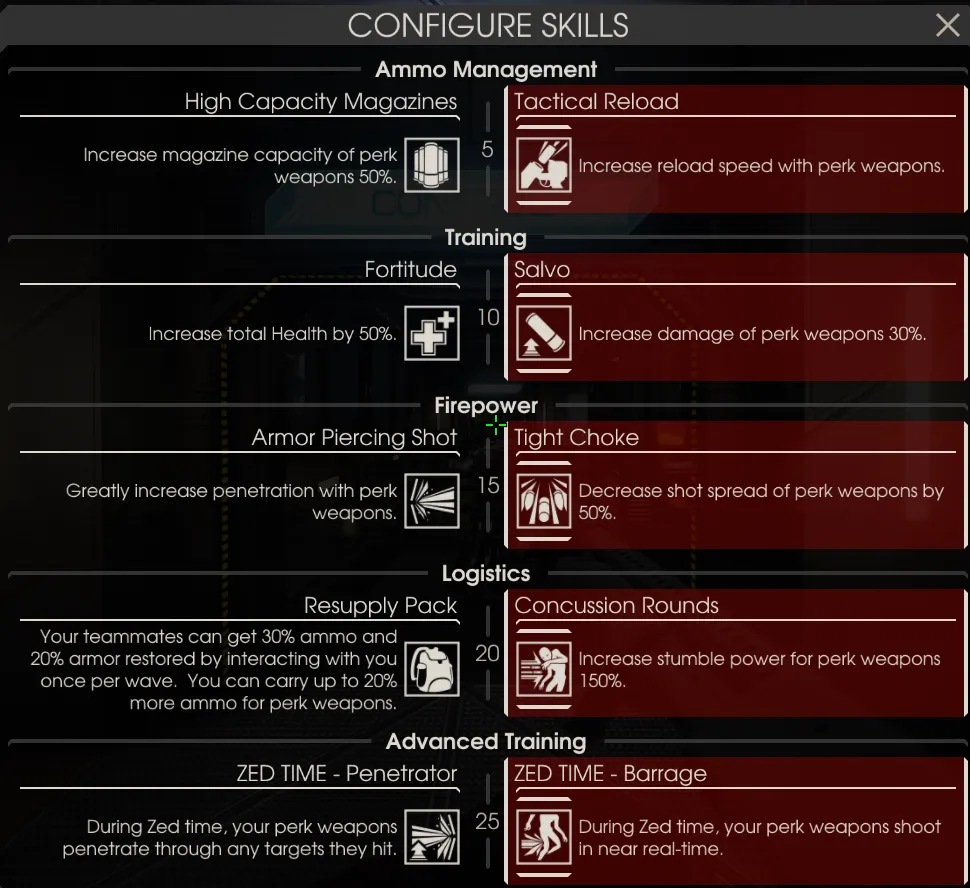
From wave 3 to 5, switch to Concussion Rounds.
- Level 5: High Capacity Mags suits mag-fed guns (Nailgun, HZ-12, HMTech-301, AA-12); Tactical Reload suits tube-fed shotguns (SG-500, Double-Barreled Boomstick, M4, Dragonsbreath, Doomstick).
- Level 10: Fortitude (150 HP) is tempting, but Salvo's extra 30% damage is a must for killing efficiently while saving expensive ammo (20 rounds of AA-12 cost 82 Dosh).
- Level 15: Armor Piercing Shot or Tight Choke. Support already has the greatest penetration of all perks (+20% shotgun penetration per level), while spread is the main problem at medium and long range, so Tight Choke massively extends your range.
- Level 20: Resupply Pack or Concussion Rounds; stumble lets you take down big zeds without taking damage.
- Level 25 (Zed Time): Penetrator or Barrage. Barrage lets you shoot in real time, so you can spam AA-12 rounds to clear groups when a line breaks. Penetrator is inferior because penetration is already huge (+500% at level 25).
Buy strategy (6-player HoE public match)
- Wave 1: SG-500 is your friend for trash and medium ZEDs; the 9mm is the backup.
- Wave 2: Sell the SG-500 for a single HRG Buckshot, or preferably the HZ-12.
- Waves 3 to 4: Keep the HZ-12 or upgrade to the M4 Combat Shotgun.
- Wave 5: Buy an AA-12, a general-purpose shotgun for a general-purpose perk.
- Waves 6 to 7: Keep the AA-12 until you can afford the Doomstick, which the author finds overpowered against big zeds.
- Waves 8 to 10: Maintain AA-12 plus Doomstick and do your job as Support.
| Criteria | HRG Buckshot | HZ-12 |
|---|---|---|
| Magazine / backup ammo (with Resupply Pack and Tactical Reload) | 5 / 123 (total 128) | 16 / 116 (total 132) |
| Cost | 550 for a single one | 750 |
| Damage (all pellets hit) | 160 | 200 |
| Ammo cost | 21 Dosh for 5 shells | 64 Dosh for 16 shells |
| Bullet spread factor | 0.15 | 0.15 |
The HZ-12 wins on damage, magazine, total ammo and economy, but costs more, so on wave 2 you may lack Dosh for ammo. The author's advice is to ask teammates for a little Dosh: you are the one who gives them ammo and armor, which is Dosh.
Loadouts
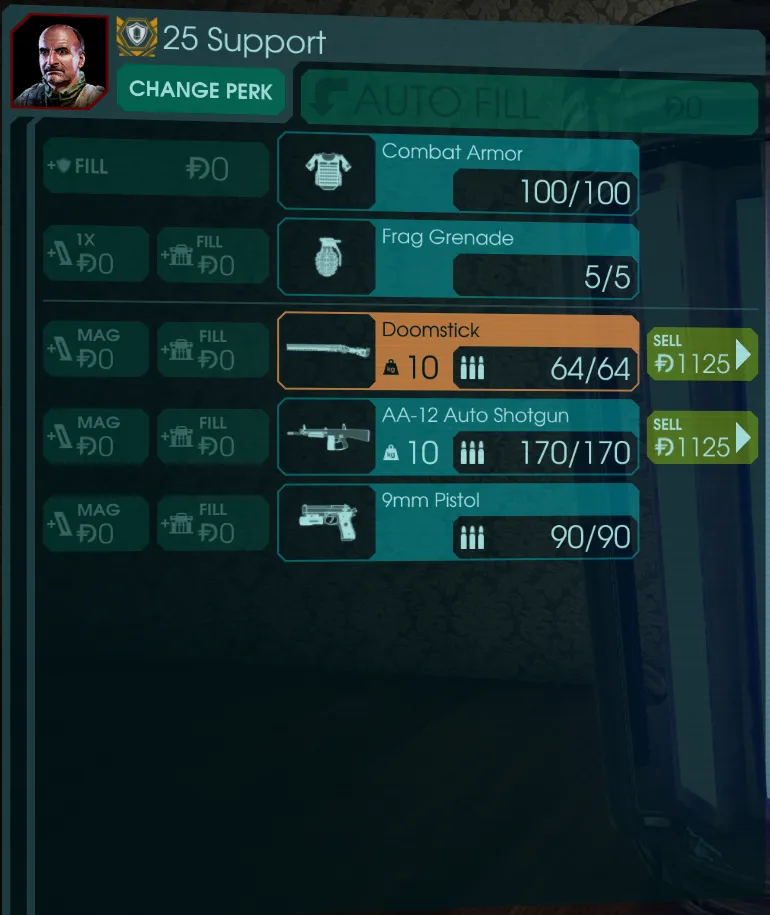
AA-12 plus Doomstick, probably the meta loadout.
- AA-12 + Doomstick. The Doomstick is for Scrakes, Fleshpounds and Quarter Pounds; the AA-12 handles trash and medium ZEDs and follow-up shots after a takedown.
- With a trash specialist: tier 5 Doomstick + tier 5 M4 Combat Shotgun + tier 2 HMTech-101 pistol. A tier 5 Doomstick can one-shot a Scrake or Quarter Pound if all pellets hit the head; the M4 clears trash and medium ZEDs and can follow up on a Fleshpound; the pistol heals teammates.
- Generalist: tier 5 AA-12 + tier 5 M4 + tier 2 HMTech-101. It lacks big zed power but works like the M14 plus FAL build of the Sharpshooter, killing most ZEDs with successive headshots; even big zeds die within one magazine.
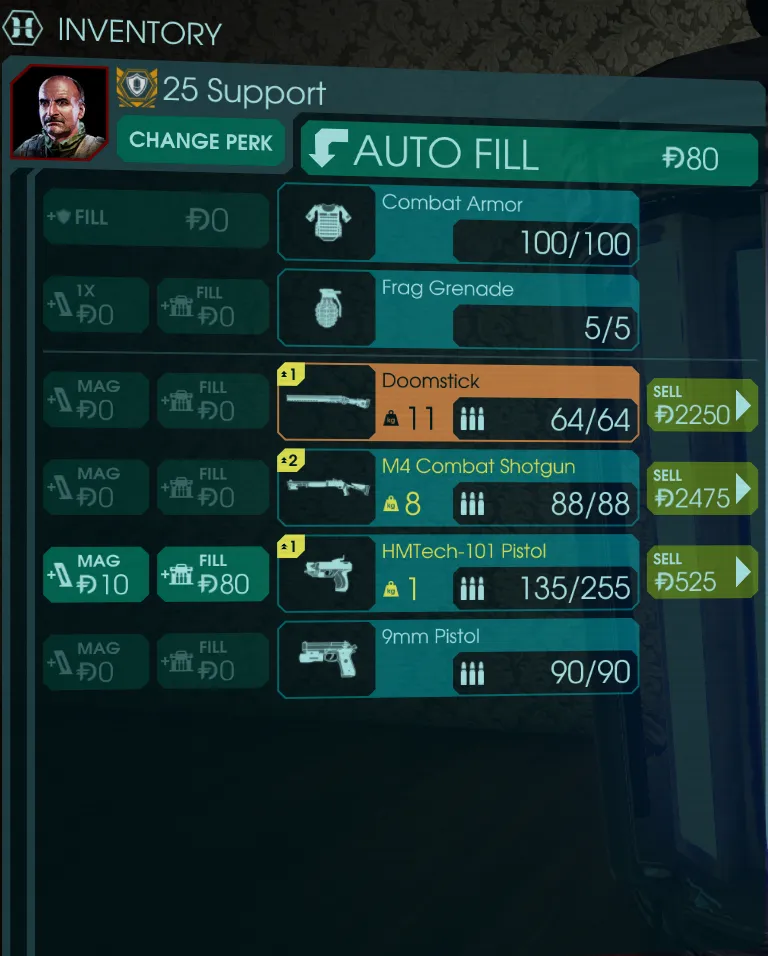
Loadout with Doomstick, M4 and HMTech-101.
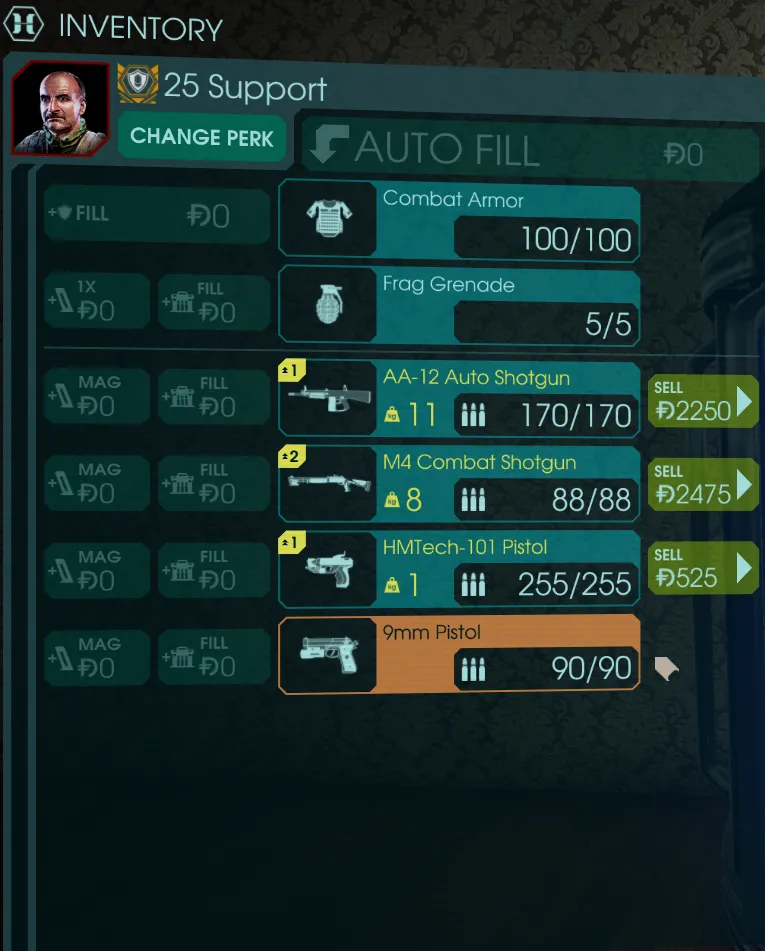
Generalist loadout: AA-12, M4 and HMTech-101.
Why not the Double-Barreled Boomstick? It scales poorly with the upgrade system (base damage dropped from 480 to 250, so a tier 4 upgrade is needed to two-shot a Scrake), and the Doomstick overshadows it for takedowns. Before the Doomstick, the Boomstick was the best and most stylish way to take down big zeds.
Big zed takedowns (6 players, HoE)
- The Doomstick is the best choice thanks to damage and stumble power (especially with Concussion Rounds); even a raging Fleshpound has no chance. With AA-12 + Doomstick, use the AA-12 for follow-up shots after the Doomstick alt-fire. A tier 5 Doomstick one-shots Scrakes and Quarter Pounds.
- The AA-12 also works: if five shots land on a Scrake's head, it staggers; keep tracking the head and it dies in 9 to 12 shots in total.
- A tier 5 M4 is exceptional: four shots for a Scrake or Quarter Pound, five for a Fleshpound. Two head hits stagger a Scrake or Quarter Pound; two more kill it.
- Learn the raging animation of a Fleshpound or Quarter Pound: head down, then tilt left, right, left, then head up. Keep tracking the head during the animation and you may behead it before the rage ends.
Advanced skills and notes
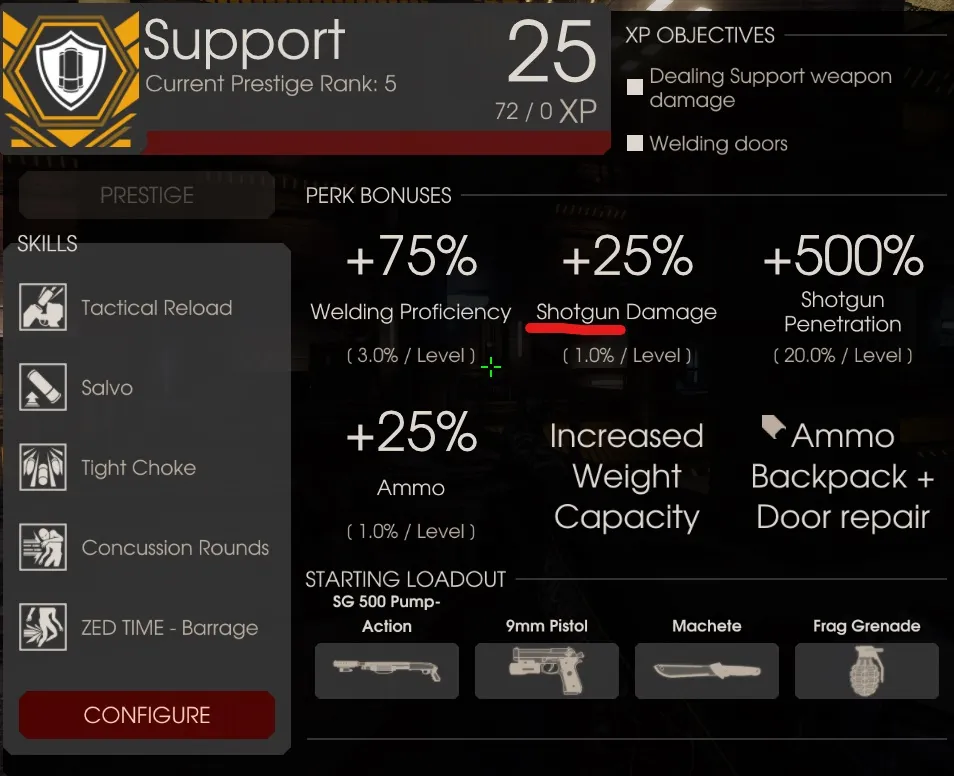
Level 25 Support bonuses: +75% welding proficiency, +25% shotgun damage, +500% shotgun penetration, +25% ammo.
- Penetration is your biggest advantage: line ZEDs up and unload; at level 25 one shot can kill three low-tier ZEDs.
- Range is your weakness, and the nemesis of Support is the E.D.A.R. and the Husk, which attack from afar.
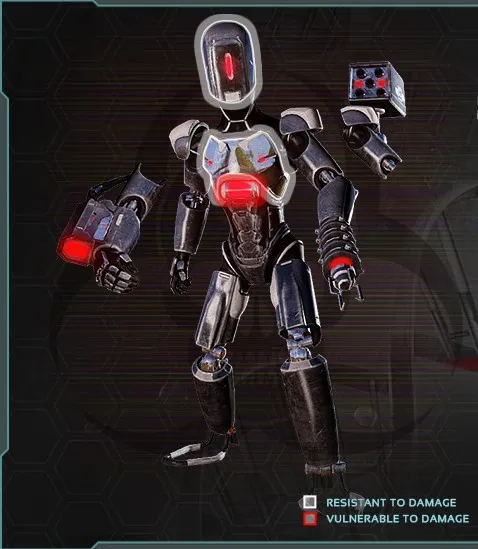
E.D.A.R., a long-range threat.
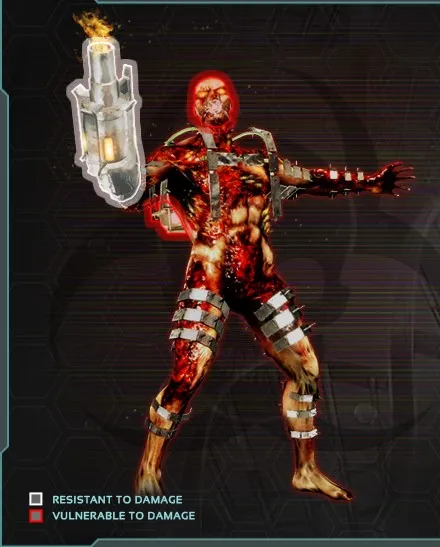
Husk, another ranged enemy.
- Over-capping: after a wave, (1) go to the trader and get your guns, (2) open the menu and switch Tactical Reload and Concussion Rounds to High Capacity Mags and Resupply Pack, (3) buy ammo and armor, (4) reload the shotguns, (5) throw them on the ground in a quiet corner near the trader (teammates may steal them), (6) switch the skills back, and (7) pick the guns up again. Do not pick up ammo boxes or take ammo from another Support afterwards. High Capacity Mags does not apply to the Doomstick or Boomstick.
- During trader time stay at a distance that still lets you open the trader menu, so teammates can grab ammo and armor from you instead of opening the trader by accident.
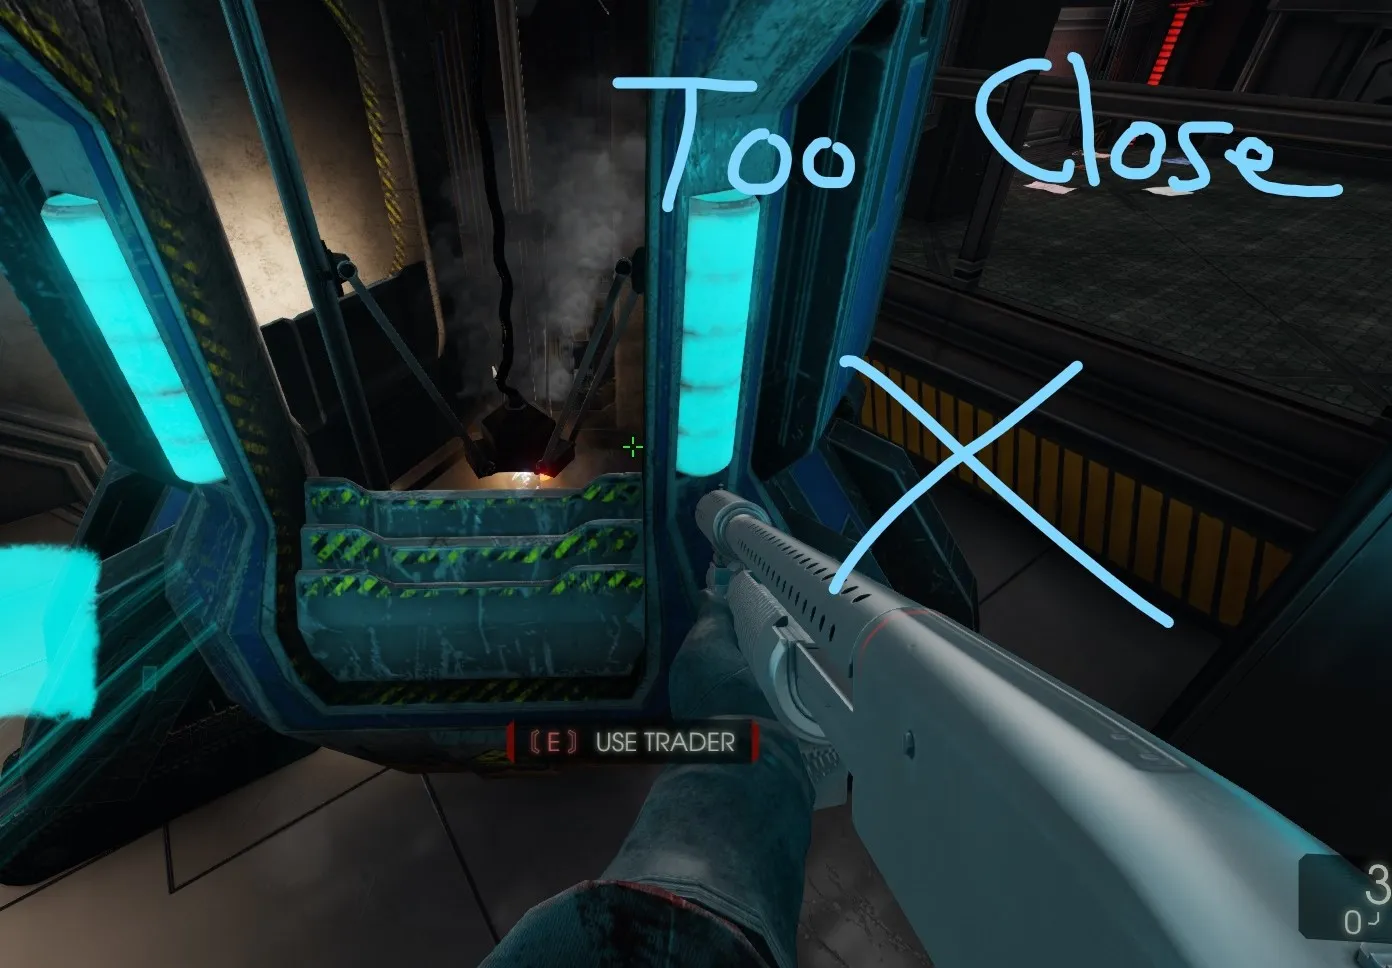
Too close to the trader: teammates open the trader menu instead of taking ammo.
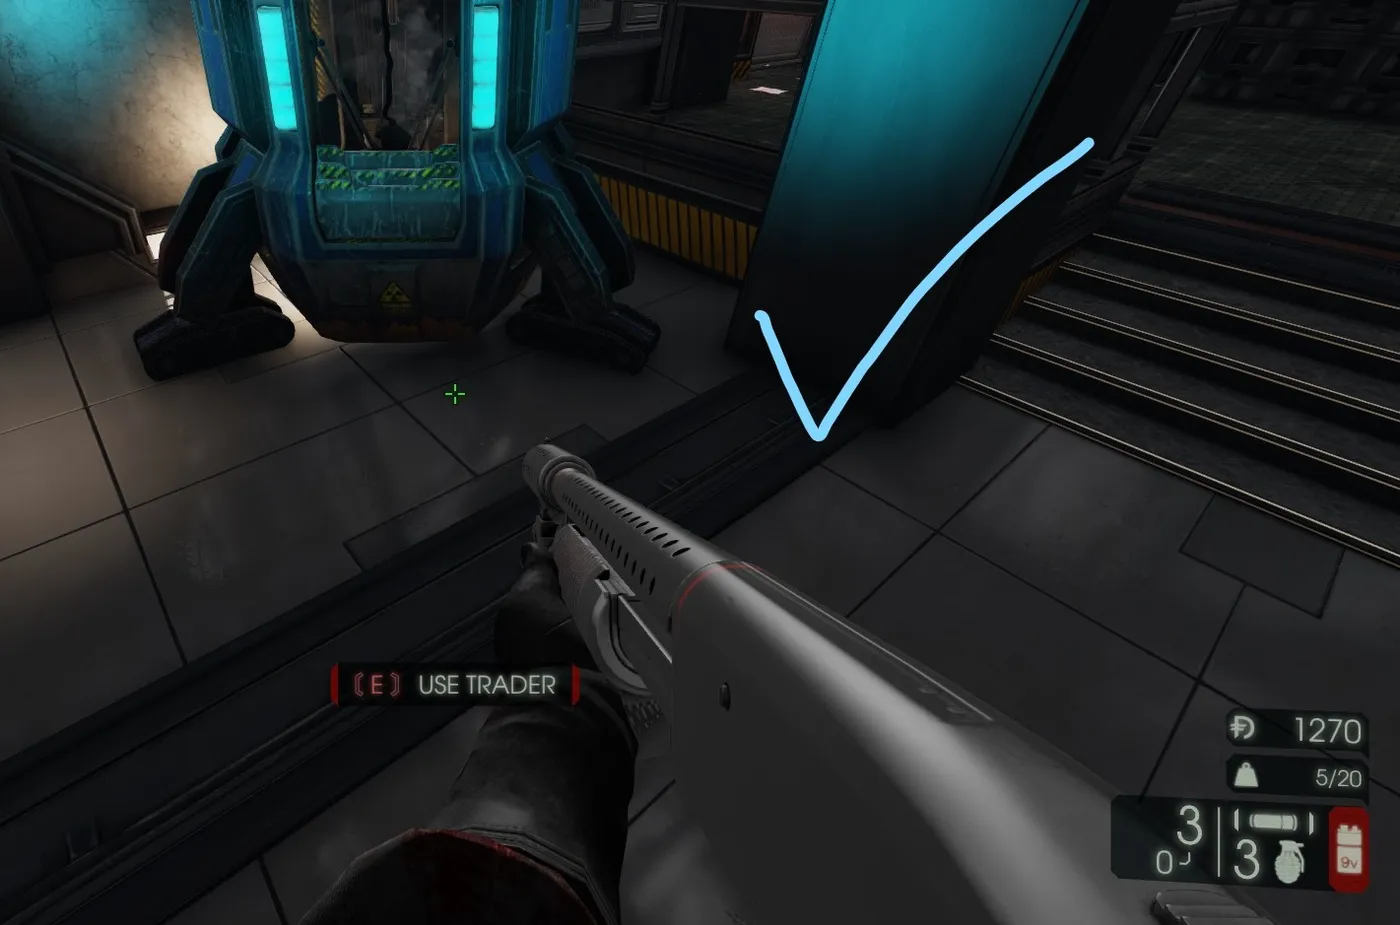
Correct distance.
- The AA-12 is the best Zed Time weapon with Barrage: fast takedowns and group clears.
- Equip Concussion Rounds to take down a raged Fleshpound safely; it has a short stumble and a random long stumble.
- The +25% damage passive applies only to shotguns, not to the 9mm.
- Reload cancelling works with all mag-fed guns, the Boomstick and the Doomstick. Method 1: when the magazine or shell is about to be inserted, press V (bash) then immediately fire or alt-fire. Method 2: watch the ammo HUD at the bottom right.
FAQ
- Which loadout is the meta for Support?
- AA-12 plus Doomstick: the Doomstick for big zeds and the AA-12 for trash, medium zeds and follow-up shots.
- Which skills should Support take on waves 1 to 3?
- Resupply Pack, then Concussion Rounds from wave 3 to 5 for stumble power on big zed takedowns.
