
KF2 Support Perk Guide: Shotguns, Skills and Loadouts
A detailed Support guide for Killing Floor 2 with weapon stats, perk bonuses, skill reasoning and loadouts for several situations. It treats the Support as the "big ZED nightmare": a perk with highly effective close-range shotguns, high weight capacity and a backpack full of ammo and armor for the team. Perk overview pages: Support and Support levels.
Perk weapons
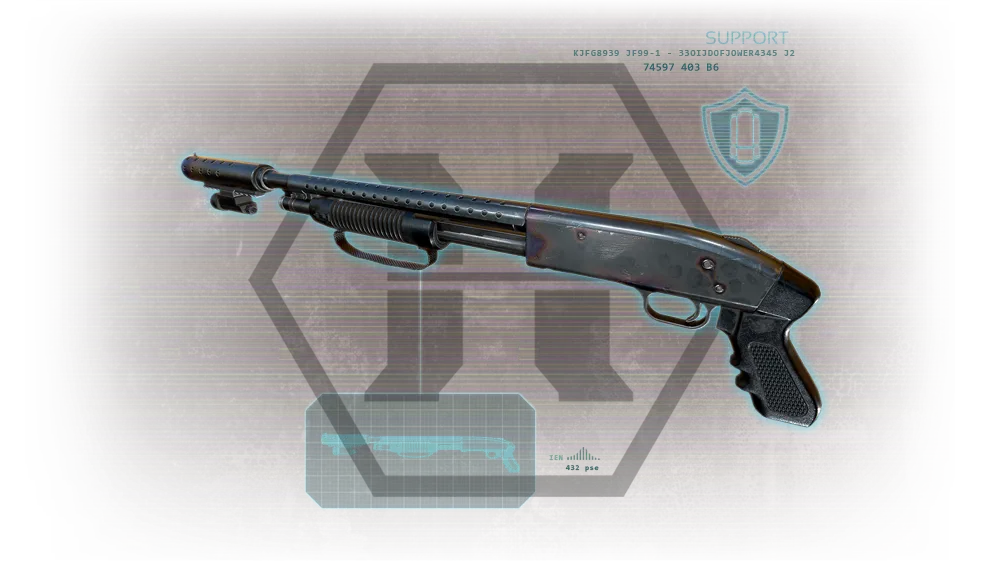 The SG 500 pump-action.
| Weapon | Weight | Price | Damage | Magazine / reserve |
|---|---|---|---|---|
| SG 500 | 5 | 200 | 140 (20 x 7 pellets) | 8 / 56 |
| Double-Barrel (Boomstick) | 4 | 650 | 300 per barrel (25 x 12) | 2 / 46 |
| HZ12 Multi-Action | 5 | 750 | 200 (20 x 10) | 16 / 80 |
| M4 Combat Shotgun | 8 | 1100 | 210 (30 x 7) | 7 / 64 |
| AA-12 | 10 | 1500 | 140 (20 x 7) | 20 / 120 |
| Frag Grenade | - | - | 200 explosion, 50 per shard, radius 9 m, 2 s fuse | max 5 |
- SG 500: the starting gun, perfect for trash (one shot, one kill) but with a small magazine, slow fire rate and expensive ammo. Missing shots means little dosh and slow upgrades.
- Double-Barrel: the highest damage of any shotgun at low price and weight, a quality-for-price champion often seen on other perks. Hard to handle because of wide spread and low capacity. Its alt-fire shoots both barrels together; against a Scrake, aim at the head. It takes only 2 carefully placed alternate shots to decapitate a Scrake on HoE at level 25 with the right skills, and the alt-fire recoil can be used to jump away.
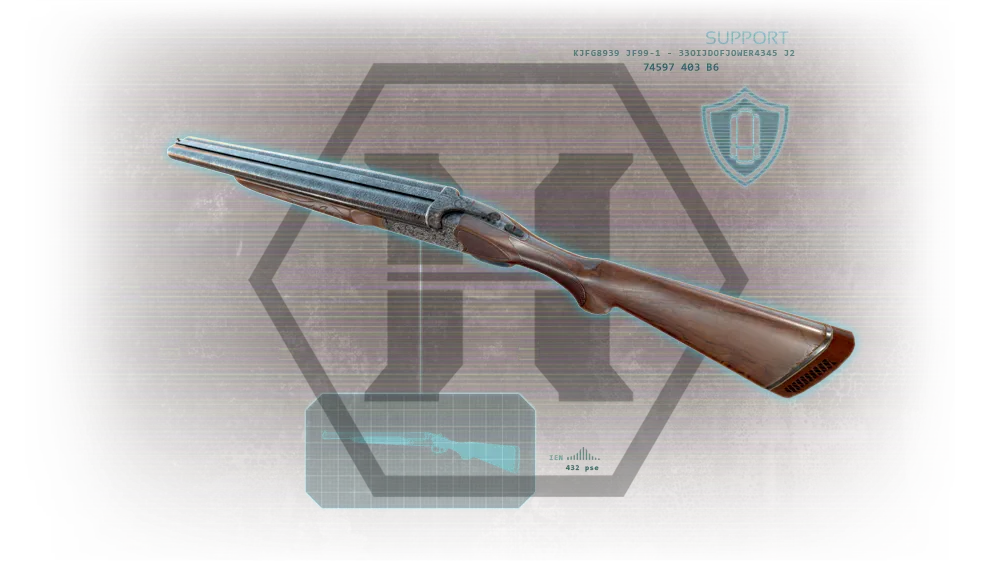 The Double-Barrel shotgun.
- HZ12 Multi-Action: a large magazine (16) and higher damage than the SG 500 and Medic 301 shotgun, ideal for small and medium ZEDs, at Tier 2 price and manageable weight. You must pump it after every 2 shots, so it is slower than the AA-12 and weaker in burst than the Double-Barrel, so you will not solo large ZEDs with it; recoil and spread are high.
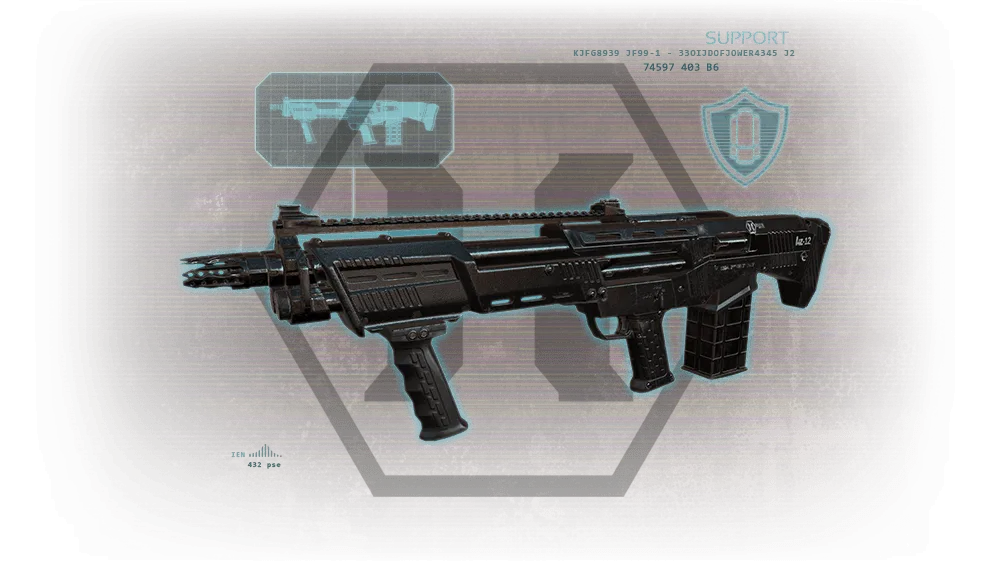 The HZ12 Multi-Action.
- M4 Combat Shotgun: like an upgraded SG 500 with more damage per pellet and faster semi-auto fire, but weight 8 pushes out the Double-Barrel and it is inferior to the Double-Barrel (nearly half the price) and the AA-12 (only 400 dosh more). It got a 20% damage buff, but you can already solo big ZEDs on 6-player HoE more easily with the AA-12. At level 15 you can carry it more easily.
- AA-12: the best shotgun in the game: same damage per shot as the SG 500 but a large magazine and insane fire rate, destroying big ZEDs. It has auto and semi-auto modes with the same rate; the author prefers semi-auto for placement, though full auto is workable with recoil control.
- Frag Grenade: less explosive damage and a longer fuse than the Commando's HE, but a bigger radius and about a dozen piercing shards that bounce. Use on groups in closed areas; it can hurt or kill you at close range. Never throw it at a Fleshpound that is not raging, since all 5 grenades will not kill a 6-player HoE Fleshpound.
Multi-perk weapons
These give XP for the perk you are using, not the weapon's original perk.
| Weapon | Weight | Price | Damage | Magazine / reserve |
|---|---|---|---|---|
| VLAD-1000 Nailgun | 6 | 600 | 210 (30 x 7) | 42 / 336 |
| Incendiary Trench Gun | 5 | 650 | 243 (27 x 9) plus afterburn | 6 / 57 |
| HMTech-301 Medic Shotgun | 6 | 1100 | 120 (20 x 6) | 10 / 80 |
- Nailgun: large magazine, cheap ammo, switches between single nail and a 7-nail shotgun mode. The single nail penetrates greatly and can decapitate multiple trash ZEDs; the shotgun mode stumbles Husks and other mediums. Nails ricochet in small rooms. Same damage as the M4 at lower price and weight, so a "better M4 than the M4", but not for big ZEDs.
- Incendiary Trench Gun: more damage per pellet than the SG 500, with afterburn (70% of initial damage every 0.5 s over 2.7 s per shot) that panics ZEDs more than kills them. Lowest magazine of all shotguns, so take Tactical Reload. Useful against Scrakes: a panicked ZED cannot attack but wanders randomly, which also makes headshots harder.
- Medic Shotgun (301): less damage but better healing than Field Medic Tier 1 and 2, with huge stumble power, low recoil and small spread, so it can help decapitate a Scrake. Dart recharge 4.8 s per dart, capacity 2.5. Perfect for a boss wave.
XP and skills
You earn XP by killing with Support weapons and by welding doors. Passive bonuses: welding proficiency 3% per level (75% at 25), shotgun damage 1% per level (25%), shotgun penetration 20% per level (500%), ammo 1% per level (25%), strength +1 weight per level (+5 slots), the ammo backpack (teammates get ammo once per wave), and door repair.
- Level 5: High Capacity Magazines (+50% magazine, but not for the Double-Barrel) or Tactical Reload. Take Tactical Reload early and if you use the Double-Barrel or Trench Gun.
- Level 10: Fortitude (+50% health) or Salvo (+30% damage). Always take Salvo; without it a Scrake needs 3 Double-Barrel alt-fires instead of 2.
- Level 15: Armor Piercing Shot or Tight Choke (-50% spread). Armor Piercing early for trash; Tight Choke on Suicidal and Hell on Earth to focus pellets on big ZED heads.
- Level 20: Resupply Pack (teammates restore 30% ammo and 20% armor once per wave; you carry 20% more ammo) or Concussion Rounds (+150% stumble power, advanced). Trick: take Resupply, buy weapons, ammo, armor and grenades, drop the weapons, switch to Concussion Rounds, and pick the weapons back up. Drop before switching or the max ammo resets.
- Level 25 (Zed-Time only): Penetrator or Barrage (near real-time firing, great with High Capacity Mags and the AA-12).
Recommended loadouts
- Standard Support: skills High Capacity/Tactical Reload, Salvo, Tight Choke, Resupply Pack, Barrage. Weapons: AA-12, Double-Barrel, Trench Gun or HZ12, HMTech-101 Pistol. Buy the Double-Barrel first, not the Trench Gun or HZ12; you need a big ZED dealer early and the SG 500 handles trash. Use Trench Gun/HZ12 on trash and ranged mediums, Double-Barrel on close mediums and Scrakes, AA-12 on Fleshpounds.
- Nails professional: the same skills with AA-12, Double-Barrel and Nailgun. No weight left for a Medic pistol.
- Solo: Tactical Reload, Salvo, Tight Choke, Concussion Rounds, Barrage with M4, Double-Barrel, Katana, C4 and Desert Eagle. In solo, trash and medium ZED numbers are the real threat, and an alt-fire Double-Barrel shot can decapitate a Scrake in 1 hit and a Fleshpound in 2. Salvo gave the author better results than Fortitude.
- Boss: High Capacity, Salvo, Tight Choke, Resupply Pack, Barrage with AA-12, Double-Barrel and HMTech-301. Spam the AA-12 and use the Double-Barrel jump shot to escape if the boss aggros you. Solo boss: Tactical Reload, Fortitude, Tight Choke, Concussion Rounds, Barrage with AA-12, Double-Barrel and Katana (parry).
- Levels 0-9: AA-12 plus HZ12, Trench Gun or Nailgun, optionally the 101 Pistol; or AA-12 with the Double-Barrel and 101 Pistol to learn the key weapons. Take the 101 pistol as soon as weight allows. Level 10-19: AA-12, HZ12 or Trench Gun, and the 101 pistol.
FAQ
- What is the Support's main job in KF2?
- Support the team, typically by killing Large ZEDs with close-range shotguns, lining ZEDs up for penetration, and resupplying teammates with ammo and armor.
- Which Support weapons does this guide rate best?
- The AA-12 is called the best shotgun in the game for big ZEDs, and the Double-Barrel's alt-fire is the key tool against Scrakes (2 carefully placed shots at level 25 on HoE).
- Which level 20 skill does the guide recommend?
- Resupply Pack for most games: teammates get 30% ammo and 20% armor once per wave, and you carry 20% more ammo.
