
KF2 Large Zed Takedowns: HoE Guide and Practice Setup
A video-and-text guide to killing Scrakes and Fleshpounds on 6-player Hell on Earth, written by a veteran player in the style of an in-universe Horzine "employee manual". The video covers takedowns for Berserker, Commando, Support, Field Medic, Demolitionist, Firebug, Gunslinger, Sharpshooter (stationary and mobile) and SWAT. This page keeps the guide's reasoning, rules and the whole practice setup (test maps, console commands, mutators). For a plain list of weapon combos see Scrake and Fleshpound takedowns and Berserker parry lock.

Cover of the large zed takedown video guide.
Video chapters
The video is about an hour long and each perk has its own timestamp: Berserker 03:32, Commando 09:23, Support 12:16, Field Medic 20:55, Demolitionist 23:49, Firebug 32:06, Gunslinger 35:49, Sharpshooter 42:44, Sharpshooter (mobile) 47:33, SWAT 55:55. Text notes appear alongside the footage, so pause often. Some clips were recorded in 2020-2021, so numbers such as the Parry boost duration may differ from the current patch.
What counts as a takedown
A takedown is a repeatable sequence that kills a Scrake, Fleshpound or Quarter Pound alone (or with a helper) while meeting these criteria as closely as possible:
- The large zed never hits you (Berserker is the exception, since Parry needs a hit to activate).
- It does not start attack animations unless you deliberately bait one as part of a combo.
- It dies before starting, or finishing, its rage animation (Scrakes have none).
- It dies near the spot where it raged, so the team does not have to backpedal out of position.
Techniques that are too difficult, too inconsistent, too risky, too slow or too inefficient (ammo and grenade hungry) are left out. Fleshpound "melee locking" is the example: powerful if mastered, but unrealistic in a chaotic public match. Quarter Pound takedowns are skipped because they are easier versions of the Fleshpound ones.
Solo takedowns and how to assist
The combos are designed for one player. A second player dealing random afflictions can ruin the timing or rage the zed early. Safe ways to help without breaking someone's combo:
- Shoot the head while the zed is stunned or frozen (recovery animations always finish).
- Shoot the head after the combo player has applied their affliction (Stumble, Gun Hit, Knockdown).
- Shoot a Fleshpound's head during its rage animation.
- Shoot a Scrake's head after a Sharpshooter stun.
- Shoot a sprinting raged Fleshpound, unless you would add Fire Panic or Stumble (raged Fleshpounds have 75% resistance to all afflictions).
Often it is better to split roles: a Commando or SWAT clears the trash around the large zed so the combo player can work.
Design choices of the guide
- One skill set per perk (for example Quick Draw for Gunslinger, Butcher for Berserker). Only the Sharpshooter gets two setups.
- Weapon upgrades let many low-tier weapons kill large zeds, but only upgrades required for specific combos are shown.
- Stun and Freeze takedowns are limited because they are slower and burn grenades; exceptions are Sharpshooter, Demolitionist and SWAT, whose grenade combos are efficient.
- HRG Winterbite is ignored; the Freezethrower appears only as an off-perk Field Medic tool.
Revisions worth knowing
- The Compound Bow briefly lost its ability to stun Fleshpounds with Ballistic Shock; the author later reported that it works again on patch 1150.
- An old bug lets zeds start a block without playing the animation, granting 80% resistance to afflictions and 10% melee and bullet resistance, so afflictions silently fail. Enraged large zeds cannot block, so against a Scrake you can force it to attack first. Fleshpounds are harder to control.
Prerequisites
You should know reload and swing cancelling, boomstick recoil boosting, affliction meters and cooldowns, resistances, zed AI and aggro, head and body health pools, rage criteria and zed animations. The author recommends the Suicidal and Hell on Earth team-play guide, Tamari's Survival Handbook (Afflictions and Universal Offensive Tactics) and the official KF2 wiki mechanics page.
Practice setup: KF-TestingMapRedux
Subscribe to KF-TestingMapRedux and the Controlled Difficulty Eternal addon (CD), plus the Yet Another Scoreboard mutator to fix CD's stuck on-screen boxes. Open the console with the tilde key and enter:
Open KF-TestingMapRedux?Game=ControlledDifficulty_Eternal.CD_Survival?Difficulty=3?GameLength=0?Quarterpoundhpfakes=6?Fleshpoundhpfakes=6?Scrakehpfakes=6?Trashhpfakes=6?Bosshpfakes=6?FakesMode=ignore_humans?Mutator=YAS.YASMut
This equals a 6-player HoE game. Difficulty values: 0 Normal, 1 Hard, 2 Suicidal, 3 Hell on Earth. Extra options include ?MovementSpeedMod=1.0000, ?DisableEventZeds=True, ?DamageMessages=True and ?LimitedPerkSwitch=False. Once inside, enter enablecheats | imrich | opentrader to switch perks freely, buy anything and take no damage.
Spawn commands: spawnzed fp (Fleshpound without AI), spawnai sc (Scrake with AI). Other names: minifp (Quarter Pound), clotc (Cyst), clots (Slasher), clota (Alpha Clot / Rioter), gorefast, stalker, husk.
Useful binds (replace x with your key): setbind x killzeds, setbind x opentradermenu, setbind x dramaevent 1 3 (artificial Zed Time), setbind x clearcorpses, setbind x clearsplatters, setbind x demigod (not compatible with opentrader). For Sharpshooter practice, setbind x dramaevent 1 0.1 triggers a very short Zed Time before the combo so that the real one does not interfere.
DLC weapons missing from the map's spawners can be obtained with GiveWeapon KFGameContent.<class> commands, for example KFWeap_Bow_CompoundBow, KFWeap_Minigun, KFWeap_Pistol_G18C or KFWeap_Edged_Zweihander.
Alternative: SomeTestMap v2 and v3
KF-SomeTestMap_v2 with its custom game mode needs no Controlled Difficulty or cheats: the trader is always open, you have lots of Dosh, all DLC weapons are buyable, and a menu lets you kill zeds, enable demigod and add fake players. Start with:
Open KF-SomeTestMap_v2?Game=stm.SomeTestMap?Difficulty=3
Bind setbind x stmoptions to open the menu, raise the fake player count to 5, and bind setbind x stmkillzeds. In KFstm.ini you can set bDisableZedTime=True and bAllowSpawnRaged=False. If spawners break in offline play, spawn zeds by console. Version 3 adds more arenas; start v2 once, then use Open KF-SomeTestMap_v3?Game=stm.SomeTestMap?Difficulty=3?Mutator=stm3.stm3.
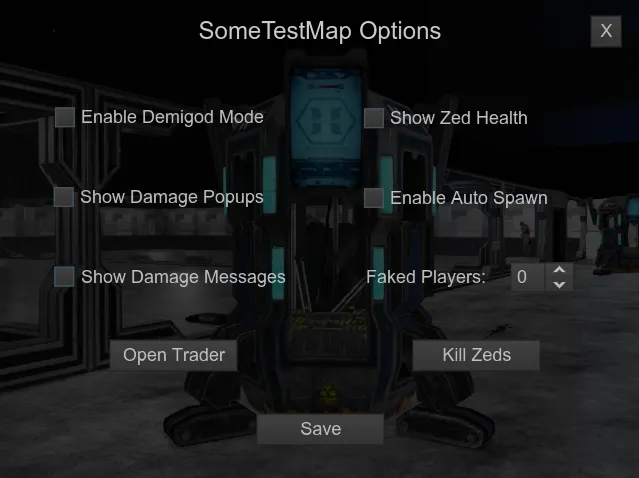
The STM options menu with the fake player count set to 5.
PerkLevelManager mutator
The PerkLevelManager mutator forces perk levels (default 25), useful after prestiging. Add ?Mutator=PerkLevelManager.PerkLevelManagerMutator to the startup line, or combine mutators with a comma, for example ?Mutator=YAS.YASMut,PerkLevelManager.PerkLevelManagerMutator.
From the test map to real matches
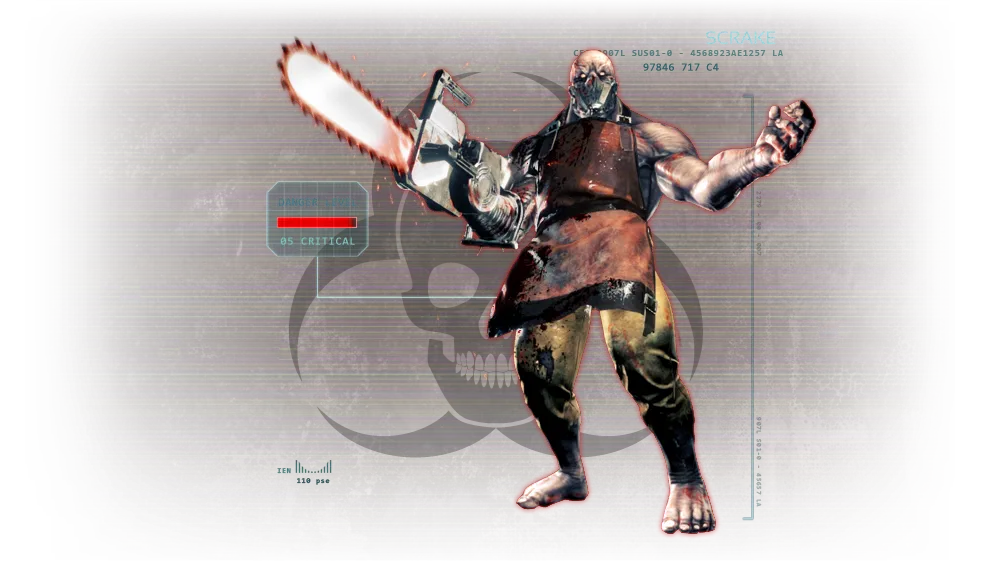
A test map is a controlled environment; real matches are chaotic.
A test map is clean: in a real match you have trash zeds, teammates adding afflictions and uneven ground. Practice combos efficiently (an AA12 Support can kill a 6-player HoE Scrake in 18 shots, but 11 is the target) and then use them anyway. Ask a Commando to clear trash, ask a Medic for darts (+20% damage) and healing, and start combos on flat ground. Zed Landing is recommended as a real-match practice map because its small height differences force you to adjust your aim.
FAQ
- Is this guide for a specific difficulty?
- It targets 6-player Hell on Earth with level 25 perks, but most combos also work at lower levels.
- How do I practice without teammates?
- Use KF-TestingMapRedux with Controlled Difficulty or KF-SomeTestMap_v2, enable cheats and spawn Scrakes and Fleshpounds on demand.
