
KF2 Modding: Test Rigged Cosmetics in the Map Viewer
This is a short add-on to Tripwire's official cosmetic tutorials for modders who make items rigged to bones other than the head, such as a scarf. With the stock process the rigging often has no effect in the test world. The steps below change the export, import the model as a skeletal mesh and set up a Kismet test so the item follows the character. For general cosmetic info see KF2 cosmetics.
Exporting the model
Follow Tripwire's export tutorial with two changes.
Skip steps 4, 5 and 6. Do not bind the pivot point (model origin) to the head bone or center it at 0,0,0. Keep the model in the position it will occupy in game, and leave it that way throughout.
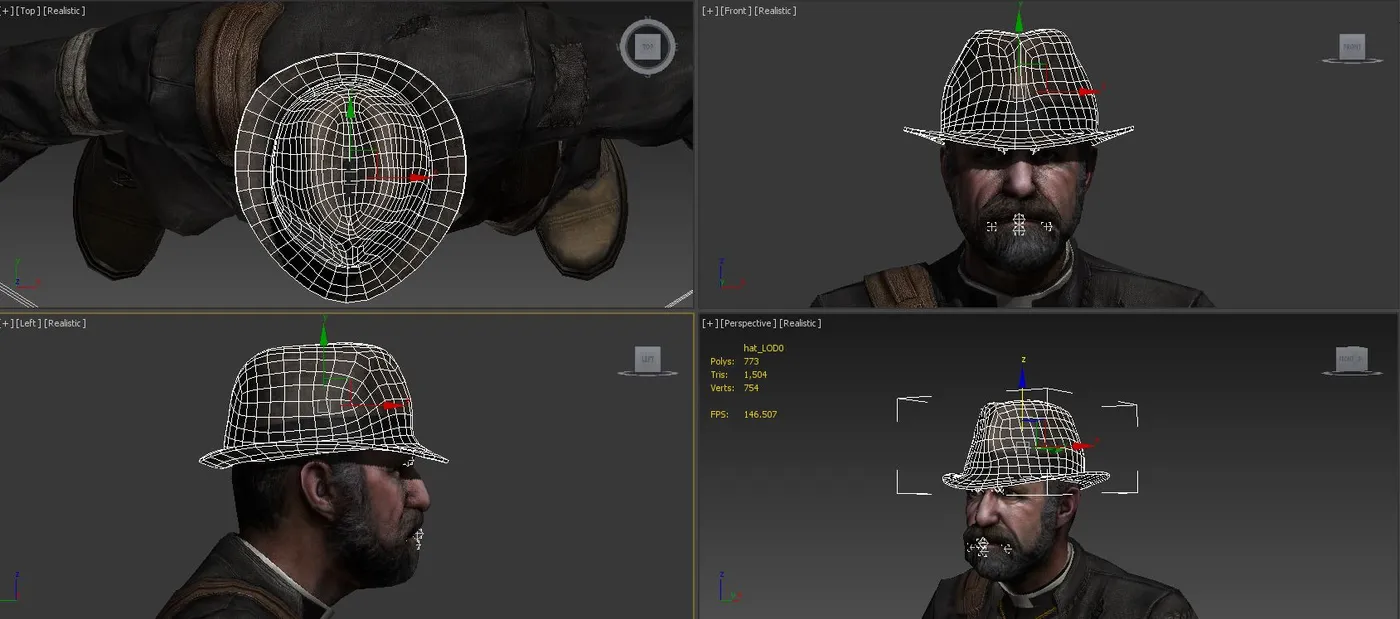 The model stays where it will sit on the character.
Change step 7a. Keep Animation checked (the author asks whether a 3ds Max user can confirm this) so the bone structure is exported. In Blender, select the armature together with the model when exporting and keep all these options checked.
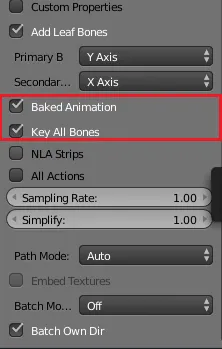 Export options with animation enabled.
Importing for testing
Do the same process as Tripwire's item tutorial to load the item into the UDK. At step 11, use these settings.
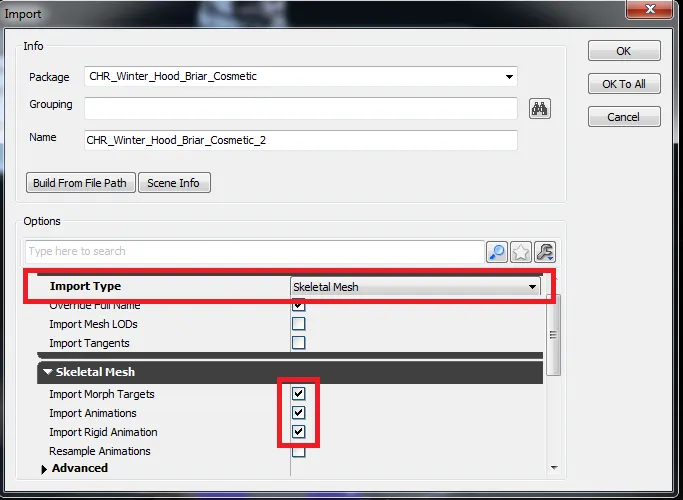 Import settings.
This imports the mesh as a skeletal mesh. The remaining package steps are identical, though the skeletal mesh preview interface differs from the static mesh one. At step 23 you set the mesh material in the skeletal mesh editor instead.
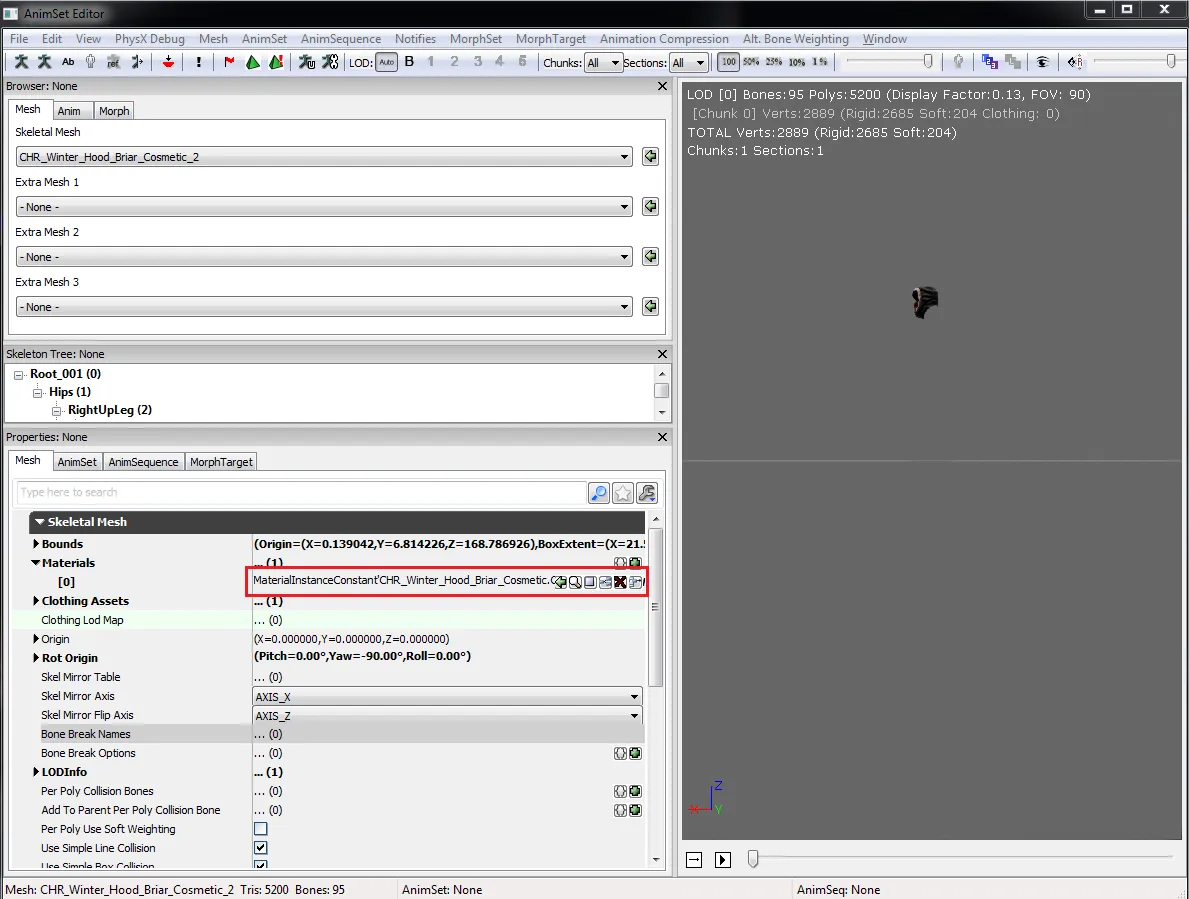 Material assignment in the skeletal mesh preview.
At this point the item is properly imported into its package.
Adding the item to the test world
Follow Tripwire's cosmetic in-game test tutorial up to step 4, then continue as below. The example item is Ana's Scarf.
- Open the provided UnrealKismet and delete InterpActor_1 (or just its link).
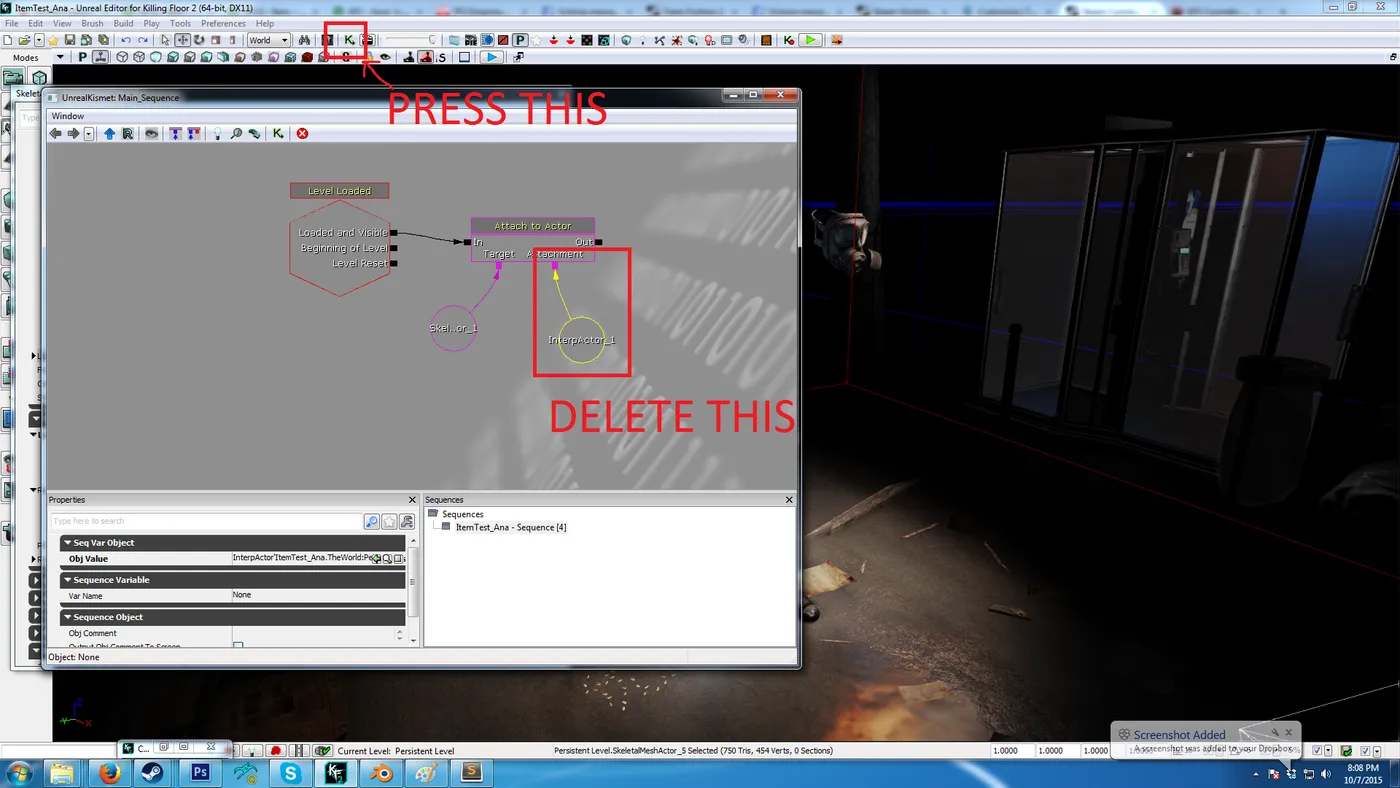 Kismet sequence before deleting the link.
- Open the Content Browser and open your cosmetic package.
- Select your skeletal mesh and right-click on the ground, then press "Add SkeletalMesh: (your mesh name)".
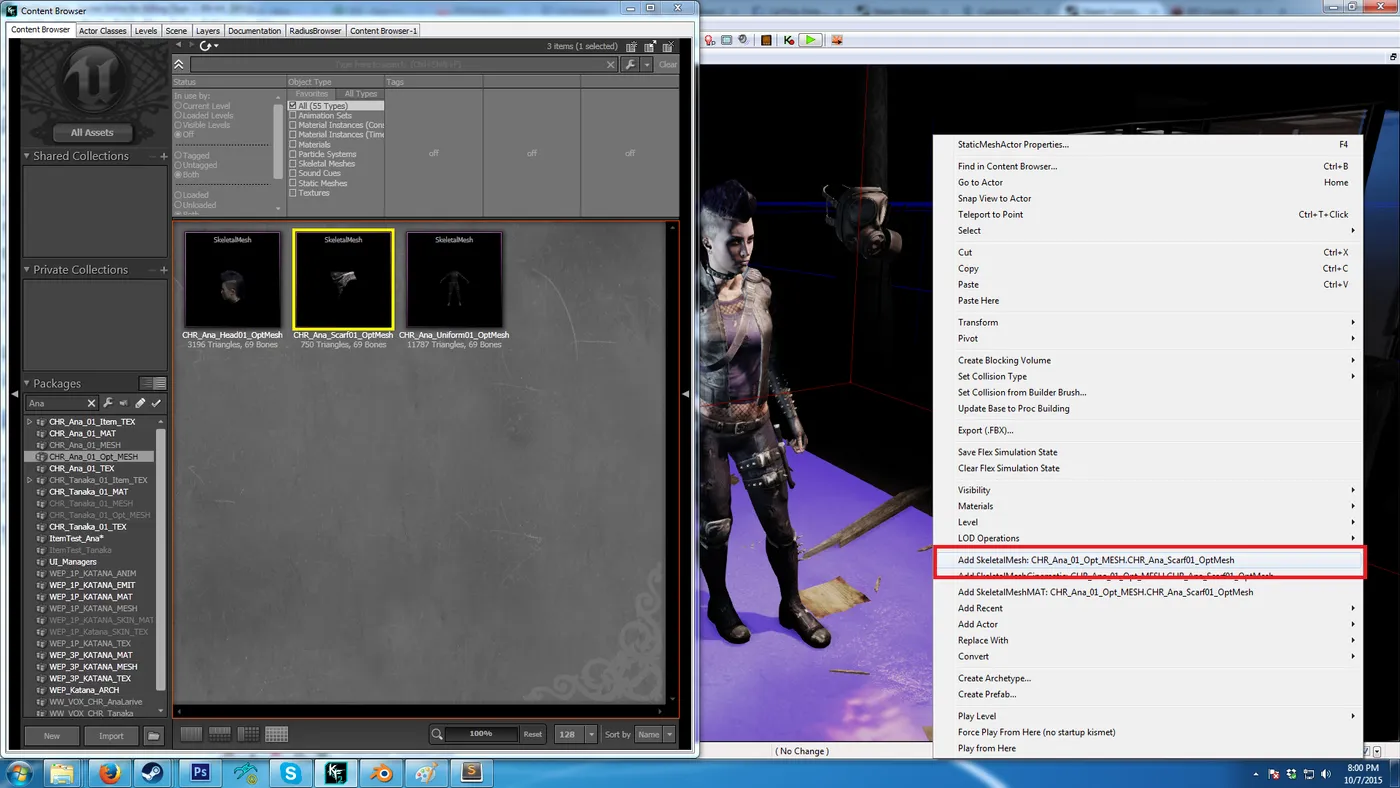 Adding the skeletal mesh to the level.
- Right-click the new mesh and choose "SkeletalMeshActor Properties".
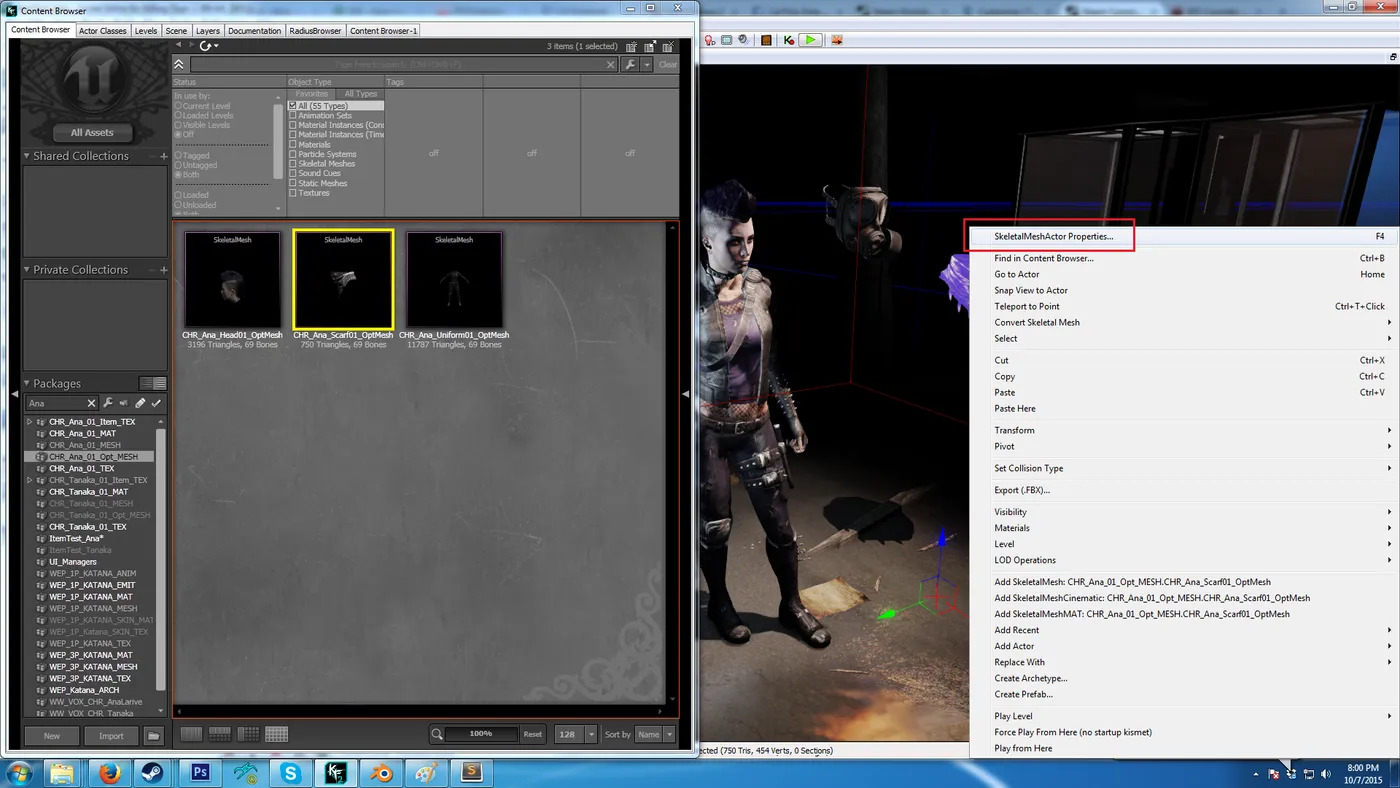 Opening the actor properties.
- Expand "Skeletal Mesh Component" and find "Anim Sets".
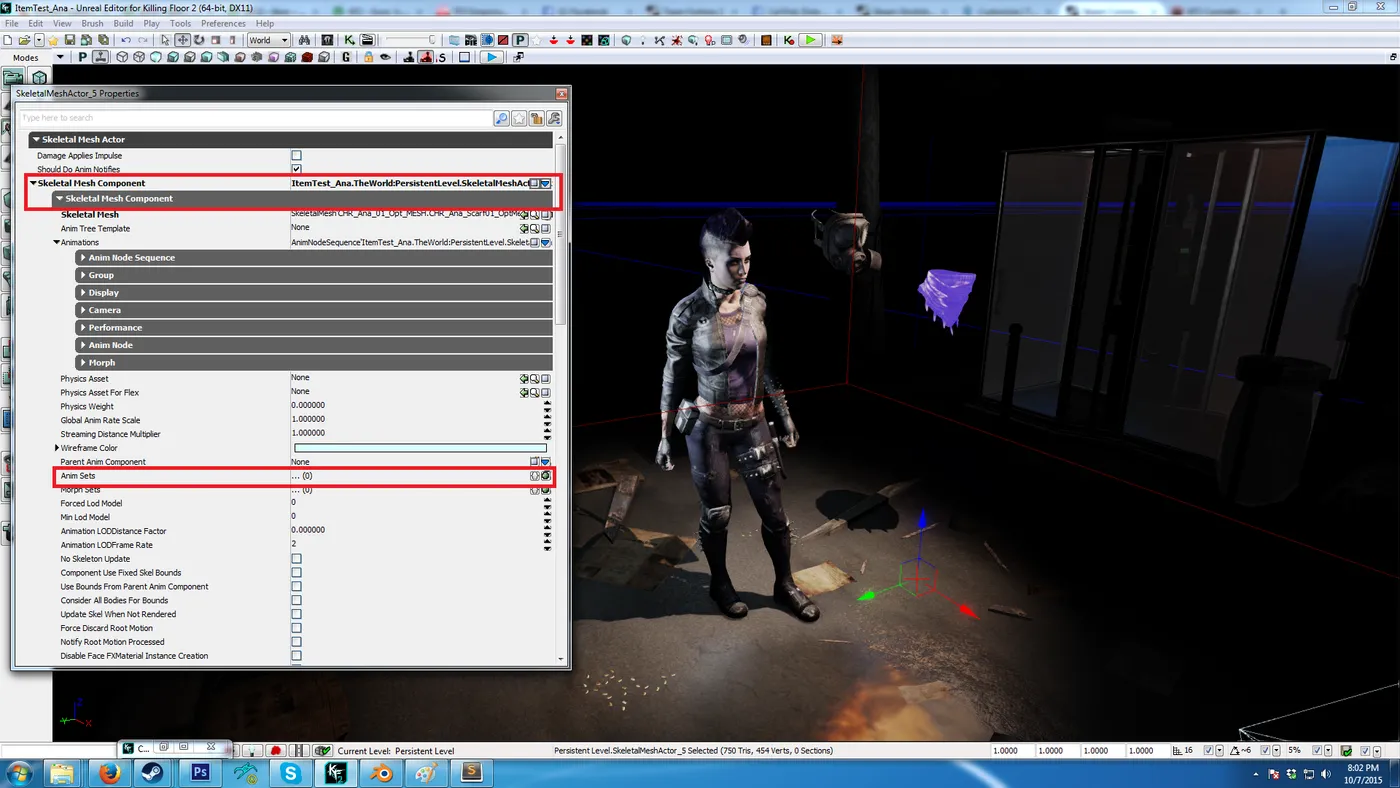 Anim Sets under Skeletal Mesh Component.
- Press "+" to add an animation set. To find which one your character uses, click the character model and expand its Anim Sets. Typically it is
AnimSet'CHR_BaseFemale_ANIM.CS_Female'orAnimSet'CHR_BaseMale_ANIM.CS_Male'.
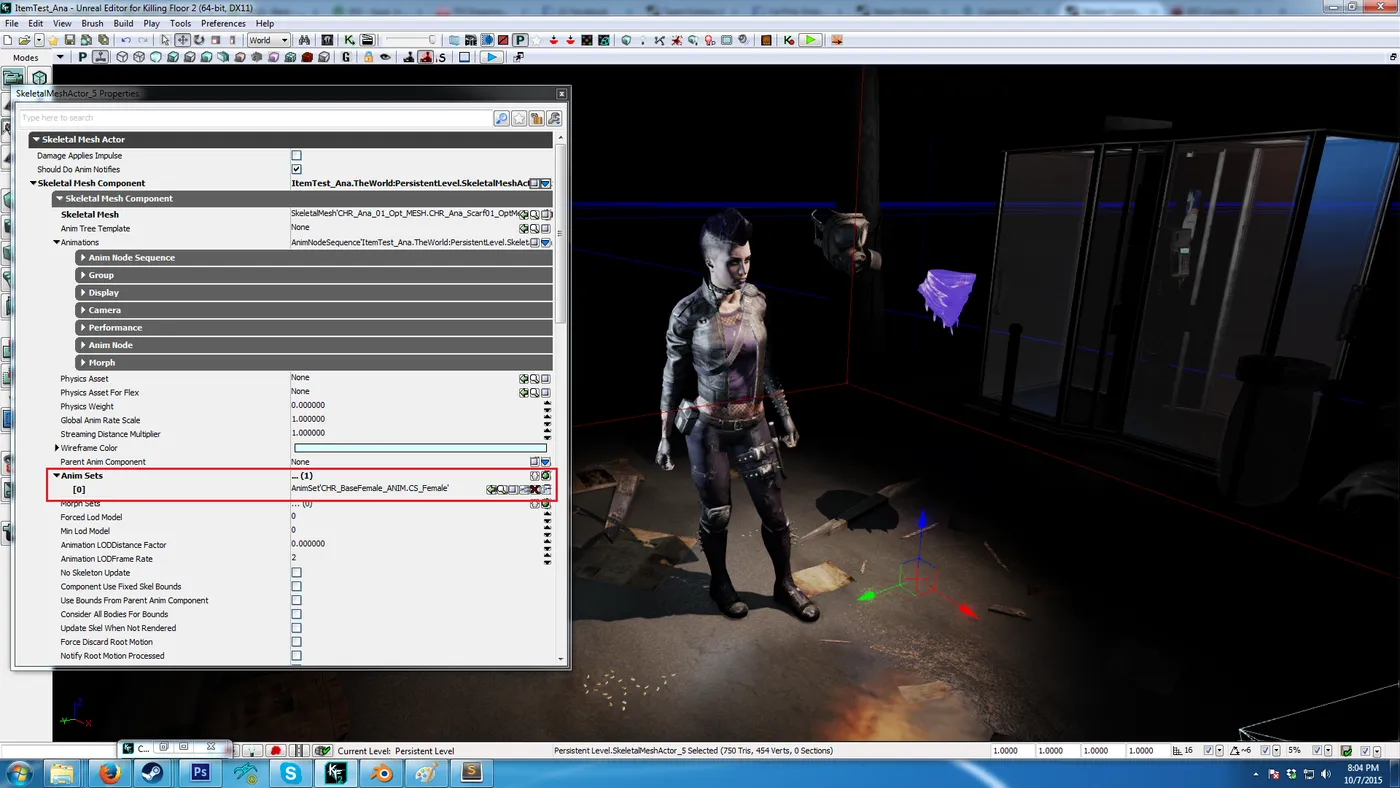 The anim set entry should look like this.
- Expand "Animation Node Sequence". Copy the character model's "Anim Sequence Name" into your model, and check "Playing" and "Looping".
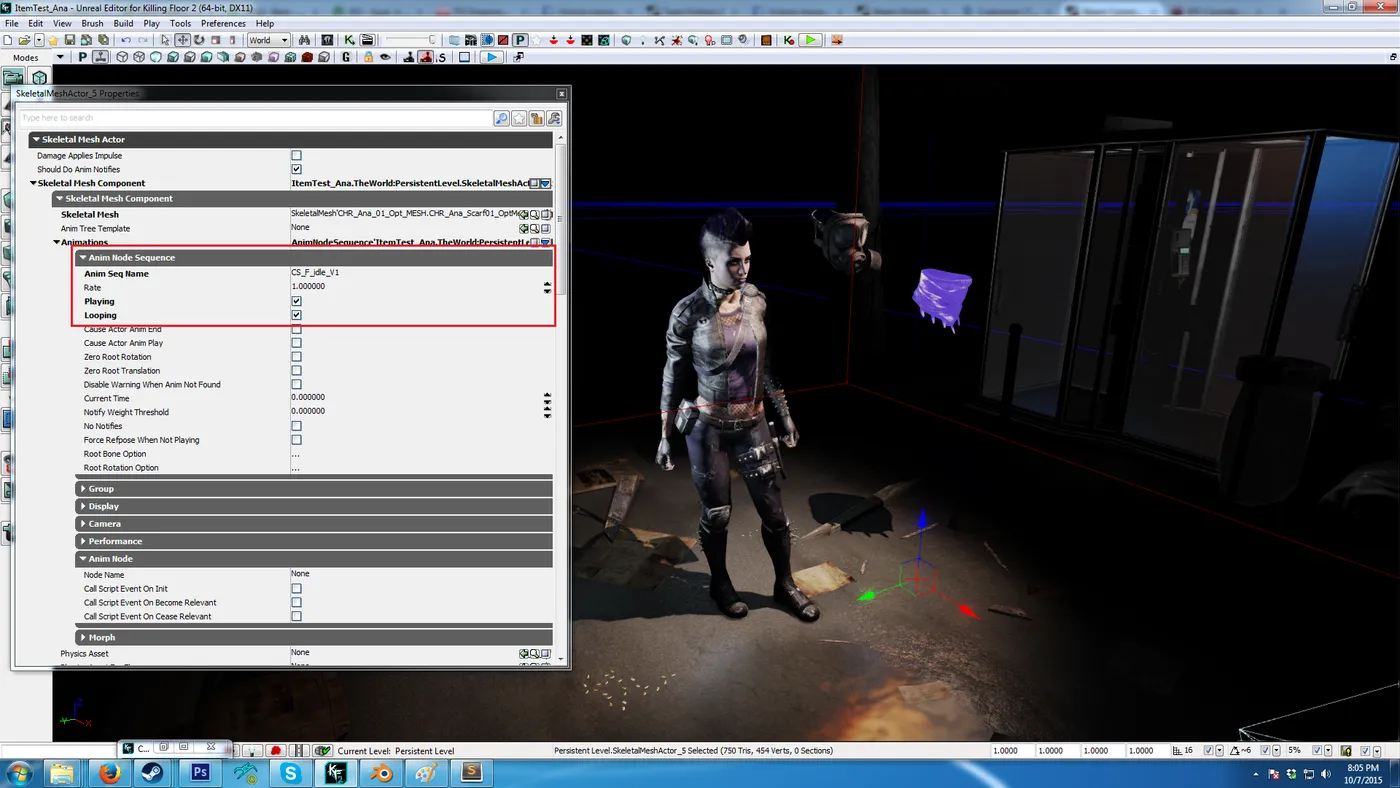 Sequence name copied, Playing and Looping checked.
- (The original guide has no step 7.) Scroll down to "Movement" and make sure your model's values match the character model's.
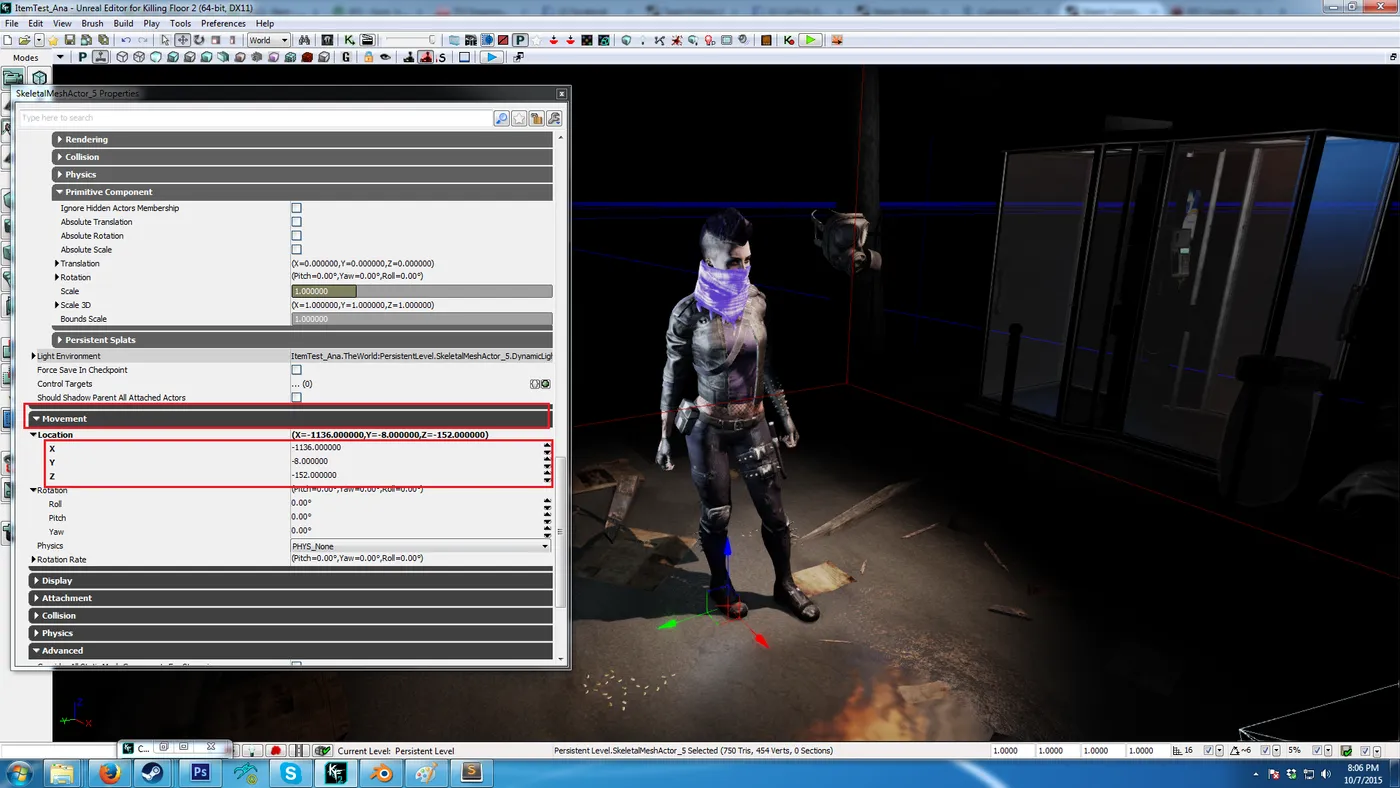 Movement settings.
That is it: the item should now use its rigging and follow the character.
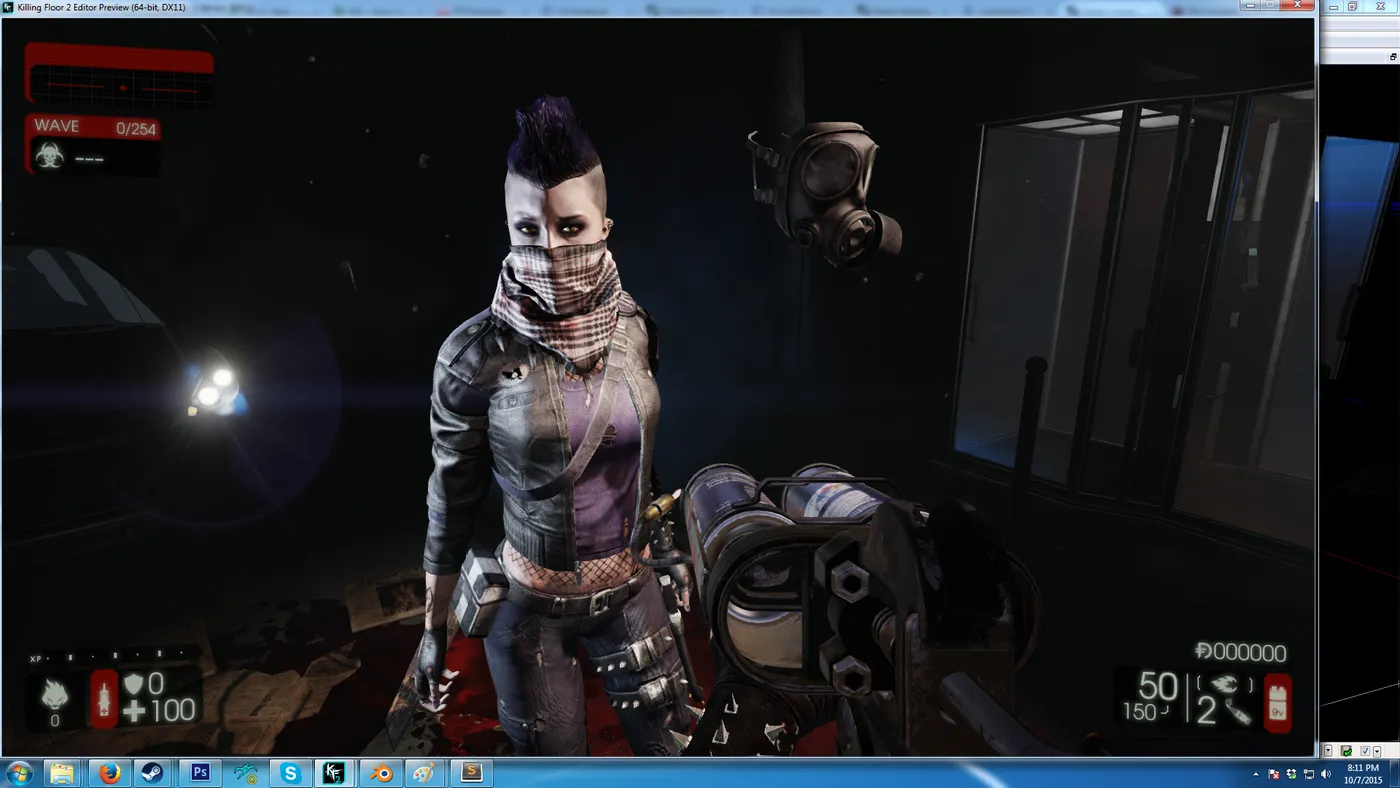 The finished result in the map viewer.
FAQ
- Which Tripwire steps should be skipped for a rigged cosmetic?
- Steps 4, 5 and 6 of the export tutorial: do not bind the pivot to the head bone or center it at 0,0,0. Keep the model where it will sit in game.
- Which animation sets do KF2 characters use?
- Typically CHR_BaseFemale_ANIM.CS_Female or CHR_BaseMale_ANIM.CS_Male. Check the character model's Anim Sets to be sure.
