
KF2 Weapon Mods: Install Texture Mods via Published Folder
This guide shows how to install weapon texture mods for Killing Floor 2 without modifying the actual game files. The mod files are placed in a Published folder inside your Documents, so your modded weapons stay available even if the game is verified, reinstalled or updated. The examples use a Katana mod, but the same steps work for any weapon.
Before you start
- Texture files look alike. For the Katana they are
WEP_1P_KATANA_TEX.upk(first person) andWEP_3P_KATANA_TEX.upk(third person). Pasting them overwrites existing files. - You will not see the modded weapon in the Inventory. Buy it in a match the usual way, unless it is a starting item such as the knife.
- It is not an officially authorized weapon: other players normally do not see your mod. If they loaded the same weapon mod, they will see it in your hands.
- If some maps start kicking you out after repeated installs, right-click KF2 in Steam, open Properties, Local Files, and use Verify integrity of game files (about ten minutes), then install the mods again.
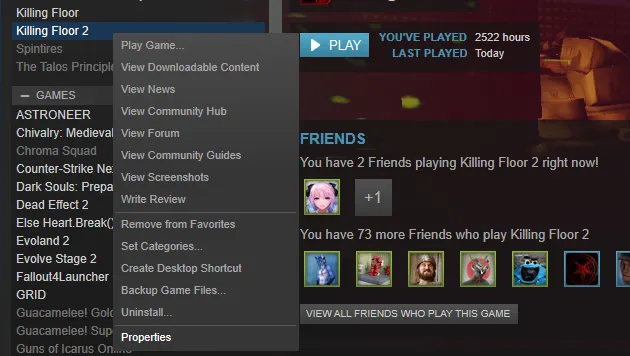
Right-click Killing Floor 2, then Properties, then Local Files.
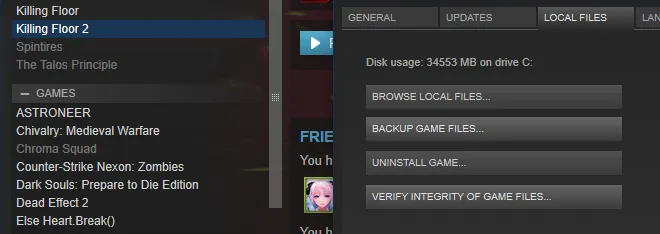
Verify integrity of game files restores original files if a map misbehaves.
Step 1. Close KF2
Make sure the game itself (not just a map) is not running.
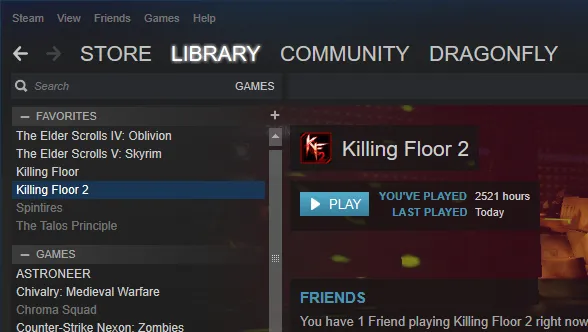
KF2 must be closed before copying files.
Step 2. Create the folder structure
You only need to do this once. The target path is:
Documents > My Games > Killing Floor 2 > KFGame > Published > BrewedPC > Packages > Weapons > Katana
- Open File Explorer and go to Documents, then My Games, Killing Floor 2, KFGame.
- If there is no Published folder, right-click KFGame, choose New, then Folder.
- Rename it exactly to
Published. The name must be exact, or the mod will not show up. - Repeat inside it to create
BrewedPC, thenPackages, thenWeapons, then the weapon folder (hereKatana).
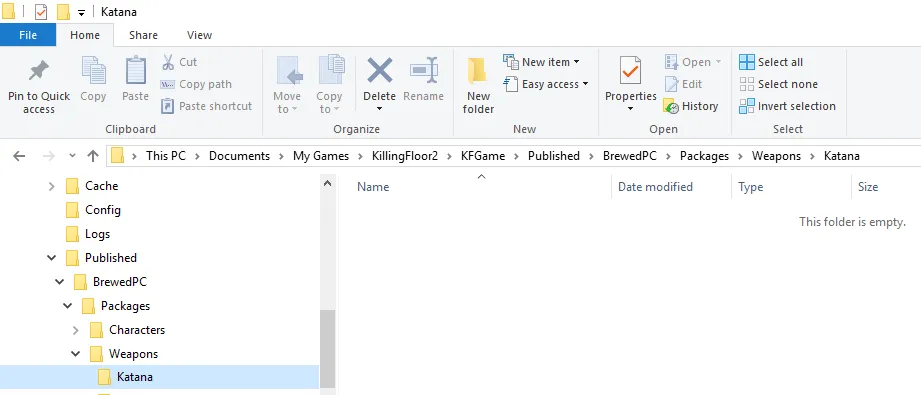
The finished path ending in an empty Katana folder.
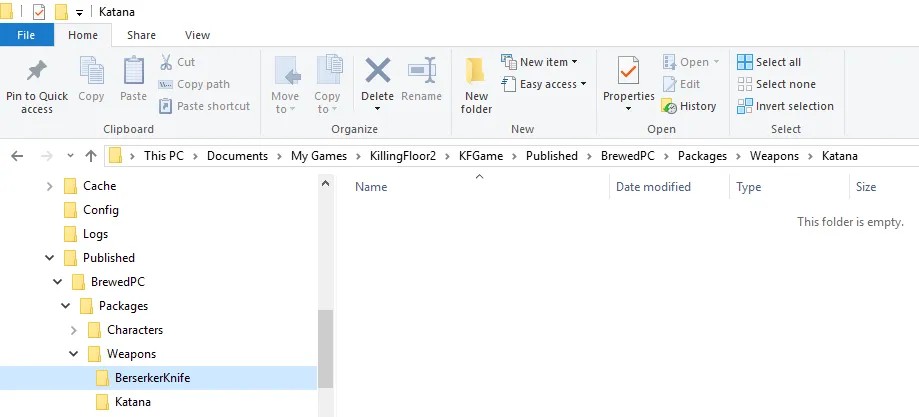
Further weapon folders are created the same way.
Weapon folder names must be typed exactly. Examples: AA12, AK12, BerserkerKnife, Crossbow, Deagle, Flamethrower, HZ12, Katana, KRISS, M14EBR, M16_M203, M79, MP7, P90, Railgun, RPG7, SCAR, Shield_Melee, Stoner63A, Welder, Winchester, Zweihander. Create only the ones you need; they stay there permanently.
Step 3. Get the modified TEX files
Download the mod. It usually arrives as a zip with two texture files (first and third person). Open the zip to reach the files.
Step 4. Copy the files
Select the file(s) and copy them.
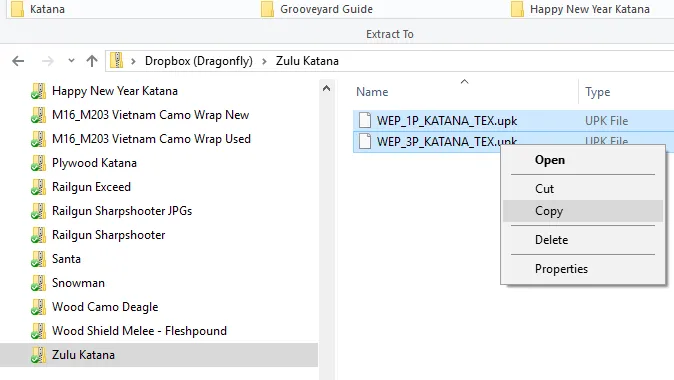
Select both upk files and choose Copy.
Steps 5 and 6. Paste into the target folder
Open the target weapon folder in the Published path, paste, and if prompted choose "Replace the files in the destination". If the folder was empty, no replace prompt appears.
Steps 7 and 8. Launch and play
Start KF2 from Steam, pick any map, buy the weapon as usual and enjoy the new look.
Related: workshop upload guide.
FAQ
- Where do weapon texture mods go in KF2?
- In Documents > My Games > Killing Floor 2 > KFGame > Published > BrewedPC > Packages > Weapons > the weapon folder.
- Do modded weapons survive a file verification or update?
- Yes. The Published folder is outside the game install, so verifying, reinstalling or updating KF2 does not remove them.
- Will other players see my modded weapon?
- Normally not. They only see it if they have loaded the same weapon mod.
