
KF2 Commando Guide: Zed-Time Refreshes, Skills and Loadouts
This long guide by an experienced player covers the Killing Floor 2 Commando from role to loadouts, assuming a six-player Hell on Earth game with a level 25 Commando. For the perk itself see Commando and Commando levels; for how it fits in high-difficulty play see the Controlled Difficulty beginner guide.
Part 1: the role
- Trash killer and crowd controller. Trash ZEDs: Cyst, Alpha Clot, Slasher, Crawler, Stalker, Gorefast.
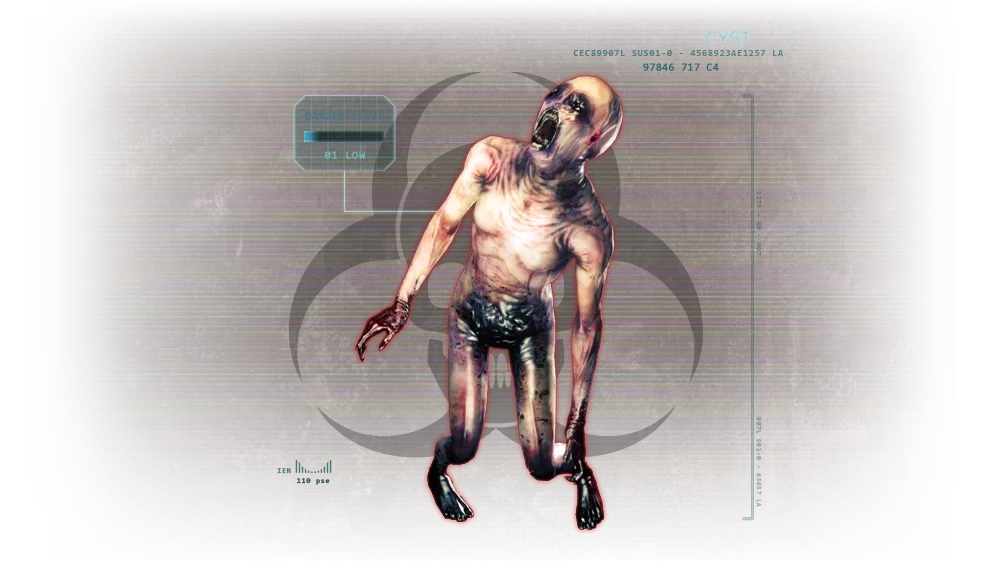 Trash ZEDs are the Commando's main targets.
- Medium ZEDs when possible: Rioter, Gorefiend, Siren, Bloat, Husk and E.D.A.R., though some need a couple of shots.
- Big ZEDs only if essential, for example when no Gunslinger or Sharpshooter is present, using high-tier weapons such as the HM-TECH 401, SCAR-H or FN FAL.
- Extend Zed-Time properly. This is what makes the Commando indispensable on Suicidal, Hell on Earth and Controlled Difficulty.
- Memorize how many shots your usual weapons need so that each Zed-Time extension is guaranteed.
- Laning: stay with a precision Big ZED hunter (Gunslinger or Sharpshooter). Avoid laning with Support or SWAT, and never with chaotic or area perks such as Firebug, Demolitionist and Berserker.
Part 2: skill choice
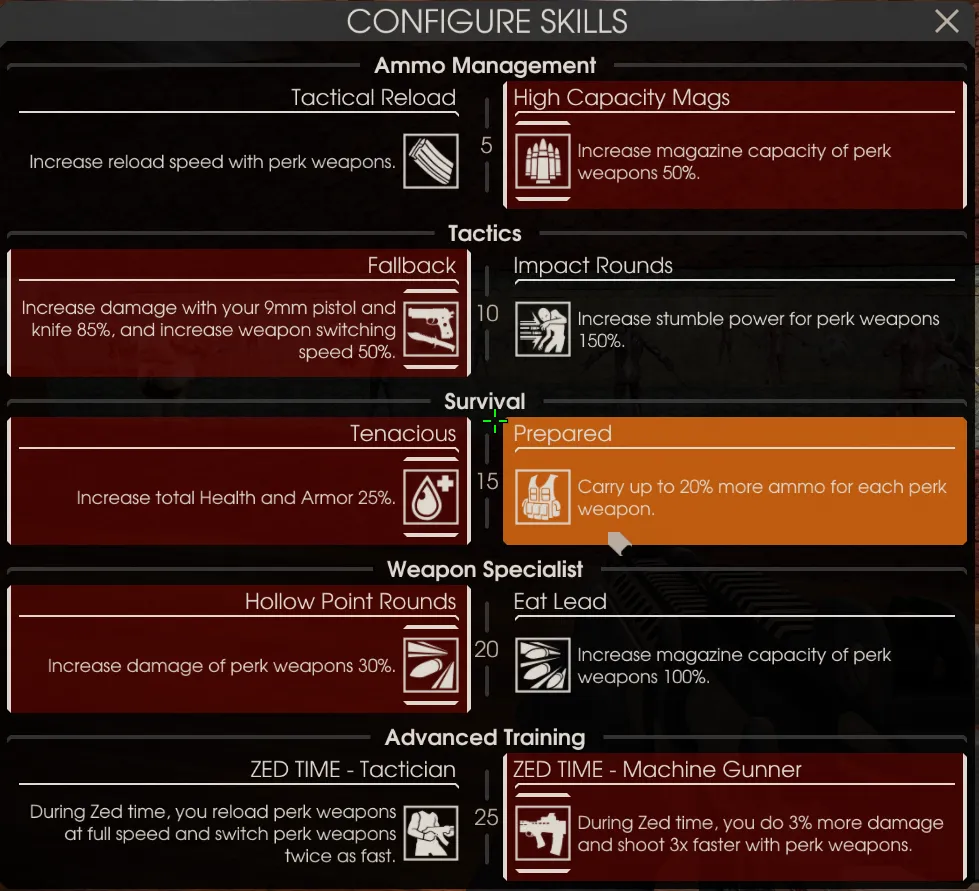 The guide's skill choices.
- Level 5, High Capacity Mag: more ammo to refresh Zed-Time and a larger margin of error in a big ZED takedown. A Fleshpound at 6-player HoE needs about 20 headshots to decapitate; Tactical Reload leaves no room for error, while High Capacity gives 10 more bullets. Tactical Reload can be countered by reload cancelling: Method 1, when the magazine is about to be inserted press bash (V) followed immediately by fire; Method 2, watch the ammo counter and when it jumps (for example 26 to 30) press V then fire. Method 1 is riskier but lets you watch ZEDs; Method 2 is safer but shifts your eyes to the HUD.
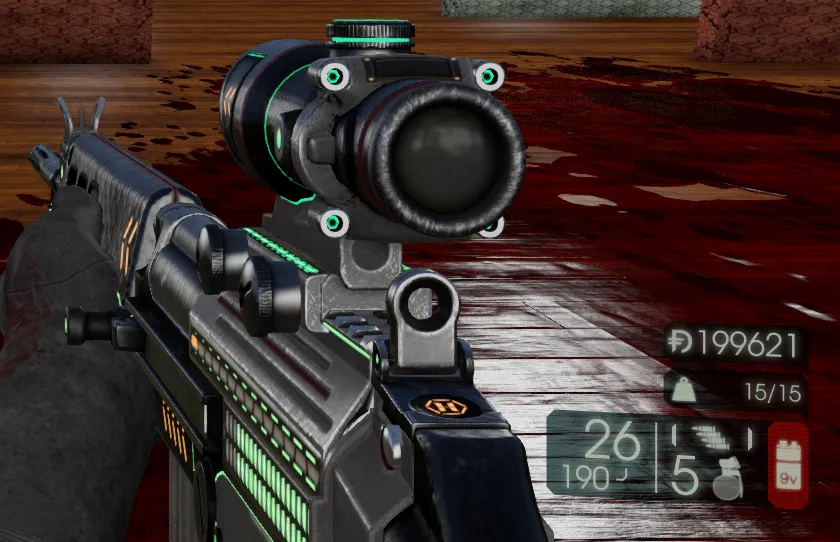 Watching the ammo counter for the reload-cancel moment.
- Level 10, Fallback: 50% faster weapon switching, including drawing the syringe. It lets you swap to another rifle in time to refresh Zed-Time. Impact Rounds can stumble big ZEDs prematurely, which causes missed shots for you and teammates.
- Level 15, Tenacious (25% more health and armor) versus Prepared (more max ammo). You can use both through "over-capping" (see below).
- Level 20, Hollow Point Rounds is far better than Eat Lead: 30% more damage means fewer shots per ZED and easier guaranteed extensions, since a one-shot kill either hits or misses.
- Level 25, Machine Gunner: faster shooting in Zed-Time for easier extensions, sometimes even a clean big ZED kill.
Over-capping
Switch to Prepared and Eat Lead, fill the ammo, then swap back to Tenacious and HPR to keep the extra ammo (only for the first magazine in the case of Eat Lead). Two situations:
When buying a new gun.
- Near the end of the wave, open the menu and switch Tenacious and HPR to Prepared and Eat Lead.
- After the wave, go to the trader and buy the guns; buying with those skills gives extra ammo (about 40 extra for an HM-TECH 401).
- Buy or scavenge ammo, reload the rifles, drop them on the ground in a corner close to the trader (teammates sometimes steal and sell them).
- Switch the skills back, pick the guns up and heal to 125 HP.
When your loadout is done. The same, plus buy ammo and kevlar, then use 60 dosh to buy the last 25 armor points. Do not take ammo from Support or ammo boxes afterwards, or the bonus resets. Eat Lead doubles the first magazine, letting you down 2 or 3 big ZEDs without reloading, and scales ammo from ammo boxes, so scavenge during trader time.
Part 3: loadouts
- Wave 1: AR-15 for trash (single-fire to conserve ammo; burst fire can kill Gorefiends when all 3 shots hit the head) and a 9mm for Bloats (3 headshots with Fallback).
- Wave 2: either keep the AR-15 if you aim well (easier with a Support using Resupply Pack), or sell it for the Bullpup or Tommy Gun (650 dosh), since full auto kills a Gorefiend before it raises its blades. Bullpup: 45/270 ammo (75/324 over-capped), lower recoil. Tommy Gun: 75/250 (75/350 over-capped), larger magazine, more spread.
- Waves 3-4: HM-TECH 401 (T4, 1500 dosh, 7 weight). Trash dies to one headshot or 2-3 body shots; medium ZED headshots needed: Siren 3, Bloat 6 (decapitation), Husk 7 (or 2 on the fuel tank), E.D.A.R. 3-4 on the chest core. It heals teammates with 3+1 medical darts (15 HP each) and has the fastest dart recharge, a strong stumble, 60 rounds per magazine (100 over-capped) and 460 total ammo (580). It costs 1 dosh per bullet, with base damage 35 so no overkill like the SCAR-H (55) or AK-12 (40). Weakness: poor against Quarter Pounds and Fleshpounds, but decent for Scrakes with room to backpedal.
- Waves 5-6: FN FAL (T4, 1500 dosh, 8 weight). Fleshpounds and Quarter Pounds take 25% more damage from rifle damage. Decapitation takes 14 headshots on a Scrake and 20 on a Fleshpound; a Quarter Pound can be killed with 14. One body shot kills trash (Clots, Cysts, Slashers, Stalkers, Crawlers), and a single headshot kills a Gorefiend in Zed-Time with Machine Gunner. Drawback: ammo (30+160, or 50+192 over-capped).
- Waves 7-10 and boss: keep 401 + FAL, the meta.
Alternatives: if your team has an excellent Medic, the upgraded SCAR-H can replace the 401. With SCAR plus FAL: basic enemies die to one body shot, Gorefast 1 headshot, Gorefiend 2, Rioter 3 leg shots, medium ZEDs 2-3 shots to the weak points, E.D.A.R. still 3-4 shots to the chest. Use the SCAR-H for trash, medium and Scrakes, and the FAL for Quarter Pounds and Fleshpounds. A fun low-difficulty trash specialization uses the Stoner LMG with Tactical Reload and the Hemoclobber, whose parry takes 50% less damage and heavy attack heals 30 HP.
Part 4: shots required
The original guide has detailed tables of headshots and body shots per ZED for the AR-15 and 9mm and other weapons (6 players, HoE, RLLLR skills). Examples for wave 1: a Cyst, Slasher or Alpha Clot takes 1 headshot or 3 body shots; a Gorefast 1 headshot; a Gorefiend 3 headshots; a Stalker or Crawler 1 headshot or 2 body shots; a Siren 3 headshots (avoid body shots); a Rioter 12 headshots or 7 leg shots; a Bloat 5 headshots with the AR-15 (3 with the 9mm).
Part 5: refreshing Zed-Time
The Commando extends Zed-Time with kills, up to the 6-refresh limit. Prefer one-shot kills, since they either hit or miss; multiple shots add uncertainty. An experienced Commando with a full refresh (18-24 seconds) can turn around a breached defense line or multiple raging big ZEDs.
Part 6: big ZED takedowns
Big ZEDs are never the Commando's priority; cover the Big ZED hunters by killing the trash and medium ZEDs that interrupt them. When you must solo one: with the 401, after about 20 headshots on a Scrake it stumbles; stop firing for that second, then continue head-tracing and it dies after 10-15 more. Learn the Fleshpound and Quarter Pound rage animation (head down, tilts left, right, left, then up) so you can keep head-tracing and may decapitate before the rage ends. Head-tracing is a must since head health is much lower than body health. If an FP spawns enraged, block with the KF-BAR (hold middle mouse) and then use the FAL. Quarter Pounds spawn in groups, so ask for help.
Part 7: advanced notes
- Priority: high: Clots, Slashers, Cysts, Crawlers, Stalkers, Gorefasts, Abomination spawns; medium: Sirens, Bloats, Husks, E.D.A.R., Rioters; low: Scrakes, Quarter Pounds, Fleshpounds.
- Positioning: stand behind the Gunslinger, Sharpshooter or Demolitionist so they have clear sight of big ZED heads; bodies block bullets.
- Rule 1: only one Commando per team (Rule 2: never close or weld doors; Rule 3: never pick up and sell a teammate's weapon). If a Commando is already present, play Sharpshooter, Gunslinger or Support.
- Call out health: the Commando alone can see all ZED health bars. When several big ZEDs rage, call out the lowest-HP one first.
- FN FAL penetration: it effectively penetrates 2 ZEDs, so two lined-up trash ZEDs die from one bullet, wasting a Zed-Time refresh. Body shot or reposition instead. It can go through 3 Crawlers, so use the 401 on those.
- Over-capped FAL has 50 bullets in its first magazine, enough for 2 Fleshpounds without reloading.
- Boss fights: keep killing the boss's trash to refresh Zed-Time so teammates can use level 25 skills. Hans cannot even drain health with his shield broken, the Patriarch cannot run to heal, and Berserkers do not fear the Abomination. Against the King Fleshpound the Commando is less valuable, but the 401 still heals and the FAL handles summoned Quarter Pounds.
- Rioters: with Fallback and HPR, the KF-BAR can pierce armor and kill them in one heavy smash (walk forward, heavy attack, headshot).
- HE grenade: 300 damage, 1 second fuse, best for trash. Use 1-2 when a lane is overwhelmed or against multiple Quarter Pounds, but not too near yourself.
Part 8: chat and voice bindings
Edit KFInput.ini (in Documents\My Games\KillingFloor2\KFGame\Config). Search for [KFGame.KFPlayerInput] and add lines after its last statement, above [IniVersion]. Back up the file first. Examples:
Bindings=(Name="five",Command="say LAST ZED TIME!!!",Control=False,Shift=False,Alt=False,bIgnoreCtrl=False,bIgnoreShift=False,bIgnoreAlt=False)
Bindings=(Name="G",Command="say Throwing Grenade! | GBA_Grenade",Control=False,Shift=False,Alt=False,bIgnoreCtrl=False,bIgnoreShift=False,bIgnoreAlt=False)
Bindings=(Name="H",Command="say Scrake Inbound! | PlayVoiceCommsDialog 2",Control=False,Shift=False,Alt=False,bIgnoreCtrl=False,bIgnoreShift=False,bIgnoreAlt=False)
Bindings=(Name="J",Command="say Fleshpound Inbound! | PlayVoiceCommsDialog 2",Control=False,Shift=False,Alt=False,bIgnoreCtrl=False,bIgnoreShift=False,bIgnoreAlt=False)
Final words
The Commando is a must on any high difficulty and is a good first perk for newcomers, since it reveals Stalkers, shows ZED health bars and can heal (HM-TECH 401). The author also wrote companion guides for Sharpshooter, Gunslinger, Support, SWAT and Medic.
FAQ
- What is the Commando's most important job in KF2?
- Extending Zed-Time correctly by killing trash ZEDs, while acting as the team's crowd controller. It is what makes the perk necessary on Suicidal, Hell on Earth and Controlled Difficulty.
- What loadout does the guide call the meta?
- HM-TECH 401 plus FN FAL, with the SCAR-H as an alternative to the 401 if the team already has an excellent Medic.
- Why only one Commando per team?
- Zed-Time can only be refreshed 6 times, so a second Commando does not add refreshes and disrupts them instead.
