
KF2 Hell on Earth Team Guide (Early Beta): Economy, Roles and ZED Resistances
This is an early-access-era guide (only four perks were available: Commando, Support, Field Medic and Berserker) to winning Hell on Earth with a 6-player team. Numbers and weapon names reflect that period, so some details have since changed; see the 2015 Hell on Earth guide for related notes.
Communication
Hell on Earth needs minimal coordination: the hardest part is not the boss but reaching the boss, and one misunderstanding can cost a wipe. Make sure everyone knows what to do when, for example, a Fleshpound spawns. Use the in-game "I need help" and "Follow me" calls, and short chat phrases:
- sc: Scrake; fp: Fleshpound; ooa: out of ammo; mid: middle; kite; run.
Never ignore them: do not leave a Medic and a tiny Berserker to fight a Scrake, do not engage a Scrake when your Support and Commando are out of ammo, and do not get surrounded because teammates were overrun. Agree early on the economy, how to kill Scrakes and how to kill Fleshpounds.
Team composition
Aim for at least one of each of these roles.
Berserker
Needed for huge targets; EMP grenades are a godsend. He is also your bank, since he gets most kills in early waves. Skills: Bulk Ammo, Fake Out, Formidable, Intimidate, any ZED Time.
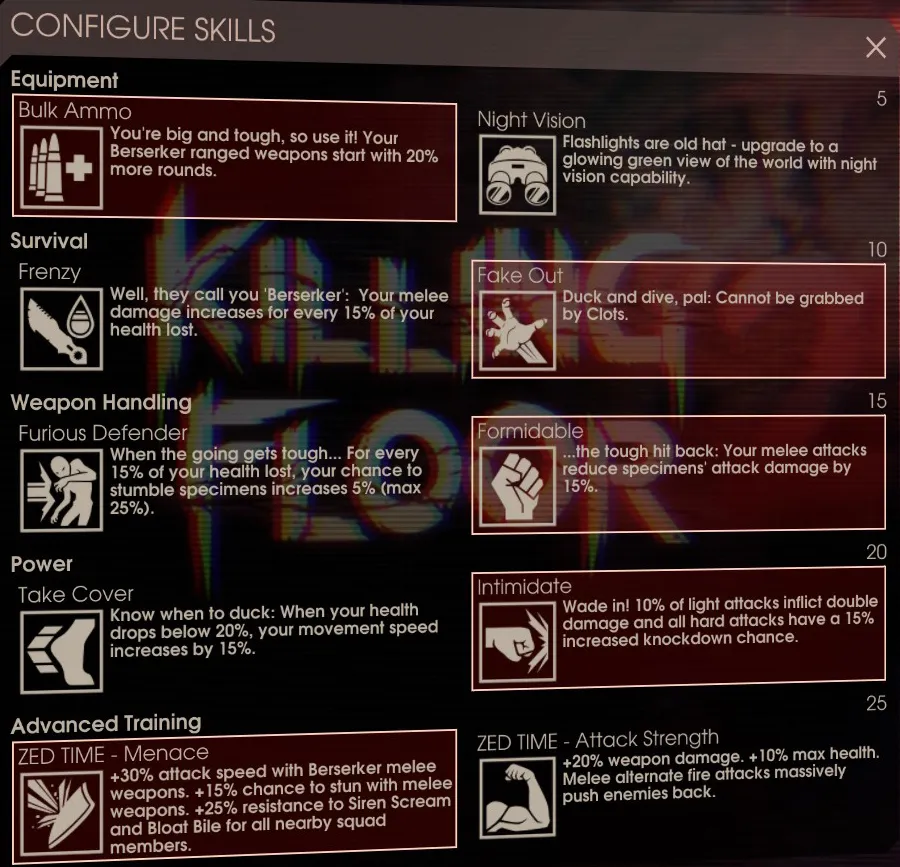 Recommended Berserker skills.
Medic
Two Medics is not bad, but it hurts team DPS; the Medic keeps the Berserker alive. Skills: Healing Surge, Armament, Regeneration, Vaccination, Zed Time - Airborne Agent (free armor for everyone).
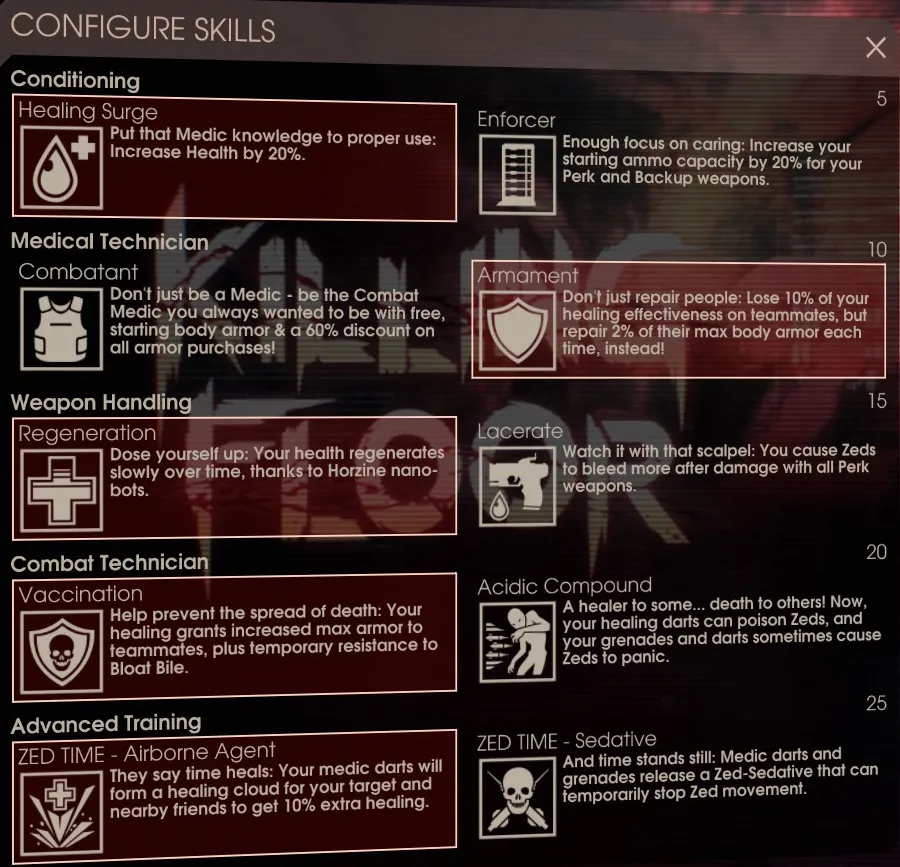 Recommended Medic skills.
Commando
Strong against trash in early waves (Sirens, Bloats, Husks); two Commandos fit a one-Medic run. Skills: Call Out, Large Mags, Tactical Reload, Impact (with the SCAR it almost feels like the Medic AR, stunning most ZEDs), any ZED Time.
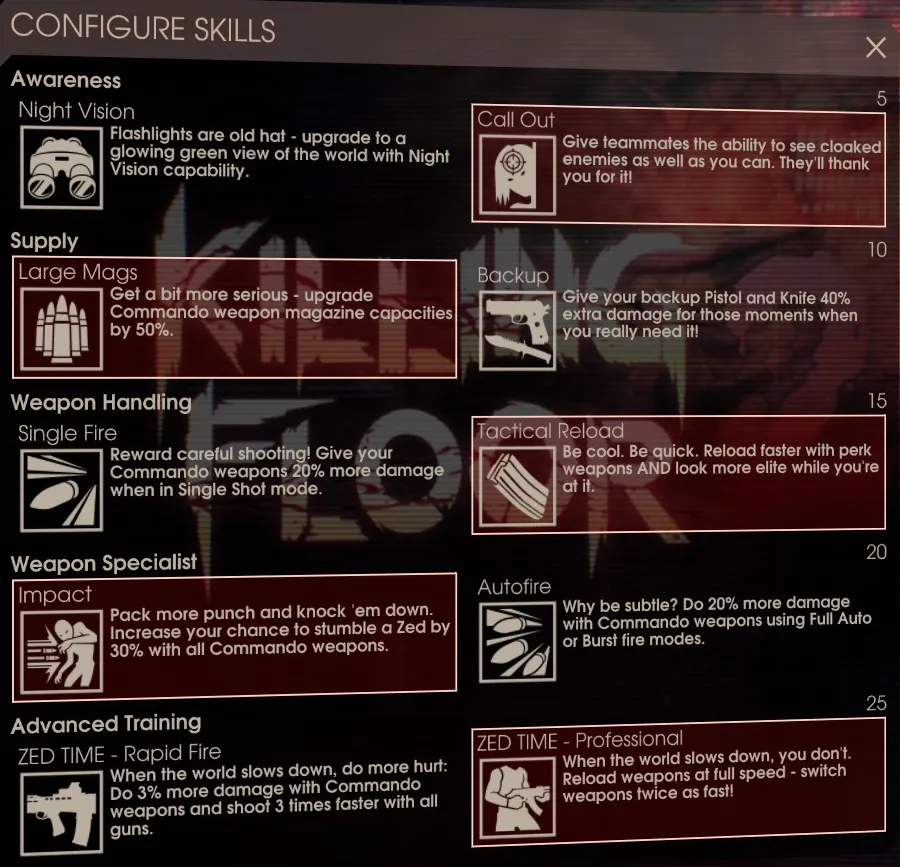 Recommended Commando skills.
Support
Not optional: the best DPS at the time, great for pushing, killing Scrakes and bursting Fleshpounds while the Berserker tanks. Skills: Supplier, Fortitude, Tactical Reload, Strength (with Strength carry three shotguns, not two autos), any ZED Time. Commandos carry more bullets while Supports deal more damage fast, so let the Commando shoot basic ZEDs first to save ammo.
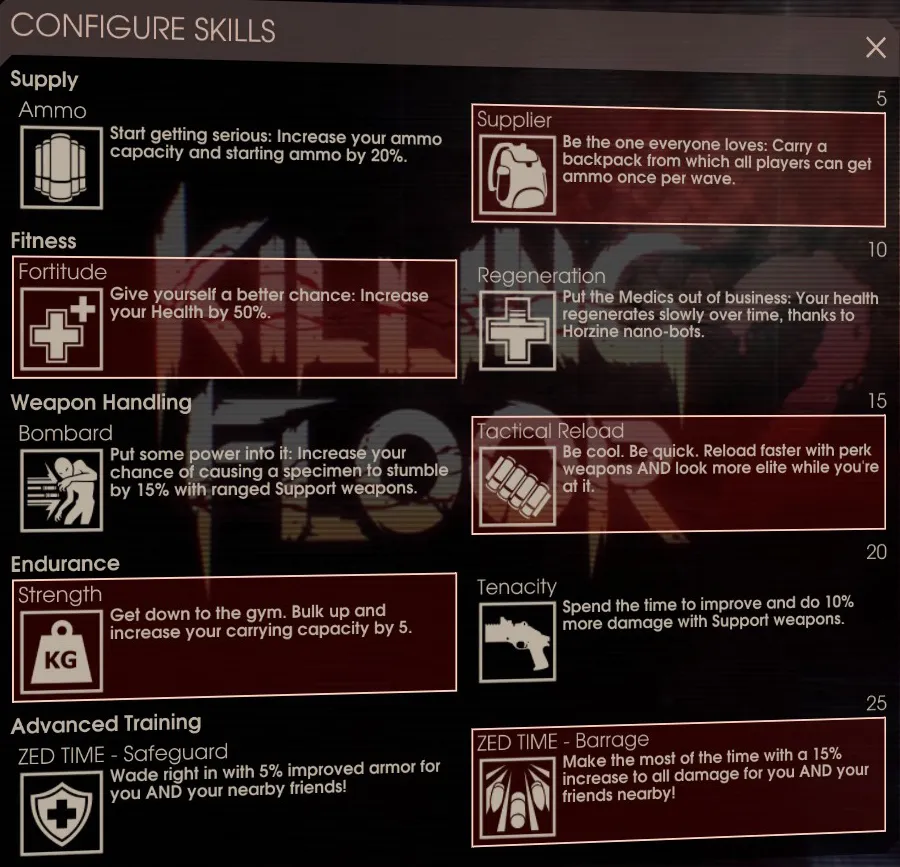 Recommended Support skills.
Economy
The author calls this the single most important part. The goal is to get every non-Berserker class its tier 1 weapon as fast as possible, passing money around so players hold starting weapons only briefly. For a 7-wave run with 2 Commandos and 2 Supports, the order is: Medic's AR, Bullpup for both Commandos, AA12 for both Supports, Pulveriser for the Berserker, then SCARs.
Rules: those giving money refill only their primary weapon (not grenades or 9mm, which you can take from Supplier); Berserkers do not refill. The receiver refills the weapon they will buy; the Medic, first to buy, may also refill grenades.
- End of wave 1: refill and give everything to the Medic. He should have about 2200 dosh (1600 worst case) for his AR. Pass spare cash to a Commando for the Bullpup.
- End of wave 2: refill and give everything to one Support for the AA12, then just enough to the second Commando for the Bullpup.
- End of wave 3: refill and give everything to the other Support for the AA12, rest to the Berserker for the Pulveriser plus grenade ammo. (Commandos do not need SCARs by wave 4 since you have two AA12s.)
- End of wave 4: give the rest to the Commandos for SCARs.
If no money was wasted you are fully ready at wave 5. If someone died or bought a tier 3 weapon (650 dosh), you are behind; only Commandos need tier 3 early. Reasons: the Medic AR prevents many deaths and brings free armor from wave 2; the Bullpup helps kill Sirens, Husks and Bloats; the Pulveriser is only needed on wave 4 if Scrakes go wrong, and the Berserker is your bank so do not let him die; the Supports have AA12s in time for Scrakes.
Know your enemy
Some ZEDs resist certain damage types, and mechanics like stumble and stun (from the Pulveriser, Nailgun, Eviscerator or Medic AR, and Commando skills) are important. Damage multipliers as listed in the guide:
| ZED | Notes |
|---|---|
| Clot / Cyst / Slasher | Basically the same; slasher rolls and jumps. No resistances or weaknesses. |
| Crawler | Hides under corpses. Takes 50% Slashing; 200% from Ballistic, Toxic and Bludgeoning. |
| Stalker | Dangerous on HoE; no resistances or weaknesses. |
| Gorefast | Fast, attacks while running. No resistances or weaknesses. |
| Bloat | Bile removes about 50+ armor. 50% from Ballistic, Explosive, Toxic and Bludgeoning; 200% from Fire, Slashing and Piercing. Solo health 75%. |
| Siren | Screams destroy grenades. 200% Explosive. Solo health 90%. |
| Husk | 50% Fire; no weaknesses. Solo health 90%. |
| Scrake | Solo health 50%. 50% Explosive. Rages below a health threshold (90% on HoE) and never stops; huge speed boost. A gun bash, parry or Eviscerator saw headshot stumbles him. |
| Fleshpound | Solo health 50%. 50% from everything except Explosive and Piercing (150%). Rage lasts about 10 seconds; stops when it attacks or is parried. |
| Hans | Heals back to 100% up to 3 times, invulnerable while healing, 50% from Toxic, EMP and Slashing. Solo health 25%. |
Both Scrake and Fleshpound rage can be cancelled briefly with Berserker EMP grenades. Parrying a raging Fleshpound or letting him hit someone calms him.
Taking down targets
Priority: Siren > Fleshpound > Scrake > Bloat > Crawler > Gorefast > Husk > Clot.
- Clots, Gorefasts, Stalkers, Crawlers: Commandos shoot heads; Supports only help if a Husk or Siren is around.
- Bloats: Support and Commando shoot heads; the Berserker should stay away unless they attack teammates.
- Husks and Sirens: take the Bullpup and kill them immediately, which is its main job early on.
- Scrake: the Berserker throws an EMP grenade at his feet so he cannot rage, then Supports and Commandos aim at the head. The Berserker stays ready to stumble him with the Pulveriser. Do not use Frag grenades (50%), keep them for Fleshpounds, and do not approach a Scrake under EMP.
- Fleshpound: parry every attack to keep him in place so Supports and Commandos can aim at the head. His first approach attack cannot be parried (block it, since he can hit twice when jumping). A raging Fleshpound needs two EMP grenades to calm, or let him hit/parry someone. The Pulveriser's explosive damage hurts him a lot: parry, then hit with an explosive attack as he turns red, repeat. The Medic focuses on healing; Commandos clear the area.
- Hans: section was marked "Coming".
Map example: Outpost
Hold at the snowmobiles: the Berserker with a Support and a Commando hold the back door, the Medic stays in between, and the other Support and Commando hold the front.
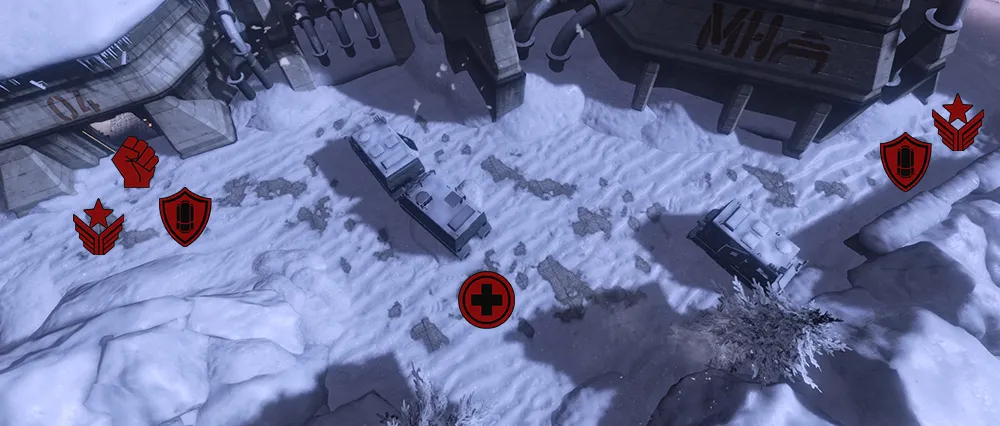 Holding at the snowmobiles on Outpost.
If overrun, run uphill by the trader to mid and push, killing ZEDs in front of the group.
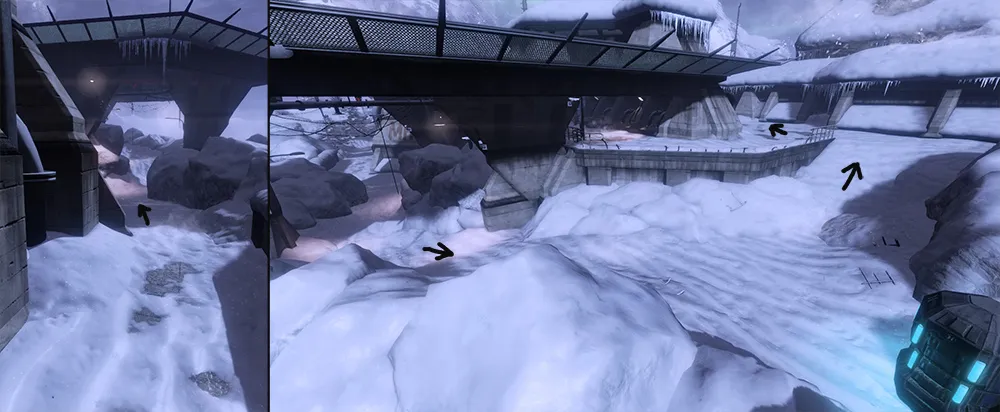 Fall back uphill to the middle.
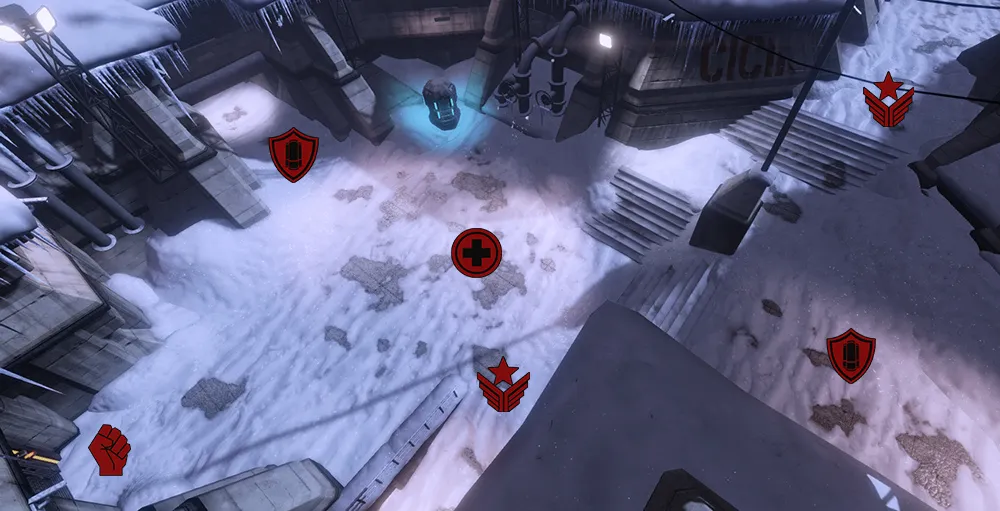 Suggested positions in the middle.
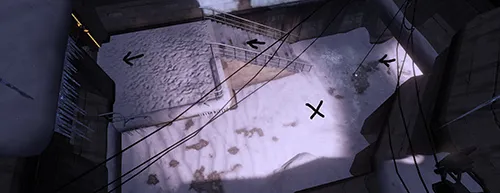
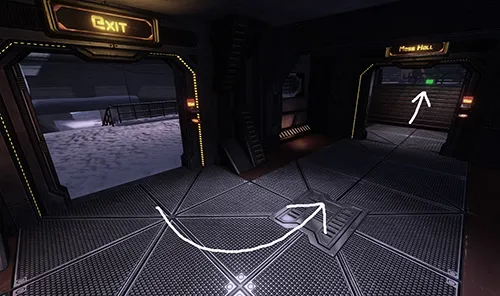
If overrun again, go under the overpass and turn left, pushing, then rotate to the Mess Hall and back to the middle, repeating.
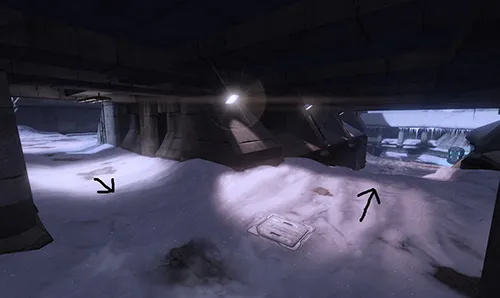 Under the overpass, turn left.
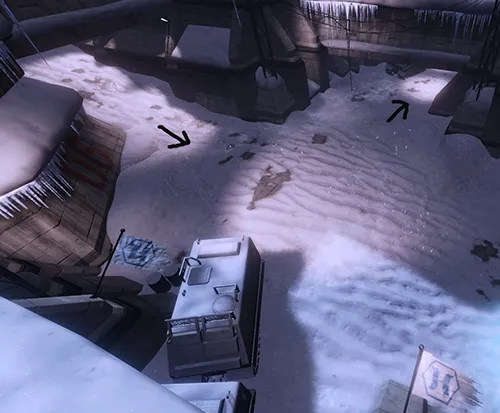 Rotating toward the Mess Hall.
 Pushing through the Mess Hall.
 Continuing the loop.
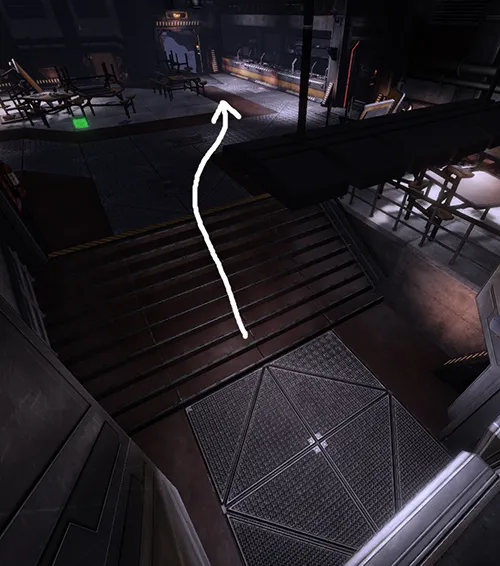 Back toward the middle.
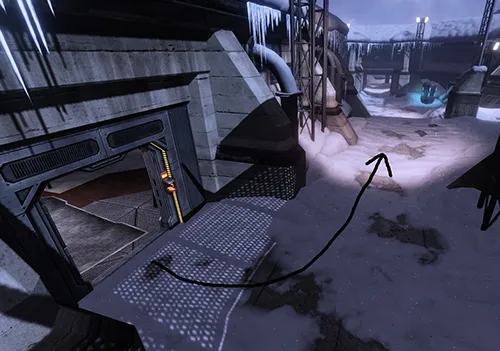 End of the loop; repeat.
Q&A
Why should a Commando buy the Bullpup before the AK-12? Husks appear on wave 2 and Sirens on wave 3, and the Bullpup helps the Berserker handle them. Commandos still need the SCAR later, but must wait until everyone has their gear. Buying an AK early could delay a teammate's AA12 or Medic AR, which are needed before wave 4. The Bullpup also needs few shots to kill specials, holds up to 45 rounds in the magazine and has a huge reserve.
FAQ
- What is the team composition recommended?
- At least one each of Berserker, Medic, Commando and Support; the guide was written when only these four perks existed and 6-player teams were the target.
- What is the target of the economy plan?
- Get the tier 1 weapon of each class, except Berserker, as fast as possible by funnelling spare dosh to one teammate at a time: Medic AR, Bullpup for Commandos, AA12 for Supports, Pulveriser for Berserker, then Scars.
- What is the kill priority order?
- Siren, Fleshpound, Scrake, Bloat, Crawler, Gorefast, Husk, Clot.
