
KF2: Export 3D Weapon Models With Umodel and Make Custom Skins
This guide shows the full pipeline for making a custom weapon skin in Killing Floor 2: exporting the model with Umodel, previewing it in Blender, painting a texture, importing it in the KF2 SDK and installing the result. The example is a Desert Eagle with a "Dragon" skin. For installing finished skins see the weapon mod install guide.
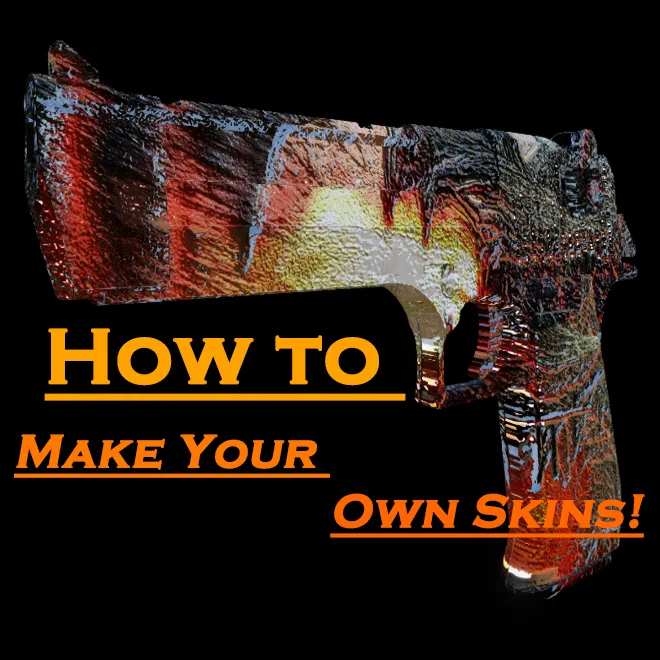
The result: a custom Desert Eagle skin.
1. Export the mesh with Umodel
Download Umodel (www.gildor.org/en/projects/umodel) and export any 3D model from the Killing Floor 2 folder.
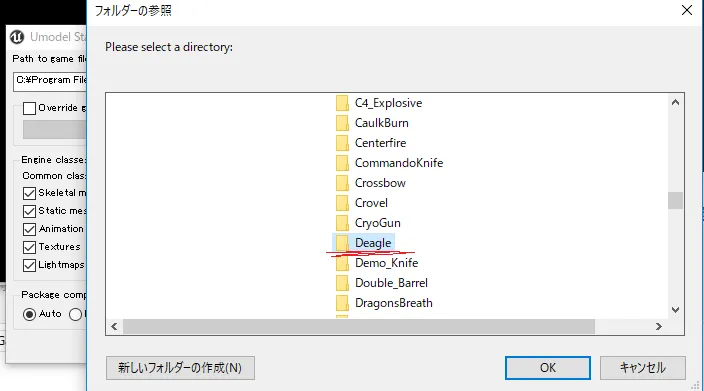
Press OK, then check WEP_1P_<weapon>_MESH.upk (for example the Deagle) and press Export.
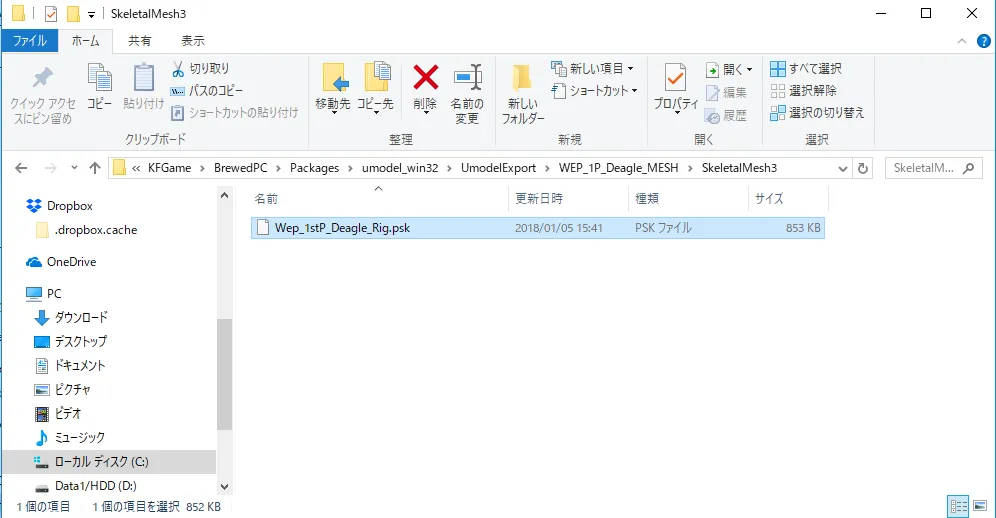
Select the mesh package and press Export.
If it succeeded you get Wep_1stP_Deagle_Rig.psk.
2. Open it in Blender
Download Blender (www.blender.org/download). First enable PSK support: File > User Preferences, enable the PSK importer add-on and save. Then File > Import > Skeleton Mesh (.psk) and choose the file you just exported.
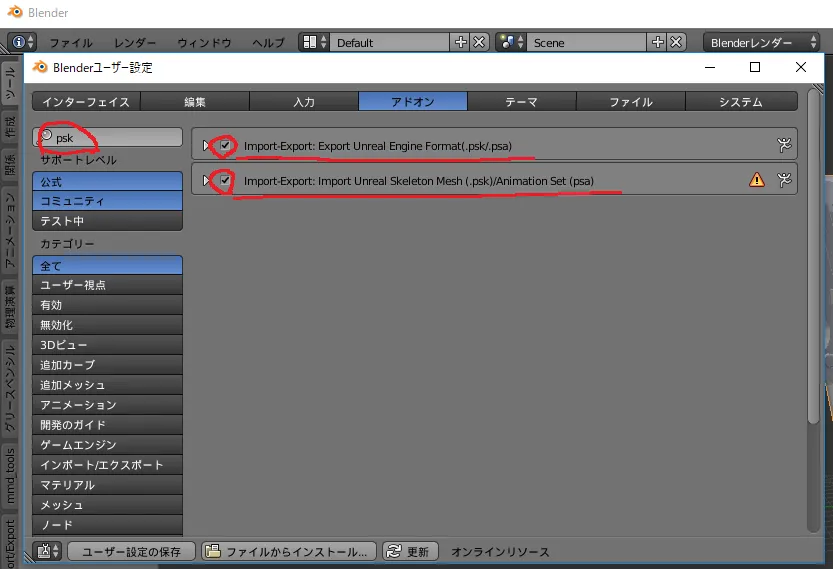
Enable the PSK add-on in user preferences.
Extra pieces (the arms and hands) may surround the weapon; delete them with right click and Delete. You now have the weapon model. Export it with File > Export > Wavefront (.obj) so you can load it in a painting program.
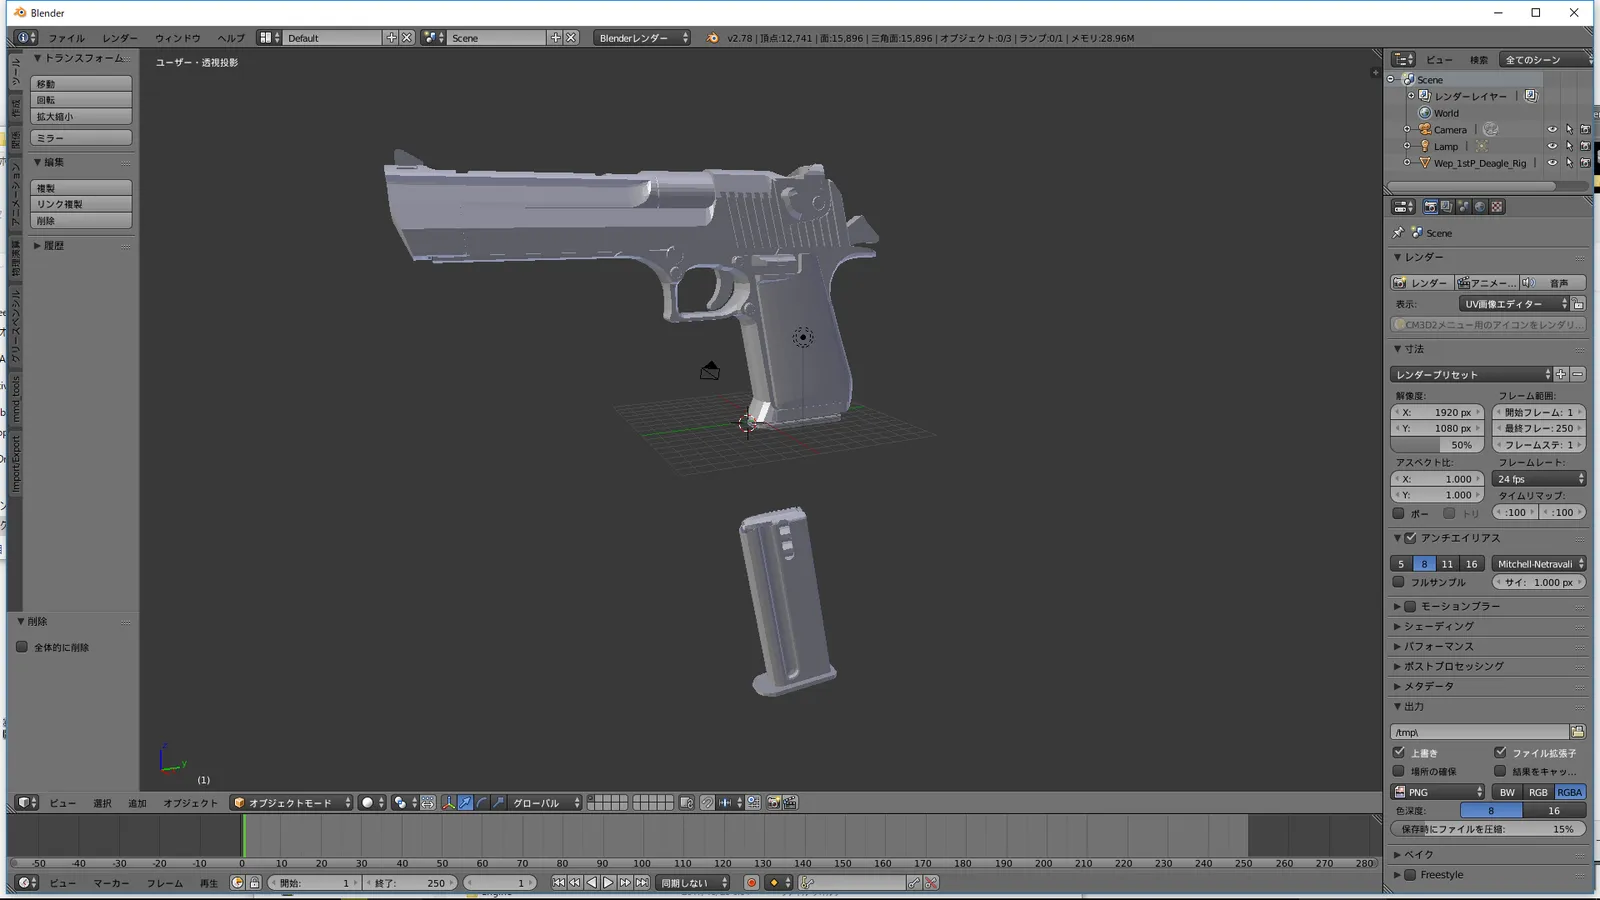
The cleaned-up weapon model.
3. Paint the texture (optional, Photoshop)
Photoshop can paint directly on the 3D model. Choose a view, then right-click the model and replace the diffuse texture (the first in the list) with the default skin of the weapon, found at umodel_win32\UmodelExport\WEP_1P_Deagle_TEX\Texture2D\Wep_1stP_Deagle_D.tga. Paint your design and "Merge Down" the layer into the texture. The author made a Dragon skin.
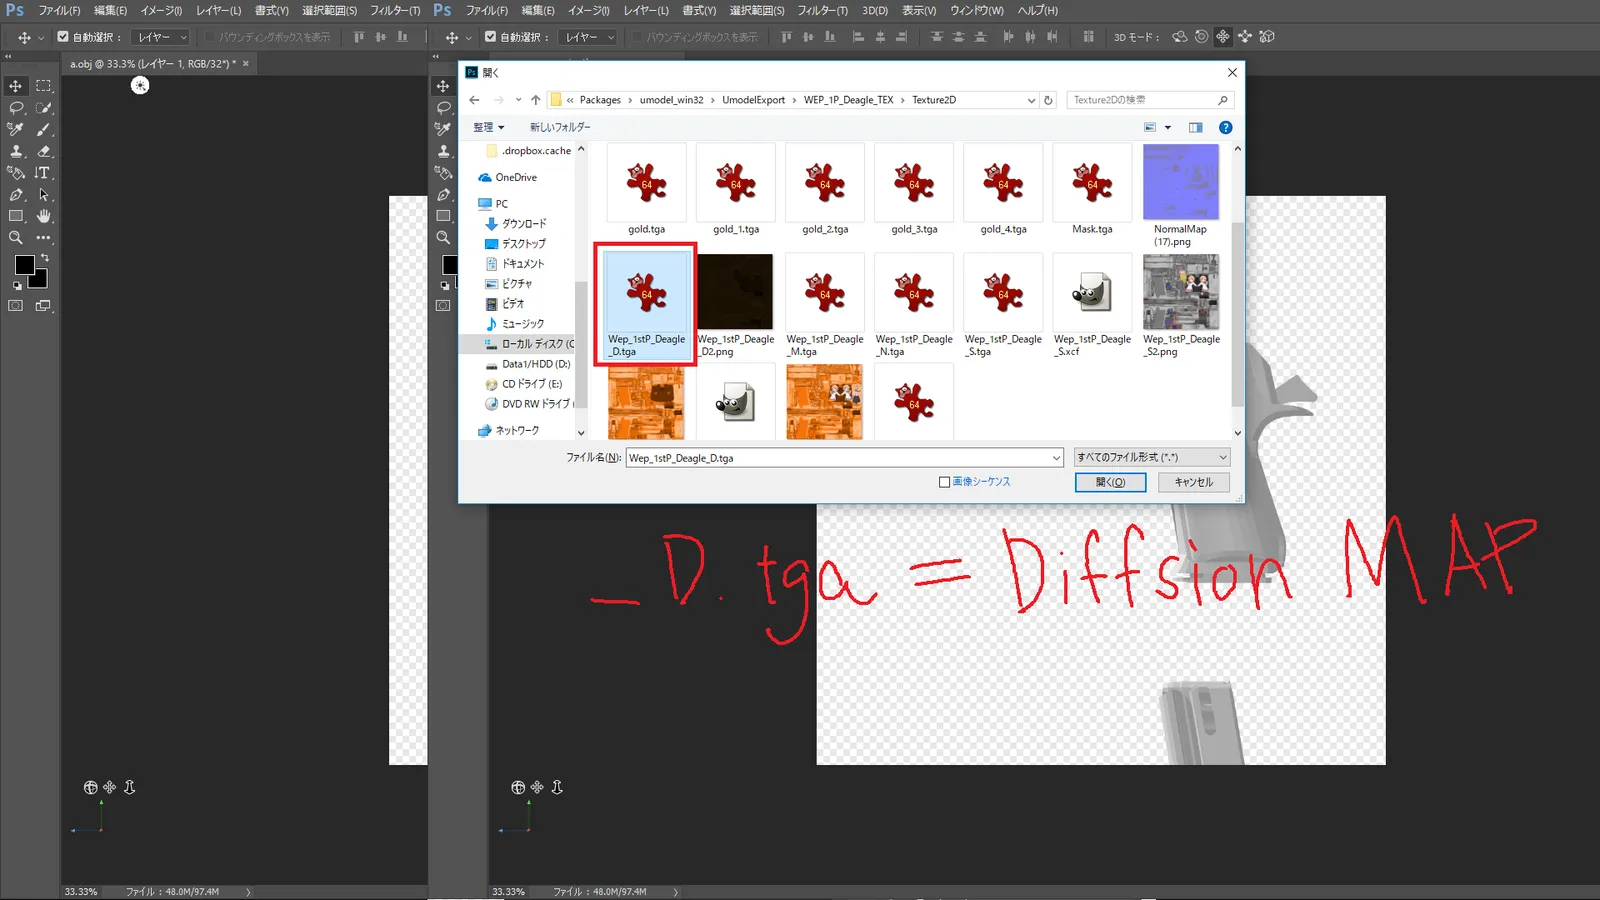
Replace the diffuse texture with the weapon's default skin and paint on top.
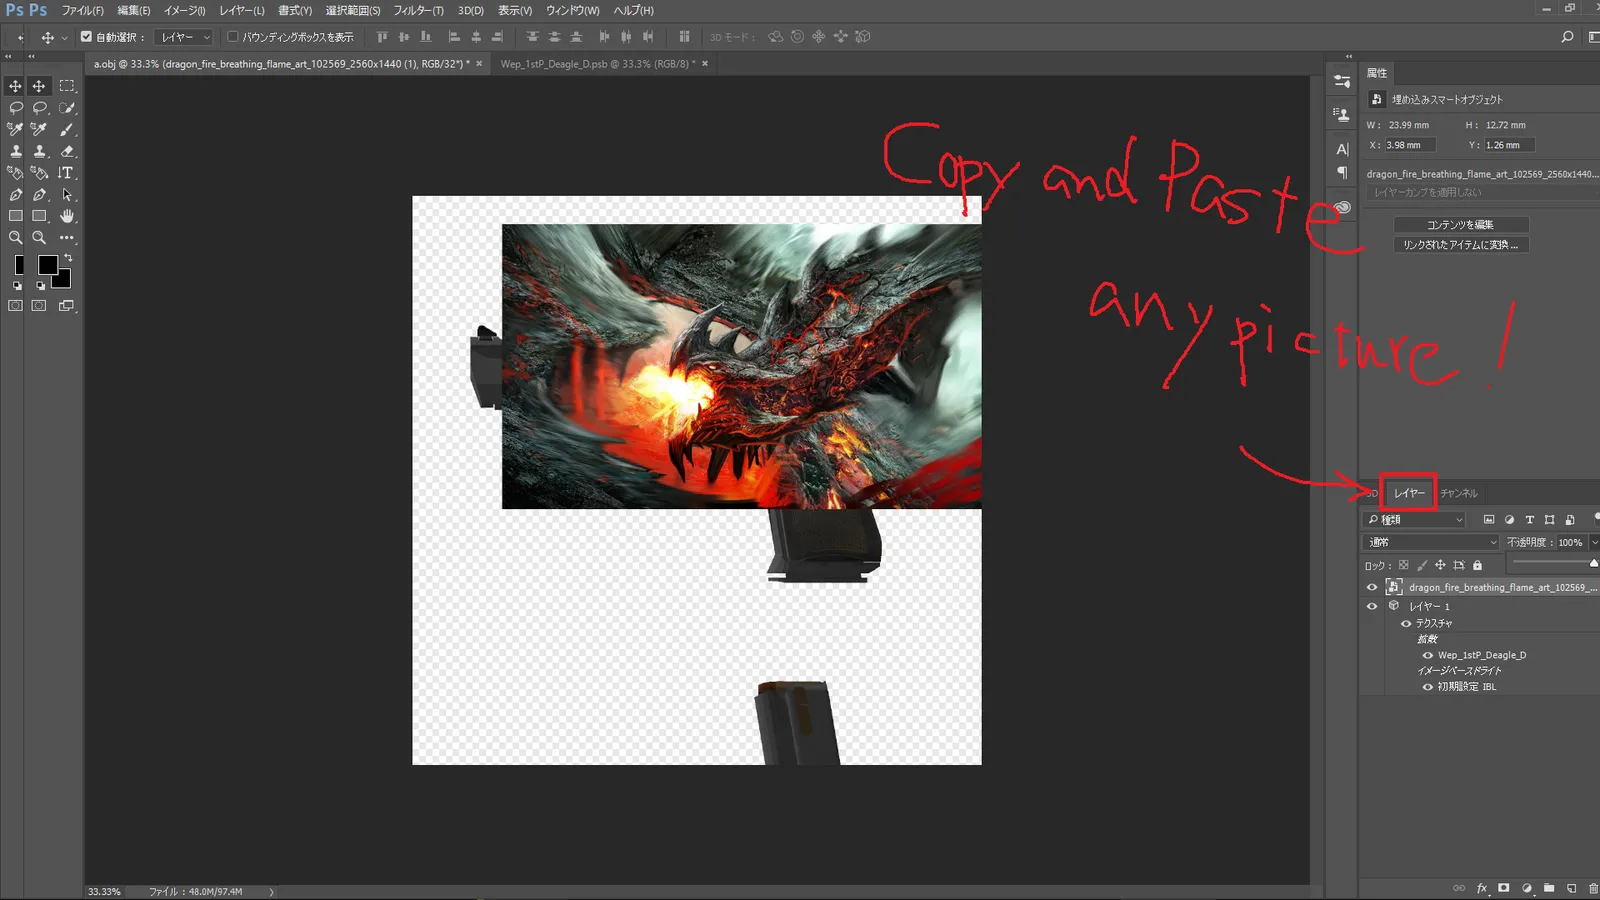
The Dragon skin taking shape.
4. Import in the KF2 SDK
In the Killing Floor 2 SDK import the painted texture and save (override save).
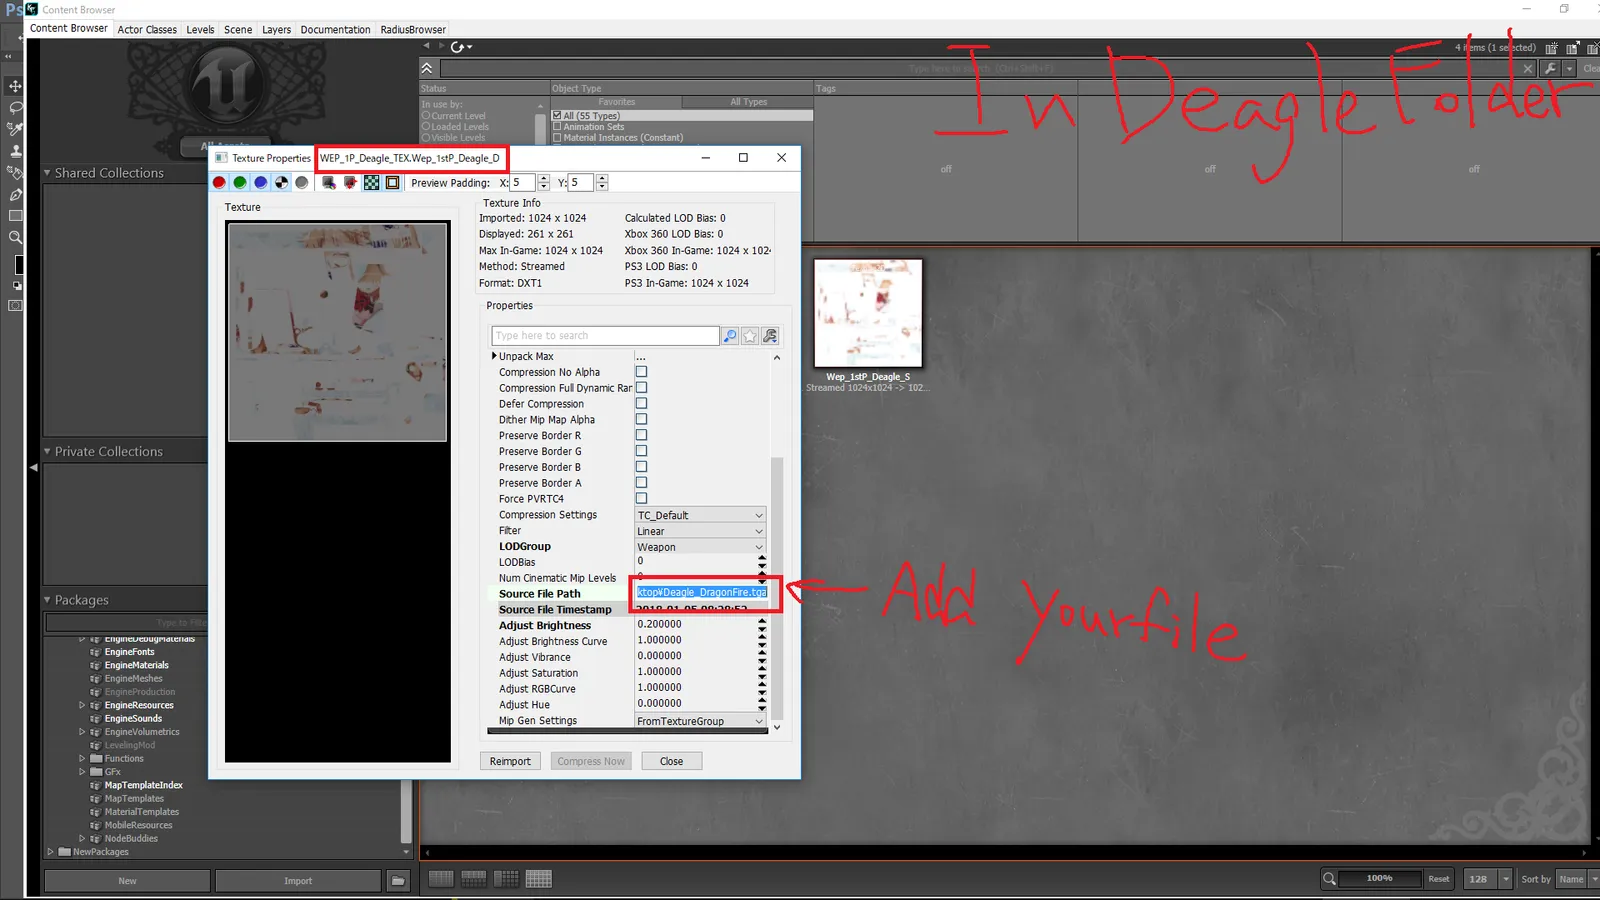
Importing the texture in the SDK.
The SDK writes WEP_1P_Deagle_TEX.upk to:
C:\Users\<your name>\Documents\My Games\KillingFloor2\KFGame\Unpublished\BrewedPC\Packages\Weapons\Deagle
Copy it to:
C:\Users\<your name>\Documents\My Games\KillingFloor2\KFGame\Published\BrewedPC\Packages\Weapons\Deagle
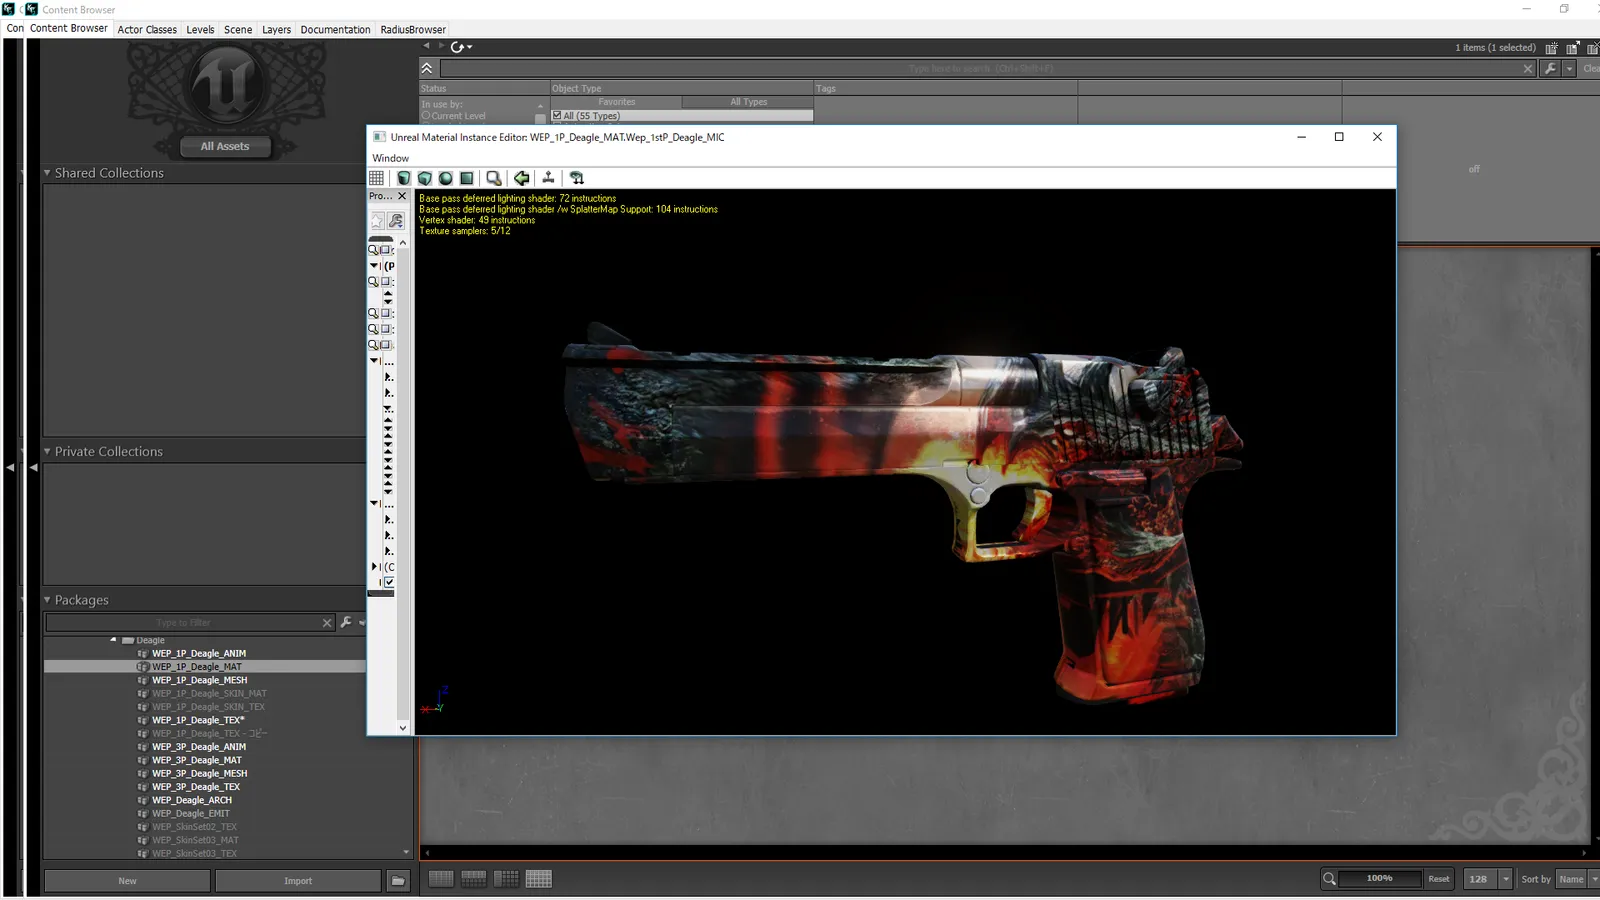
The compiled package ready to be copied to Published.
5. See it in game
Start KF2 and buy the weapon; the custom skin appears.
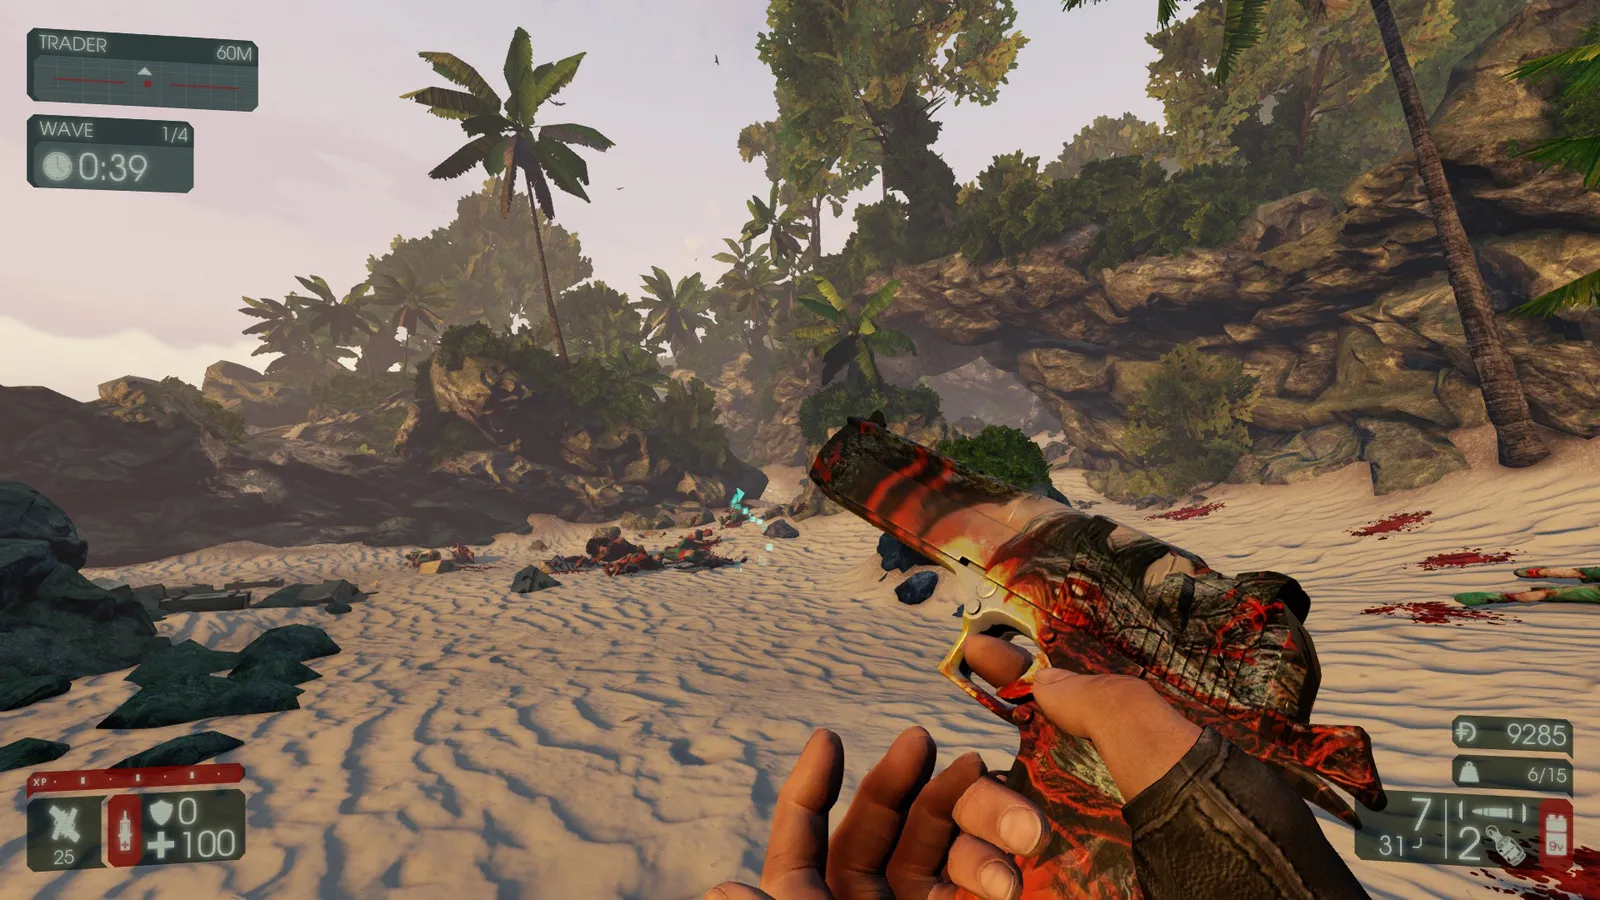
The Deagle with the new skin in a match.
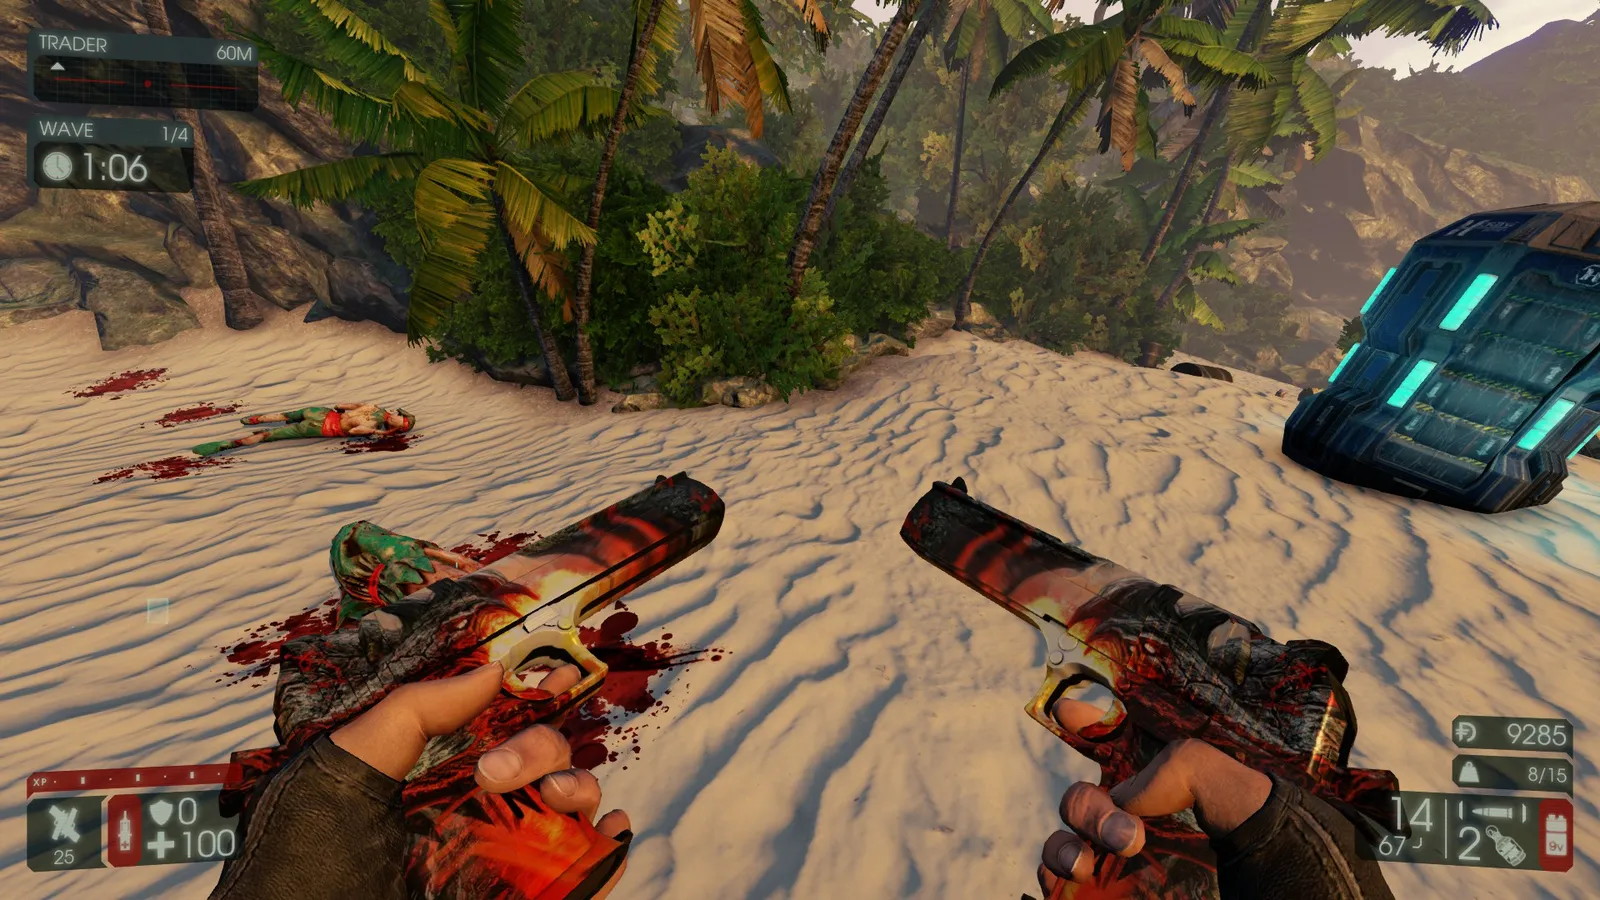
A second in-game view.
6. Optional: normal map and mask
Use NormalMap Online (cpetry.github.io/NormalMap-Online): paste your texture, tune the normal map and download it. Name the normal map with the _N suffix and add it in the SDK. The mask uses _M; the more white in the mask, the more metallic luster the weapon gets. The result is a Dragon Fire skin with metallic shine and relief.
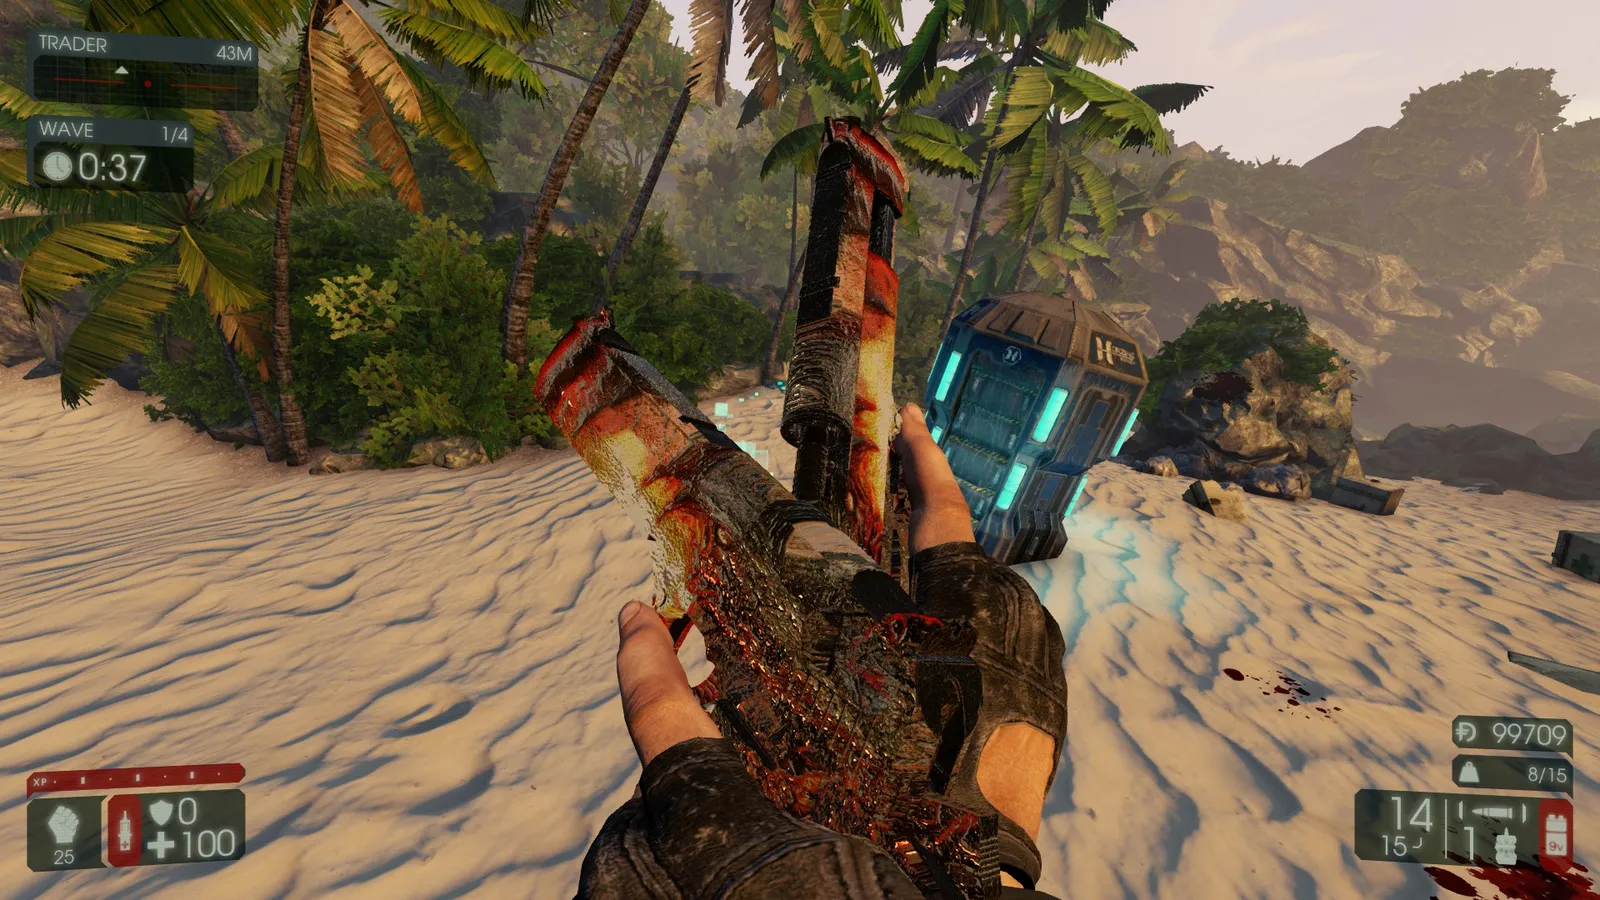
Dragon Fire: with normal map and mask applied.
The author shared a downloadable archive of this Desert Eagle skin on a file host, but the link is not reproduced here.
FAQ
- Which tool exports KF2 weapon meshes?
- Umodel (UE Viewer). Export a WEP_1P_<weapon>_MESH.upk file, which produces a .psk model such as Wep_1stP_Deagle_Rig.psk.
- Where does the finished skin file go?
- The SDK writes it to Documents\My Games\KillingFloor2\KFGame\Unpublished\BrewedPC\Packages\Weapons\<weapon>; copy the upk to the same path under Published.
- Do I need a normal map?
- It is optional. Add _N for the normal map and _M for the mask; more white in the mask means more metallic luster.
