
KF2: Use Any Weapon Skin Without Buying It (SDK Texture Swap)
This method lets you play with any weapon skin you like without buying it. It is client side, works in multiplayer and requires no console cheat commands. According to the author you cannot get banned for it, because it simply replaces weapon textures on your own machine; use it at your own risk and remember that skins are a major way to support the developer. The Neon, Neon RGB, Precious and Vault Vosh Precious skins need a different method. For the related config-file approach for HRG weapons see regular skins on HRG weapons, and for other skin topics see custom weapon skin pack.
What you need
- Killing Floor 2.
- The Killing Floor 2 SDK (Steam Library, Tools, Killing Floor 2 - SDK).
- UE Viewer (UModel).
- A TGA viewer (optional but useful).
Step by step
- Extract UModel and run
umodel.exe. Point it at the skins packages, usuallyC:\Program Files (x86)\Steam\steamapps\common\killingfloor2\KFGame\BrewedPC\Packages\Weapons\Skins. Select only Textures and click OK.
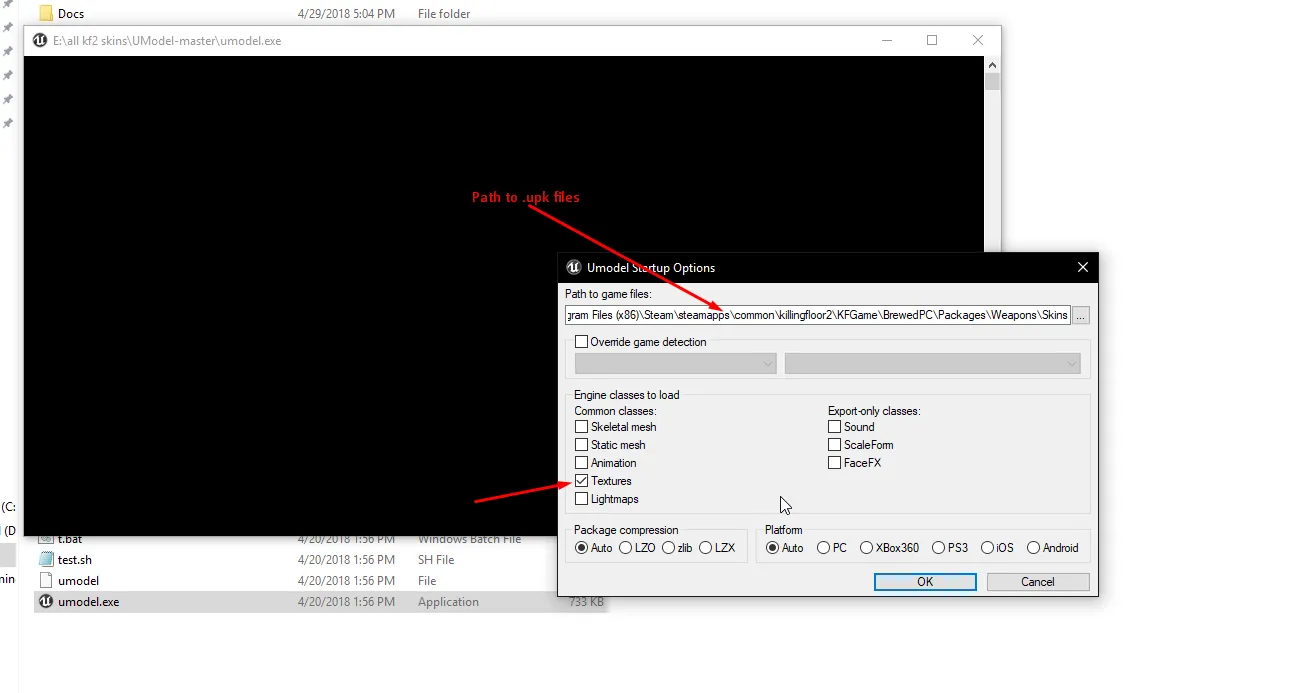 Choose Textures only.
- Select everything and export. The files appear in the
UmodelExportfolder inside the UModel folder.
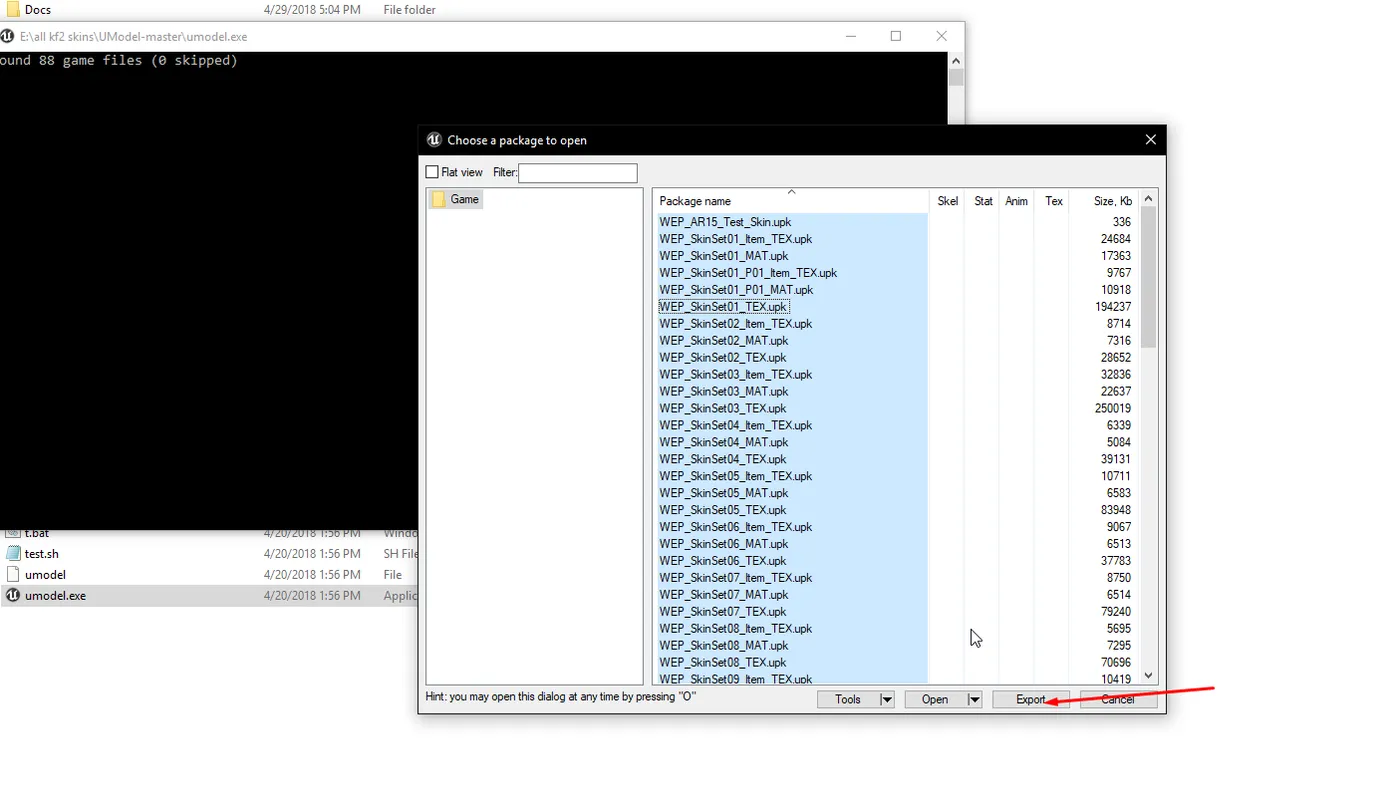 Export all textures.
- Open the SDK. In the Content Browser, right-click Weapons and choose Fully Load.
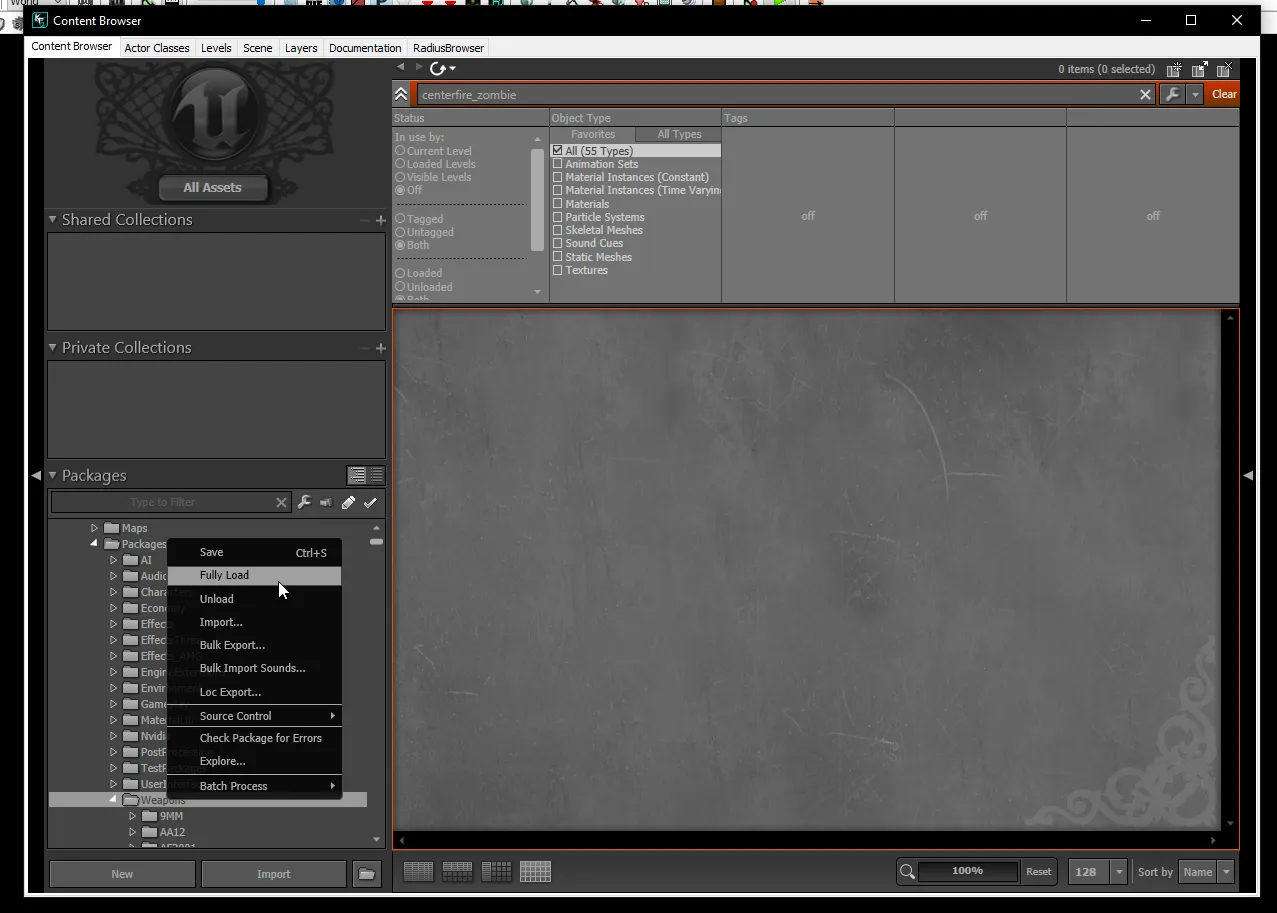 Fully load the Weapons package.
- The example uses the KRISS Vector with the Horzine Elite Blue skin. The KRISS folder has two packages you need:
WEP_1P_KRISS._TEX(first-person skin) andWEP_3P_KRISS._TEX(the skin seen on the ground or in other players' hands). Open 1P, double-clickWep_1stp_KRISS_D, choose Reimport and pick the_1P.tgaskin.
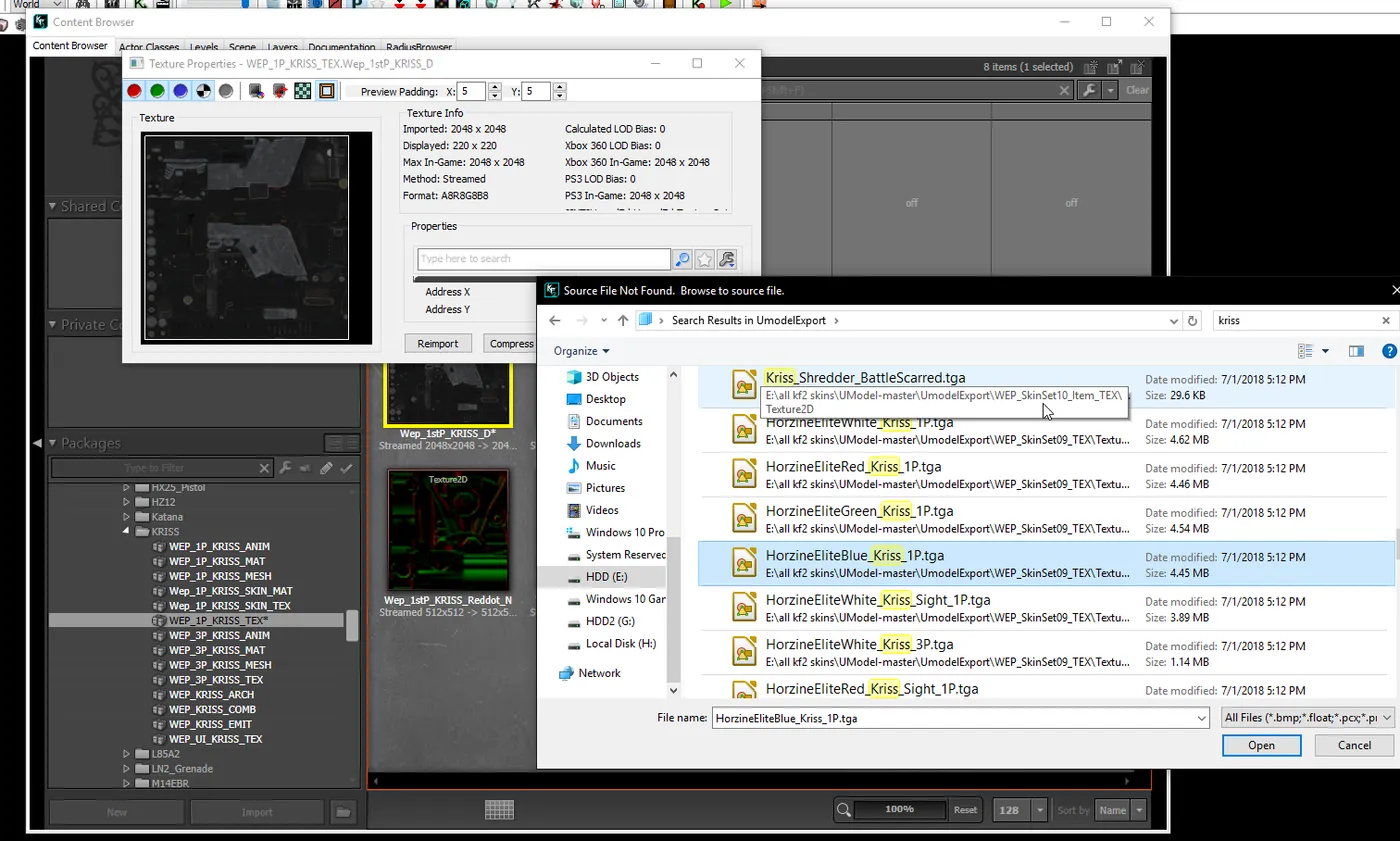 Reimport the TGA into the diffuse texture.
- Files end in
_D,_M,_Nor_S. Use the same TGA for both_Dand_S. Some skins, such as BlackGolden Crovel, also have an_Mfile; reimport it only if the skin you are copying has one (the Vector does not). Never touch_N.
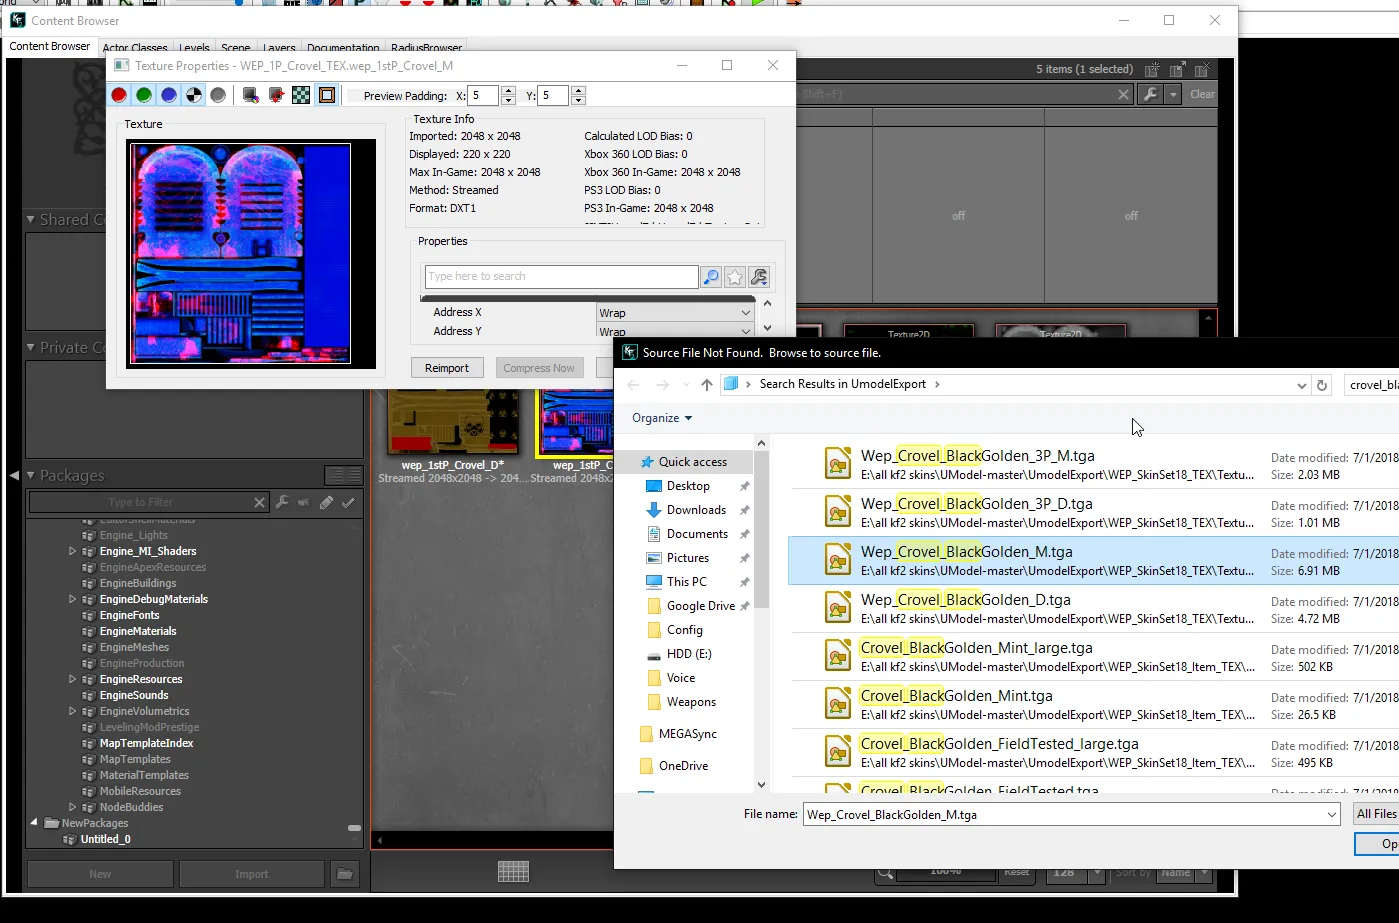 Which texture slots to replace.
- Weapons with scopes: the Vector's scope is in the same file as the weapon, so replacing it there is enough. If the scope is not in the weapon file, look in the Optics file.
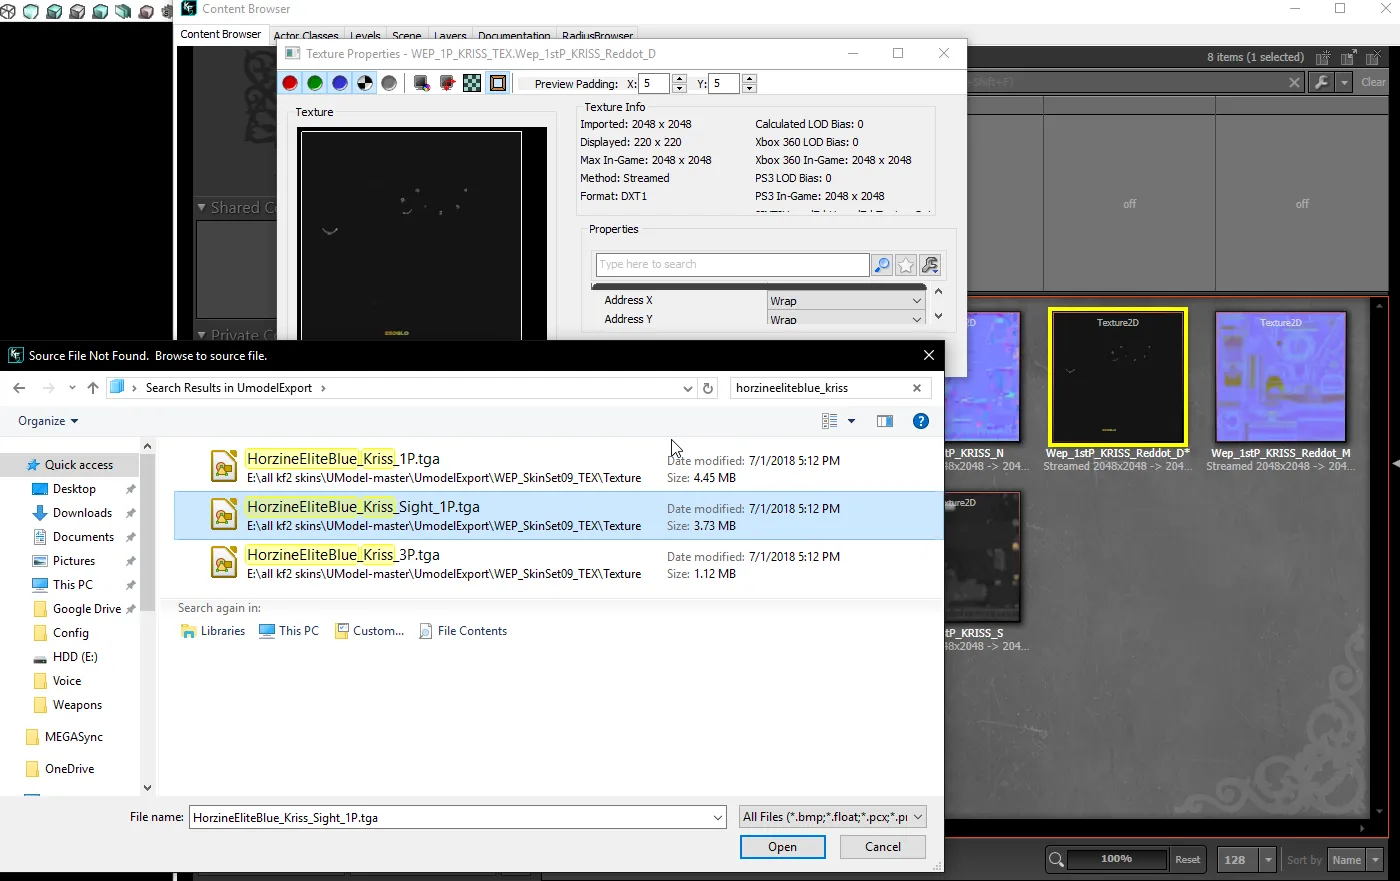 The scope is part of the weapon texture on the Vector.
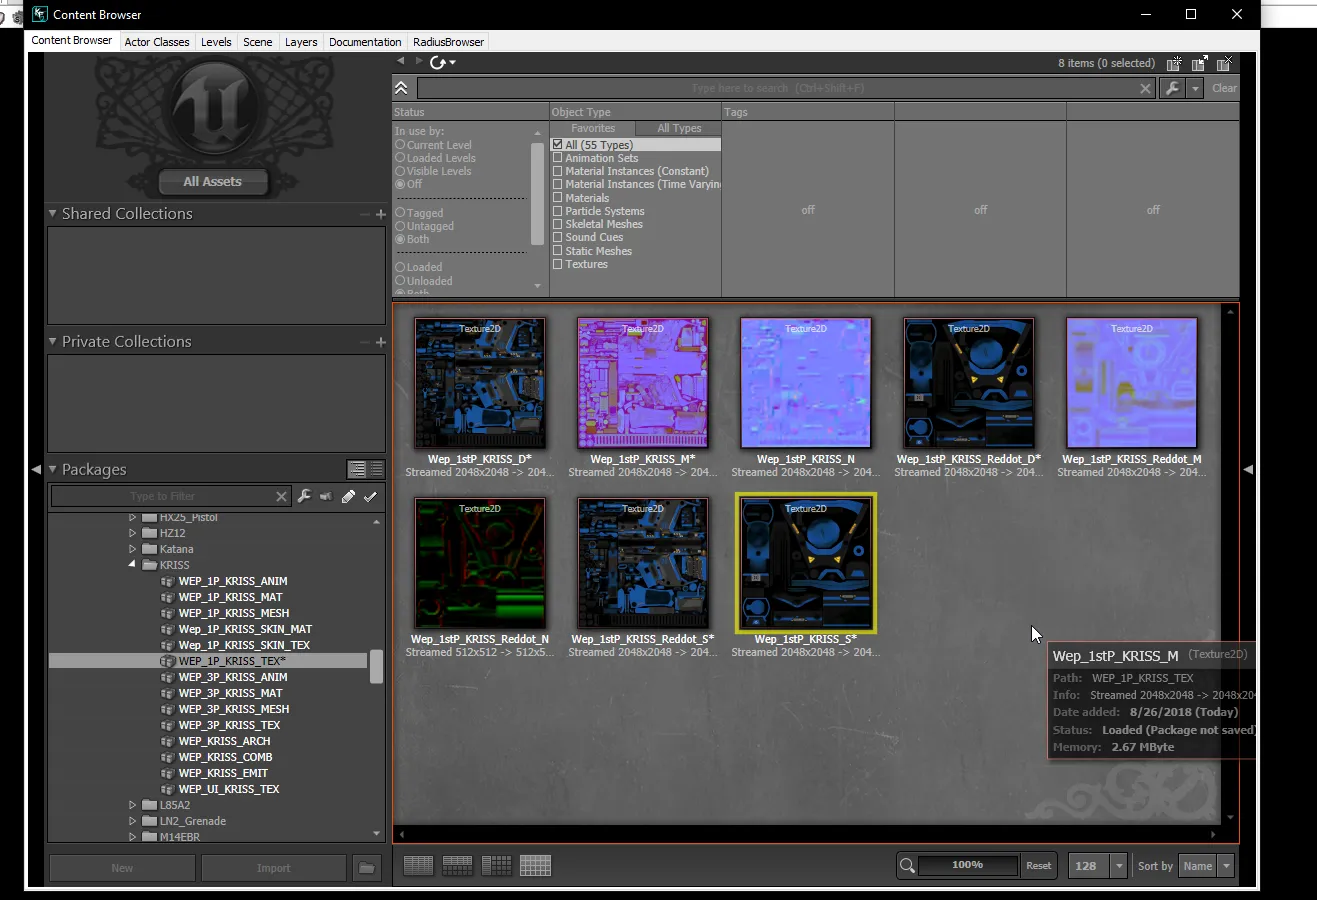 What the finished 1P file should look like.
- Repeat the process for the 3P package.
- Exit the SDK and click Save Selected. The files are saved to
Documents\My Games\KillingFloor2\KFGame\Unpublished. Rename theUnpublishedfolder toPublishedand start the game.
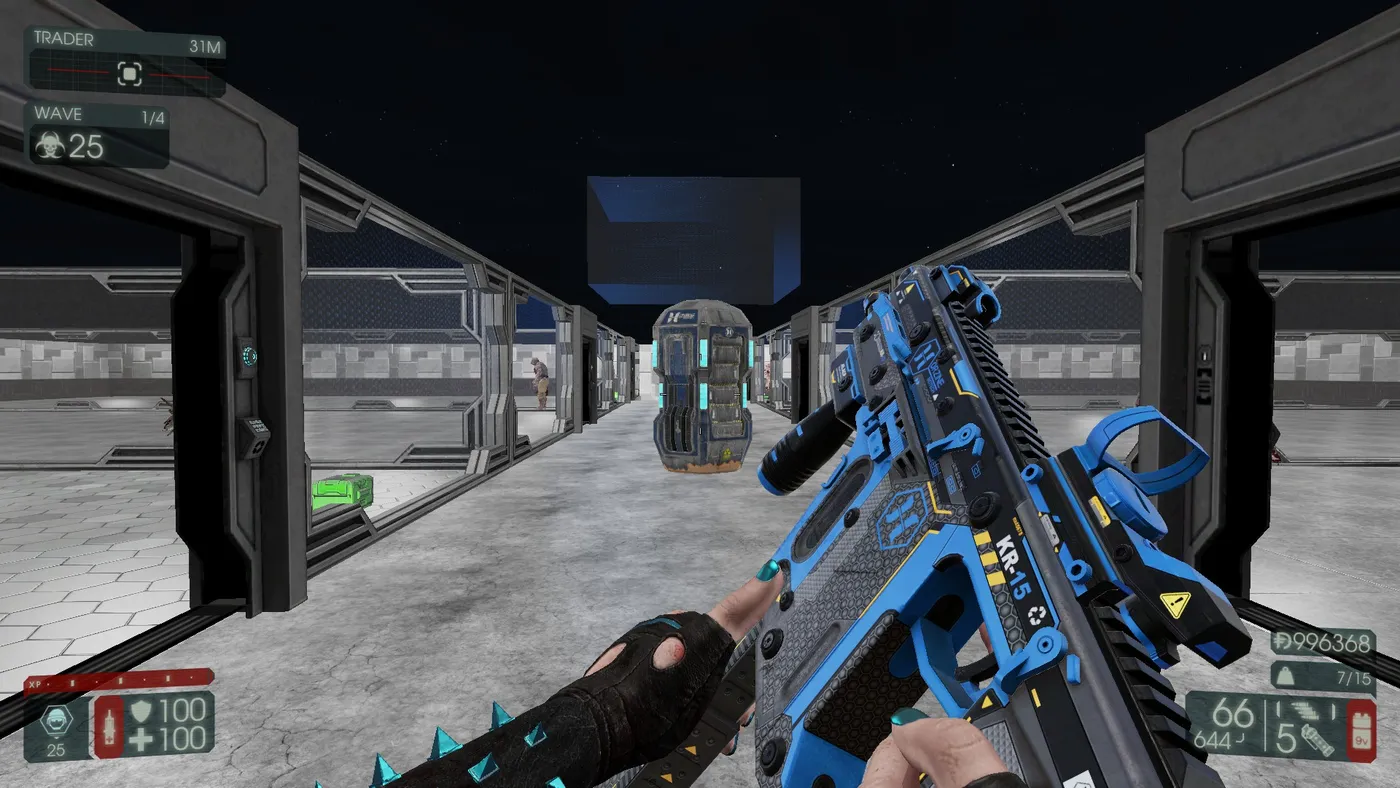 The replaced skin in game: a blue Vector.
Optional: replace a skin with a skin
If you want others to see a less flashy skin you do own instead of the default weapon, you can swap in a skin of your own. The author's example replaces AR15 | Vault | Vosh | Precious with AR15 | Containment | Mint:
- Open the SDK and go to the Skins folder inside Weapons; pick the skin you own.
- The golden AR-15 lives in
WEP_SkinSet_VaultVosh02_TEX. For golden skins replace ONLY1P_Dand3P_Dand do not touch_M. Other skins follow the same procedure as above. - The icon is in
WEP_SkinSet_VaultVosh02_item_TEX. Replace it with the icon of the other skin and you will see it in your inventory.
Results vary. Putting a regular skin over a golden one can produce a shiny, odd look, while replacing a regular skin with another regular skin looks normal. For example, Centerfire | Headshot Weekly replaced with Bluefire: other players see the Headshot skin while you see Bluefire.
Done, and a shortcut
The author also shared a zip of their favorite skins you can extract into the Weapons folder and delete what you do not want. If you like the game, consider buying keys and skins from the in-game market to support Tripwire.
FAQ
- Is this visible to other players?
- No. It is client side, so only you see the replaced skin. Others see whatever skin you actually have equipped.
- Does it work in multiplayer?
- Yes, and it needs no console cheat commands. It only replaces weapon textures locally.
- Which tools do I need?
- Killing Floor 2, the Killing Floor 2 SDK (Steam Library, Tools), UE Viewer (UModel) and optionally a TGA viewer.
- What about Neon, Neon RGB and Precious skins?
- Those animated or special skins use a different method, described in a separate guide by the same author.
