
KF2 Cosmetic Slot Trick: SetCharacterAttachment Console Guide
This is a short translation of a Chinese community guide (a simplified summary of an original forum post) about forcing cosmetic items into attachment slots in Killing Floor 2 with console commands. It is useful when two accessories normally conflict with each other and the game will not let you wear both. See also equipping conflicting cosmetic accessories and Printoutcharactercosmeticinfo basics.
Step 1. Read your cosmetic numbers
- Start the game and open the console with ~ or F3.
- Enter these three commands one after another:
enablecheatsshowlogPrintoutcharactercosmeticinfo
- A black data window appears and lists the numbers of the cosmetics you are wearing right now. Enter
Printoutcharactercosmeticinfoagain whenever you want to refresh the list. - Write down the number of the accessory you want to force in. Each character has its own accessory numbers.
The author notes they do not know how to close the black window, and that the data is also saved in a text file (shown in the second screenshot).
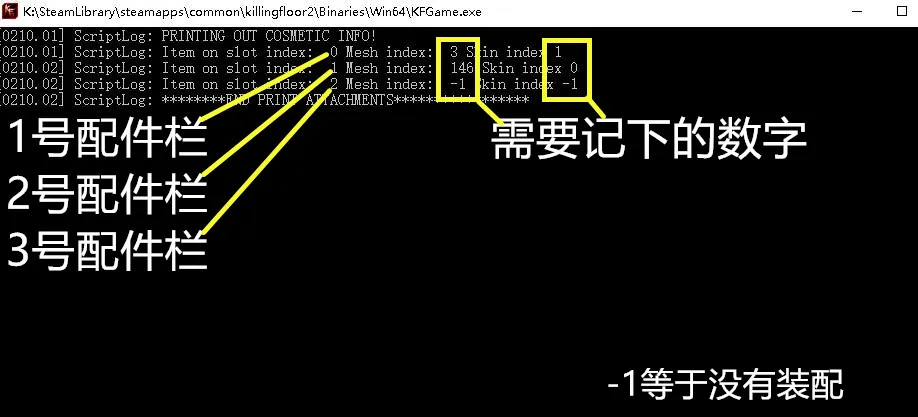 The log output with the mesh and skin indexes of the worn cosmetics.
Step 2. Force the accessory into a slot
Use this command:
SetCharacterAttachment <mesh index> <skin index> <slot> TRUESlot numbers: first attachment slot = 0, second = 1, third = 2.
Example for the third slot:
SetCharacterAttachment 237 1 2 TRUE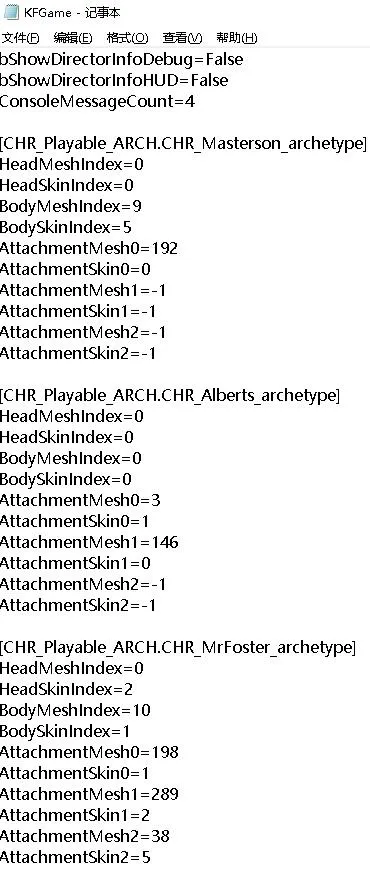 Where the cosmetic data is stored on disk.
The original forum thread (linked in the source) contains more details if something is unclear.
FAQ
- Which console commands are needed first?
- enablecheats, showlog and Printoutcharactercosmeticinfo. Together they open a log window listing the cosmetic indexes you currently wear.
- What are the slot numbers?
- Attachment slot 1 is 0, slot 2 is 1 and slot 3 is 2.
- Are the numbers the same for every character?
- No. Mesh and skin indexes differ per character, so read them again for each character you use.
